The official WooCommerce iOS App is now available for free from the Apple iTunes Store via WooCommerce.app.
This guide walks you through setup, including how to connect to your store and how to use the app.
Requirements
- iOS 11+
- iPhone 5s to current-generation iPhone XS and iPhone XR
- Jetpack
The official WooCommerce iOS App also can be used with the iPad, but it is not a universal app, and interfaces were not designed for it specifically.
Installation
Your store should be:
- Hosted on WordPress.com with a Business or eCommerce plan
or - Self-hosted running WooCommerce 3.5 and higher with the Jetpack plugin installed, connected, and activated. More info on Jetpack at: Getting Started with Jetpack.
To install:
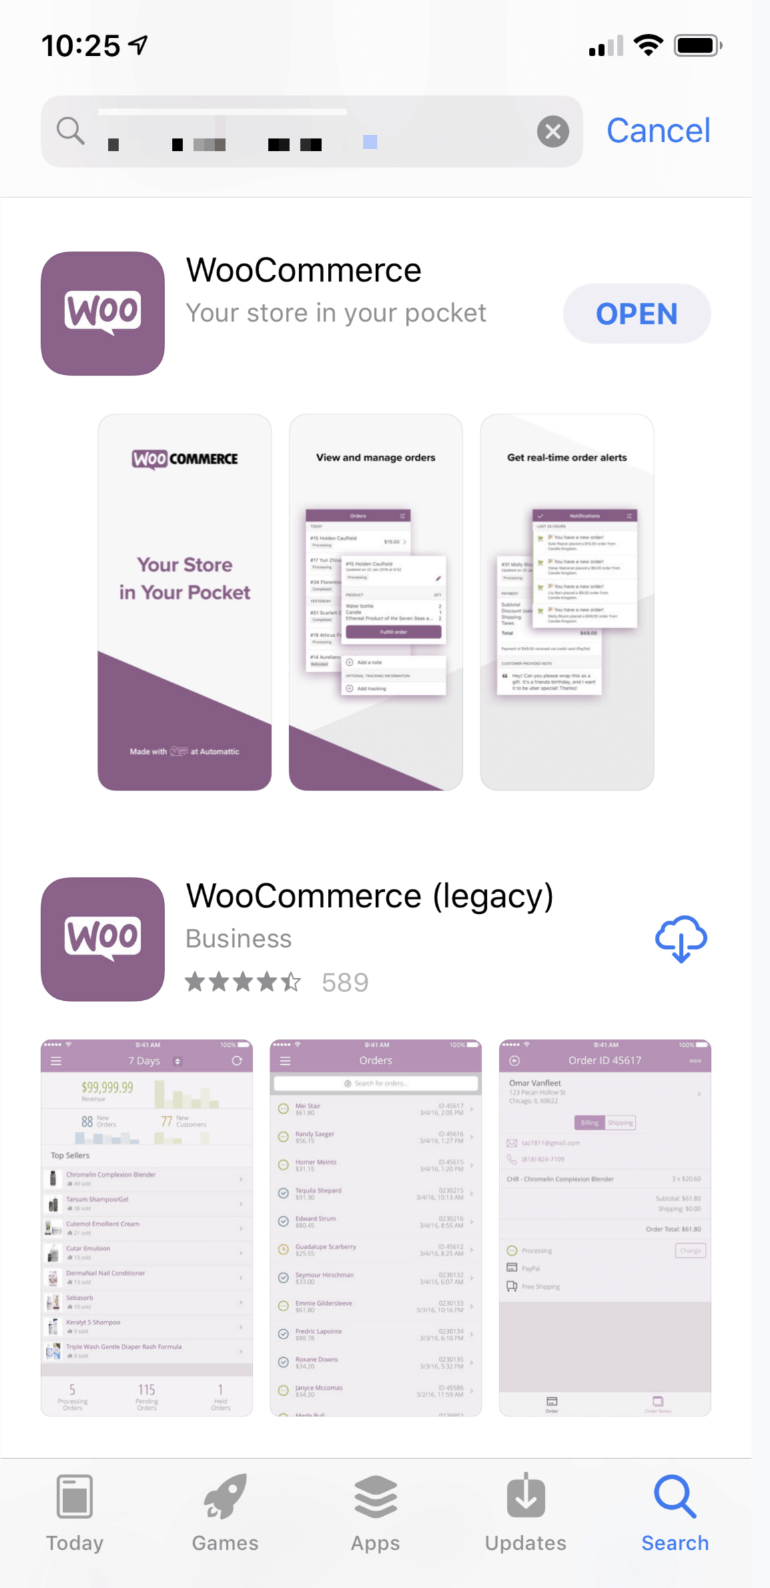
- Use your device to visit the iTunes store, search for WooCommerce by Automattic, and download.
or - Use your device to open this link and download at: WooCommerce.app.
Connect store to the WooCommerce iOS app
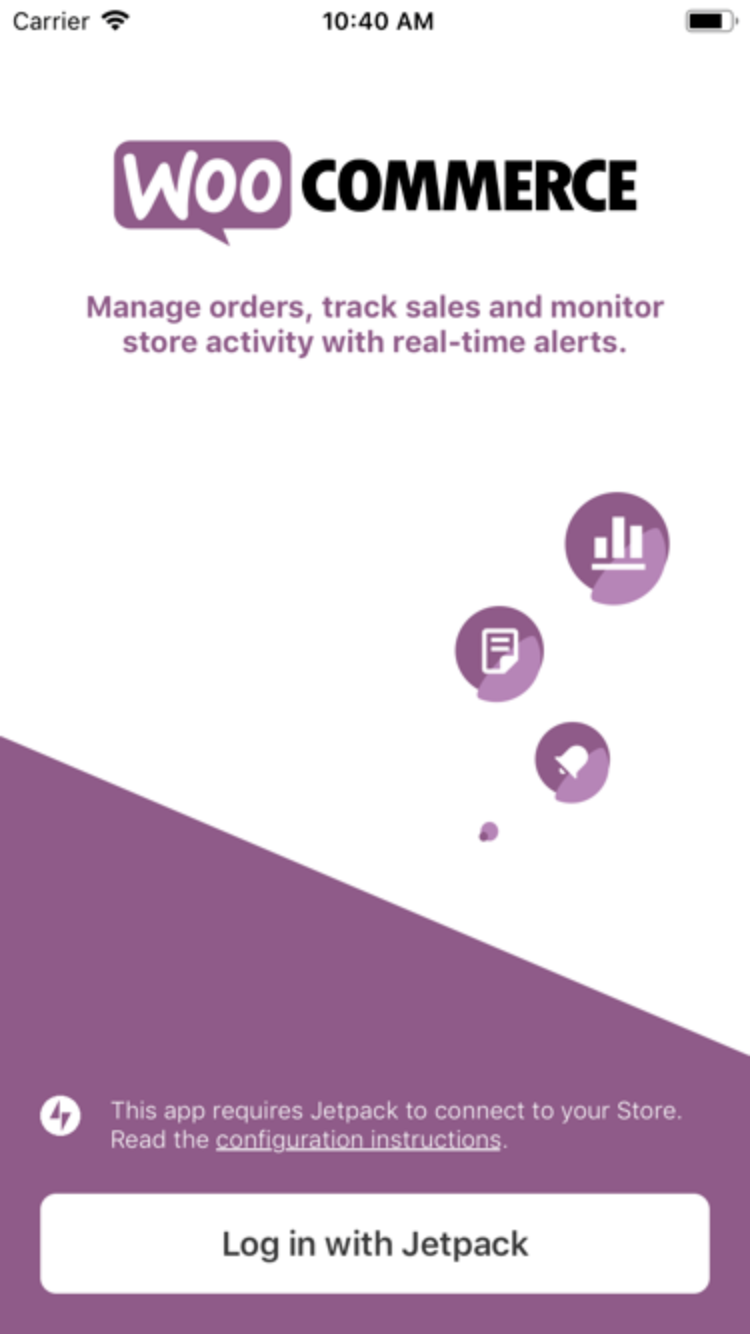
Our Welcome screen will display upon downloading and launching the official WooCommerce iOS app.
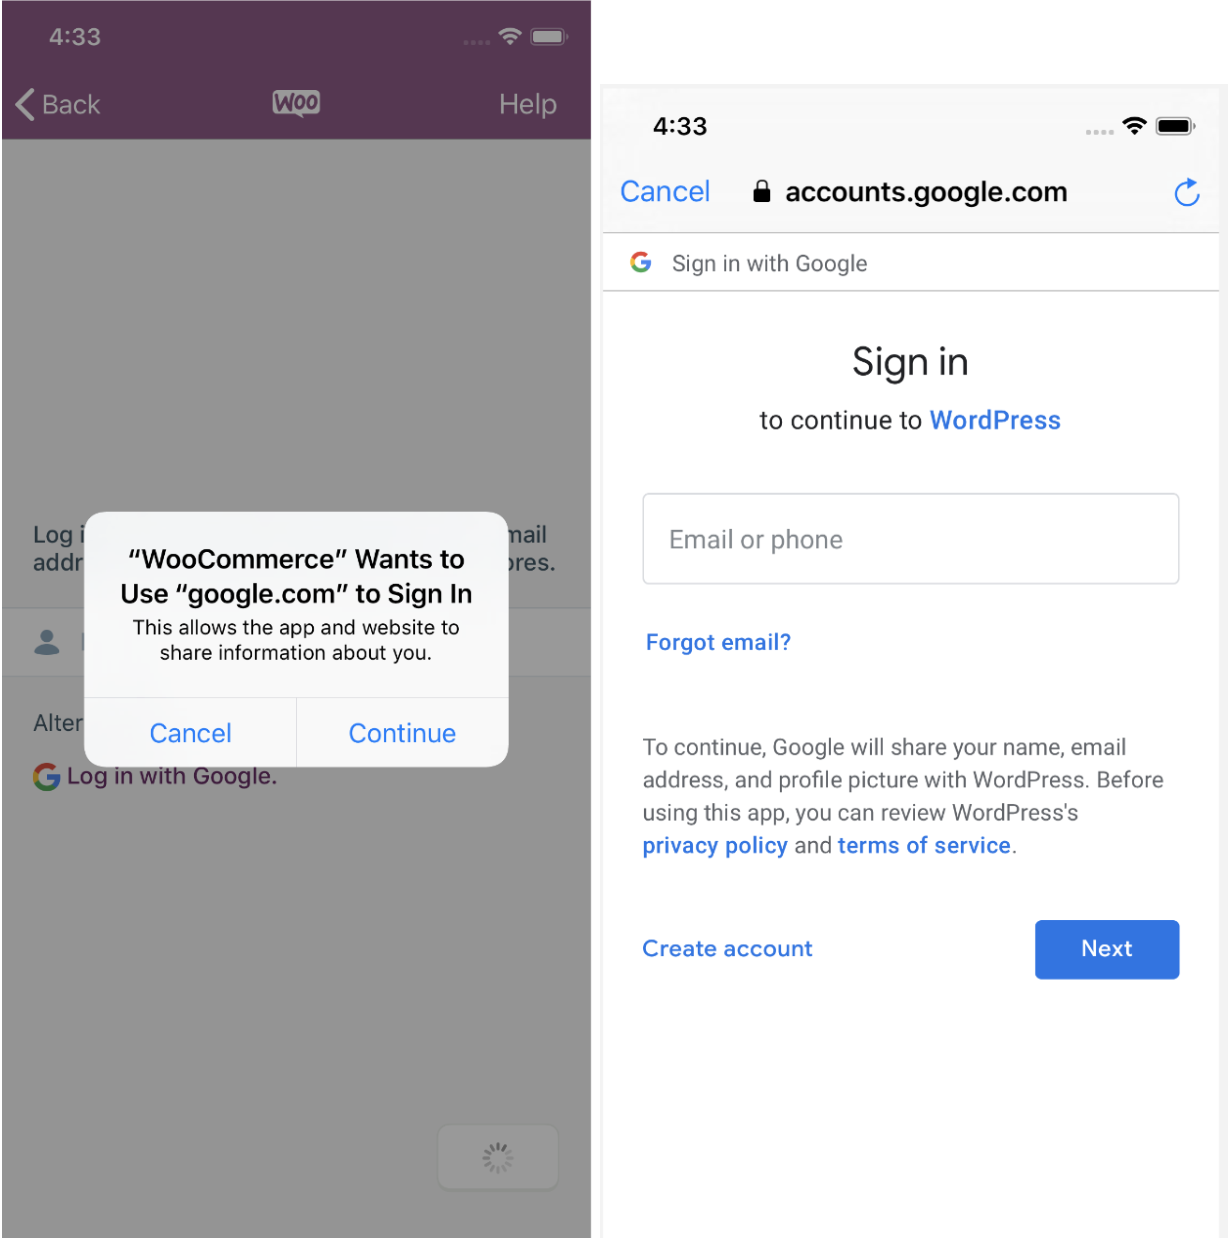
- Select Log in with Jetpack to begin.
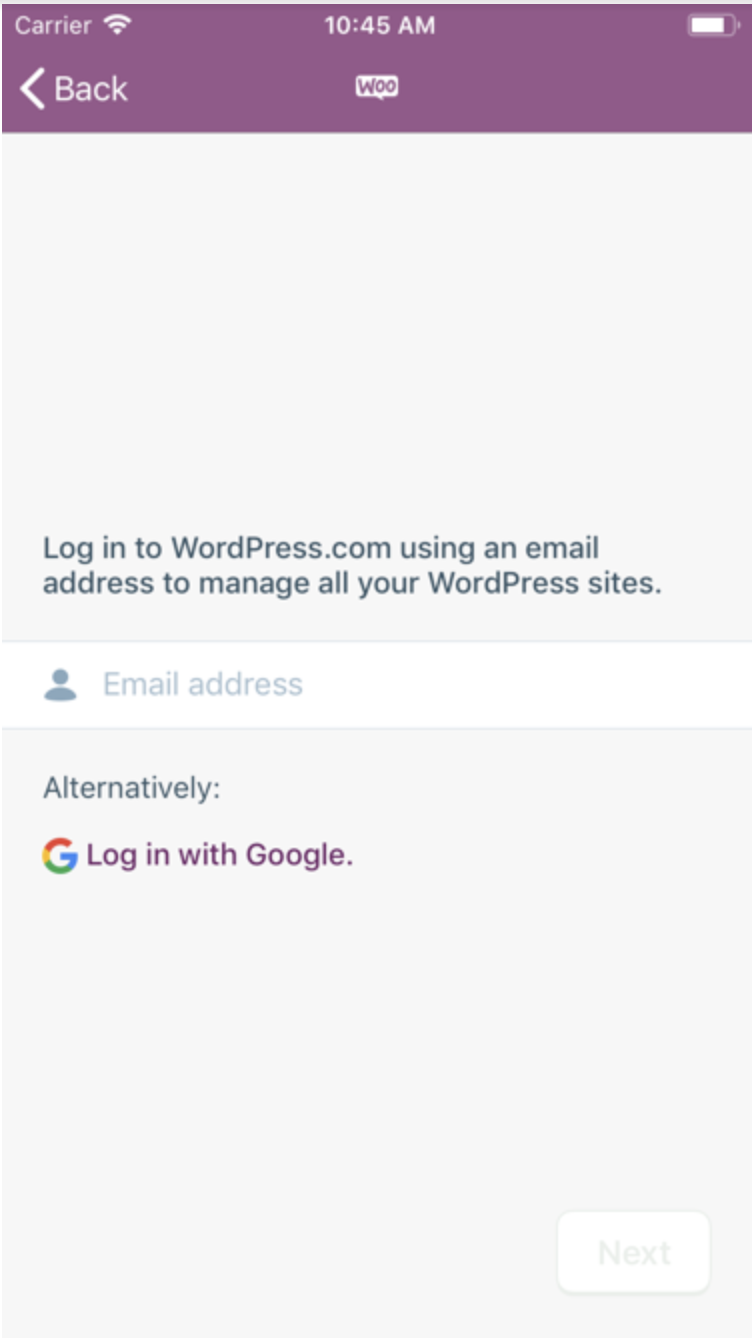
- Select a method to log in: Email address or Google profile associated with your WordPress.com account.
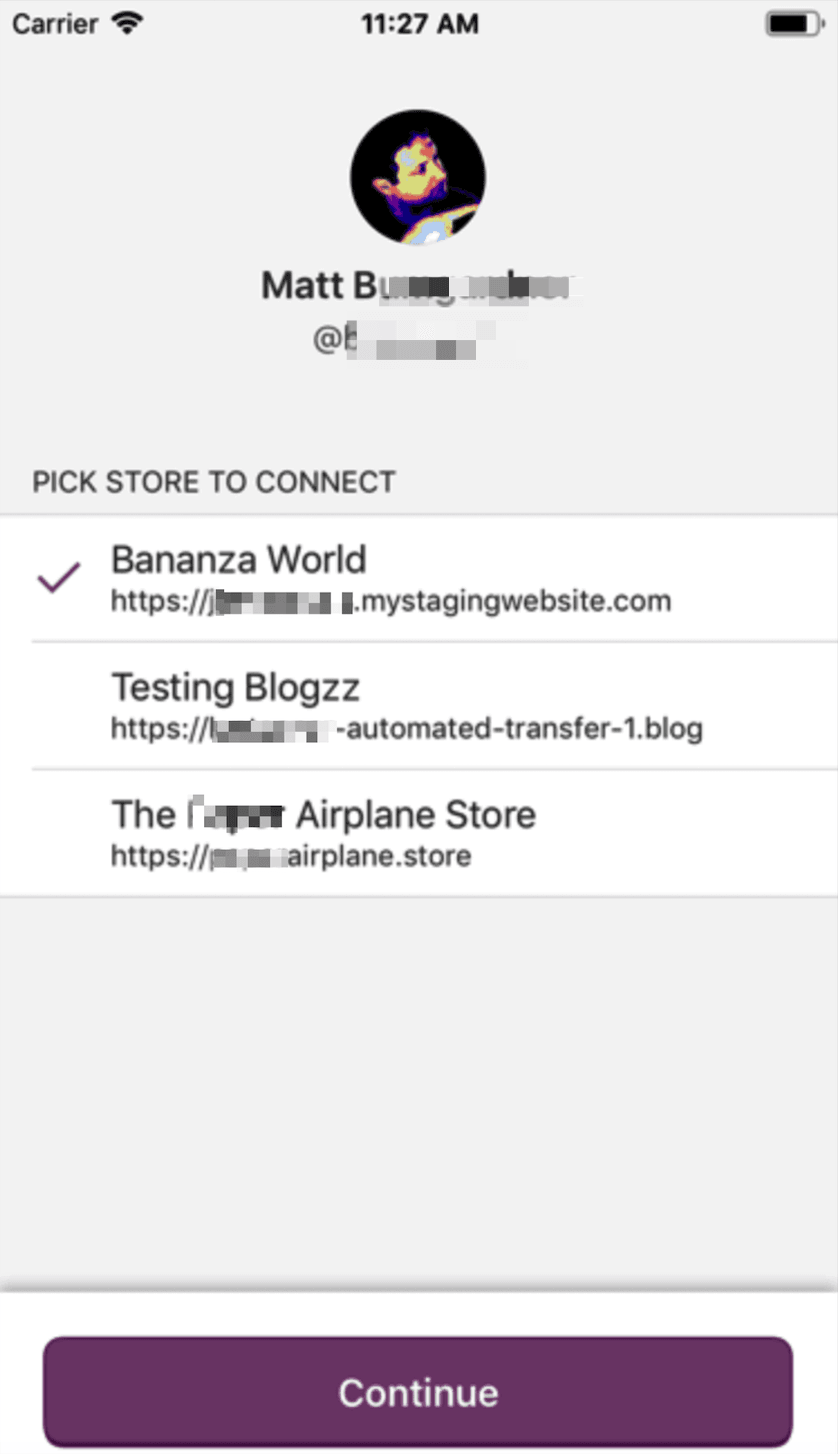
- Next. If login is successful, the Store Selector screen will appear.
- Select which store to use.
- Continue.
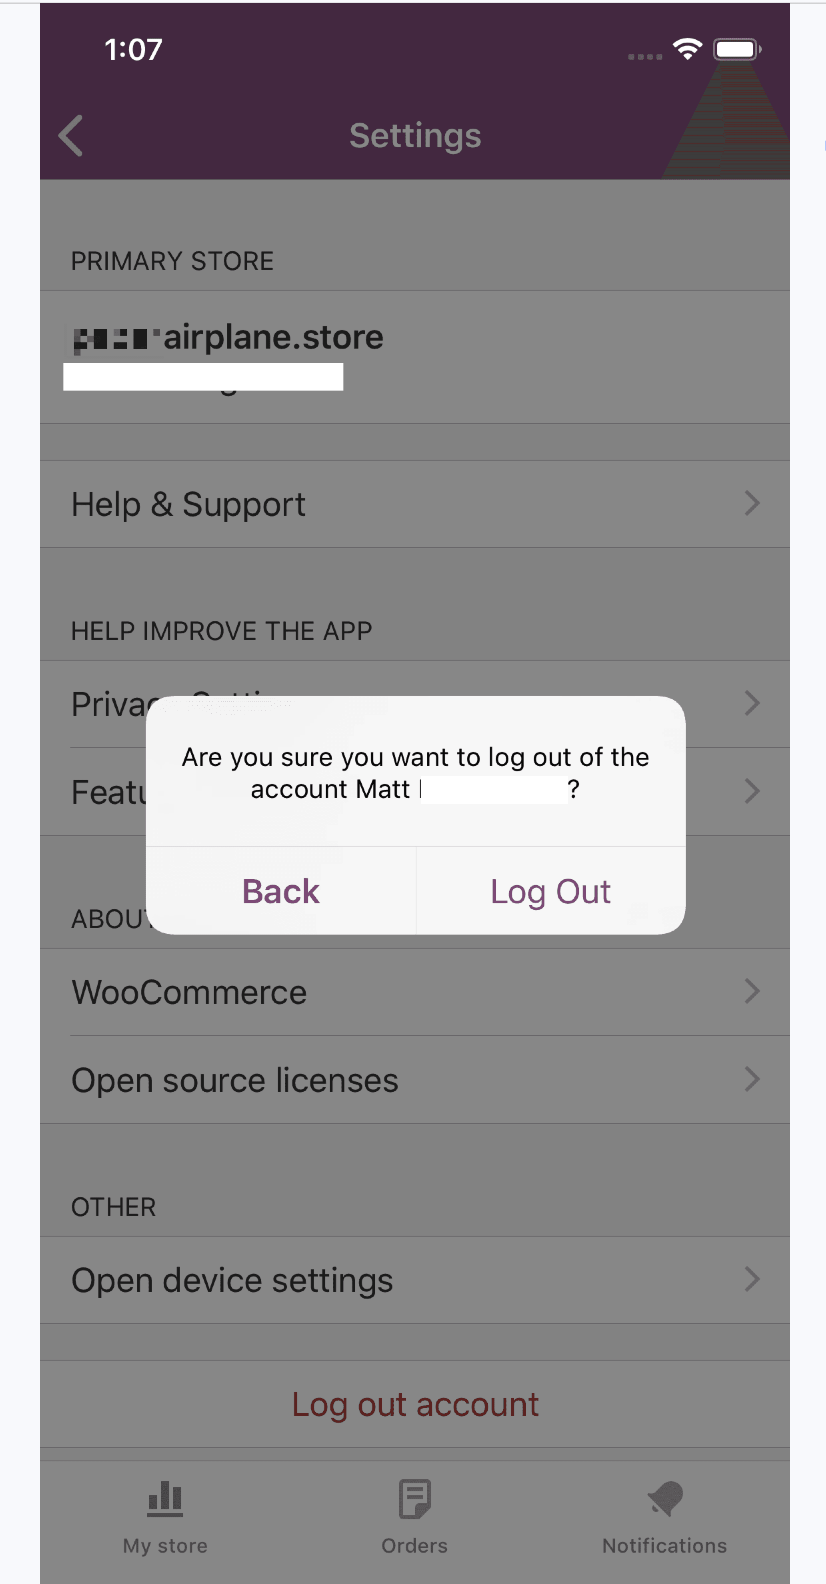
Log out of your store
To log out of your store:
- Tap the bottom-left My Store icon.
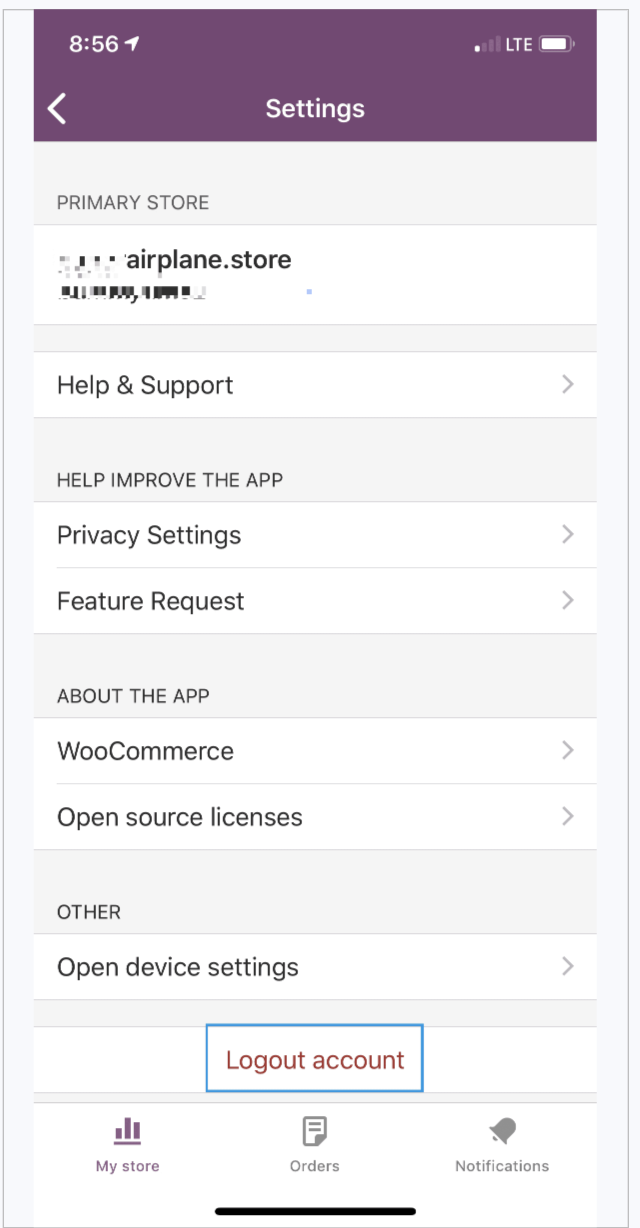
- Select the upper-right Settings gear icon.
- Select Log Out Account.
- Confirm by tapping Log Out when prompted. Or select Back, if this action was in error.
Multiple Stores
You can manage any store, using the official WooCommerce iOS app, that is connected to your Jetpack account.
- Tap the gear icon in the upper left corner, if logged in, by following steps in the Logging Out section above.
- Select Switch Store.
- Choose another store on your account.
- Tap Continue.
Note that you will only receive notifications for the selected store.
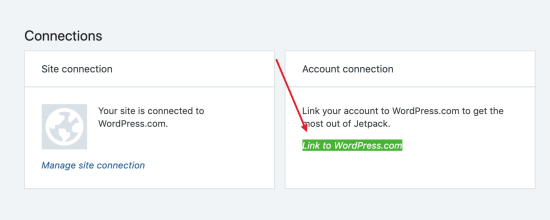
Multiple Store Admins
Multiple people with Administrator or Store Manager user roles can manage stores from their own devices. Each person will need to complete the following steps:
- Log into the website via a browser.
- Go to Jetpack > Dashboard and then Connections.
- Select “Link to WordPress.com” (see below).
- Log in with your (Store Manager) WordPress.com account
- Select Jetpack Free Plan.
- This user can now log into the app with their WordPress.com Account.
Getting Started
The Main screen launches when opening the WooCommerce iOS app. There are four major sections:
- My Store – High-level overview of sales, pending orders, and trends.
- Orders – Filterable list of all store orders from newest to oldest.
- Notifications – Latest new order and product review notifications for the connected store.
- Settings – Help & Support, privacy settings, and logout.
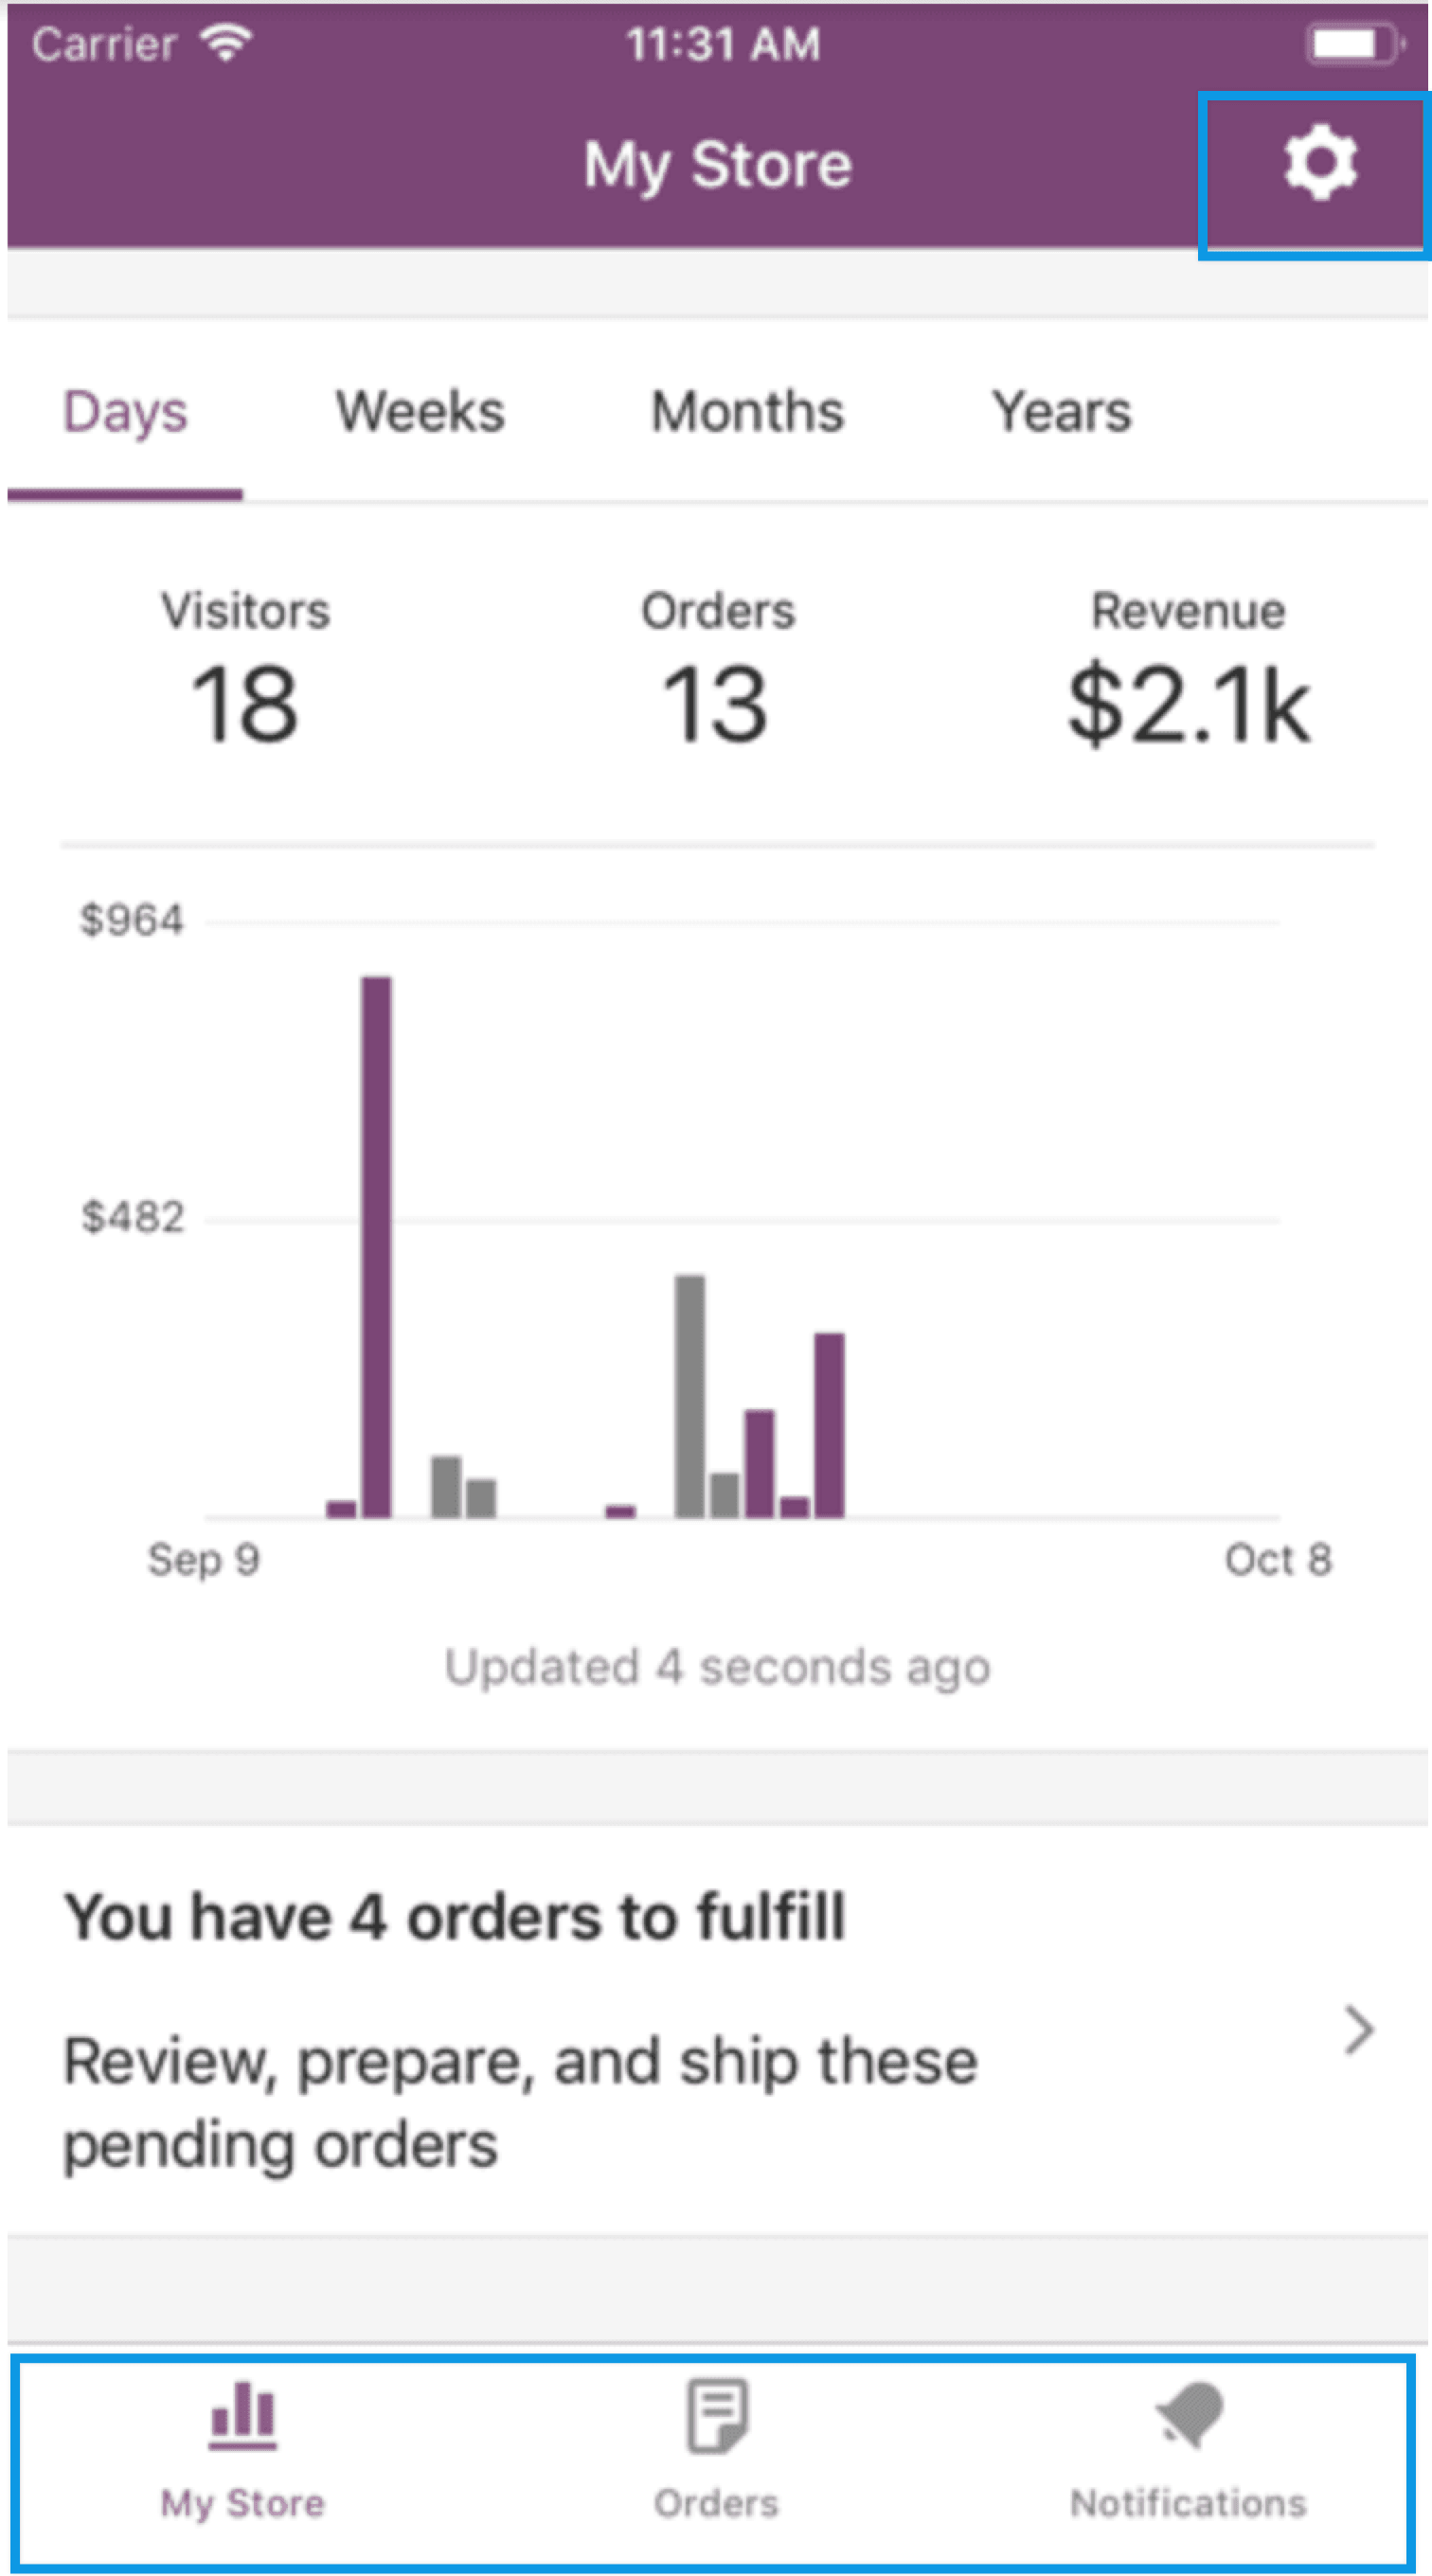
Navigation is divided into two modes:
- On the bottom bar for quick access between the most-used screens are My Store, Orders, Notifications.
- On the top toolbar is gear icon that takes you to Settings.
Manage store with the official WooCommerce iOS app
My Store
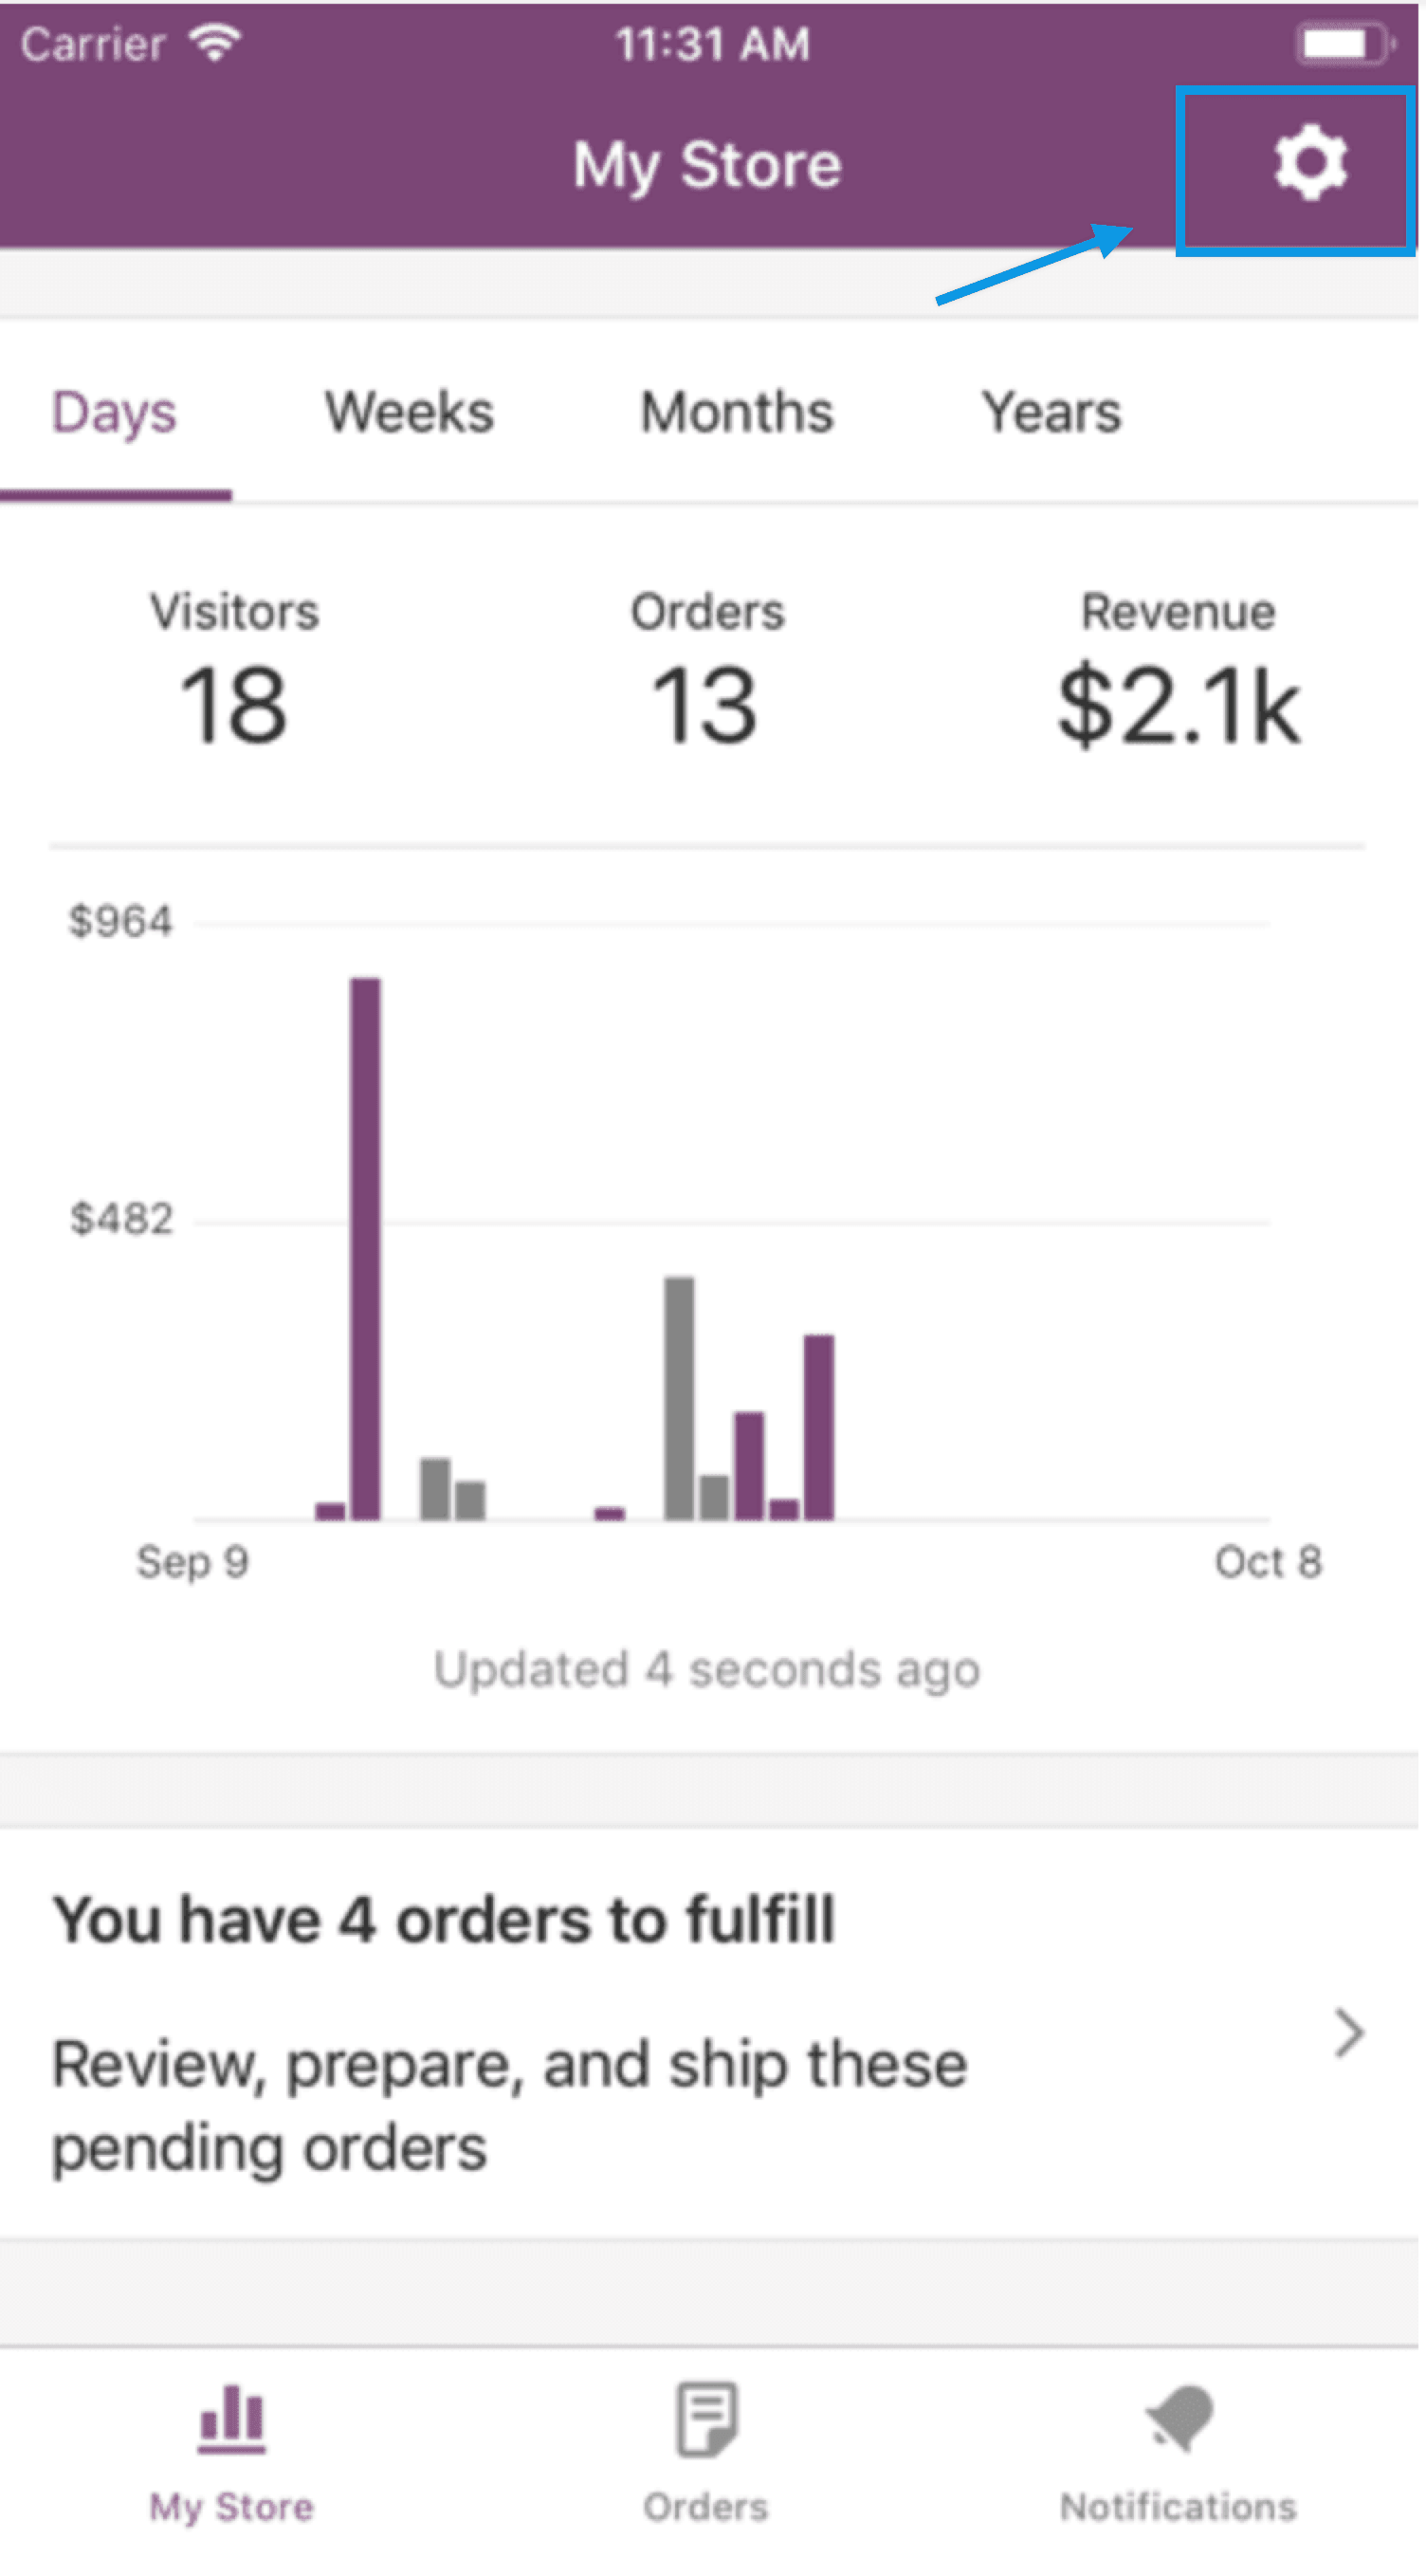
The My Store tab provides sales and visitor data, alerts you to pending orders, and gives you insight on sales trends.
To get started, tap the bottom-left My Store icon.
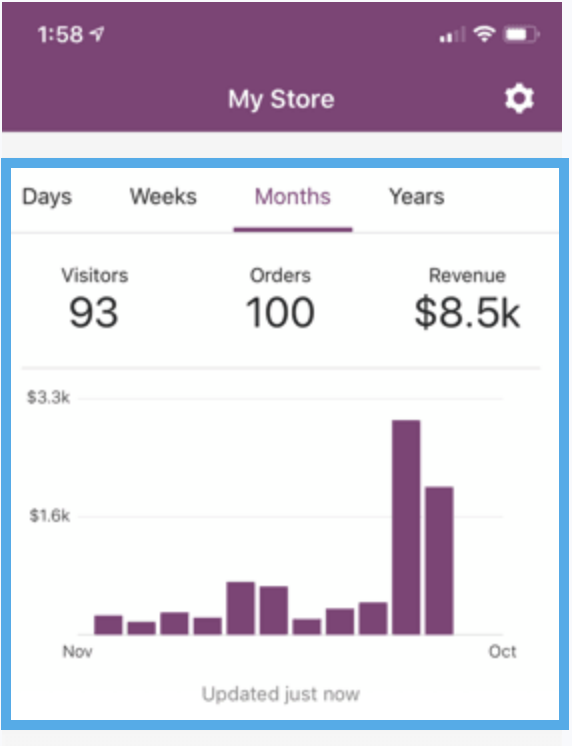
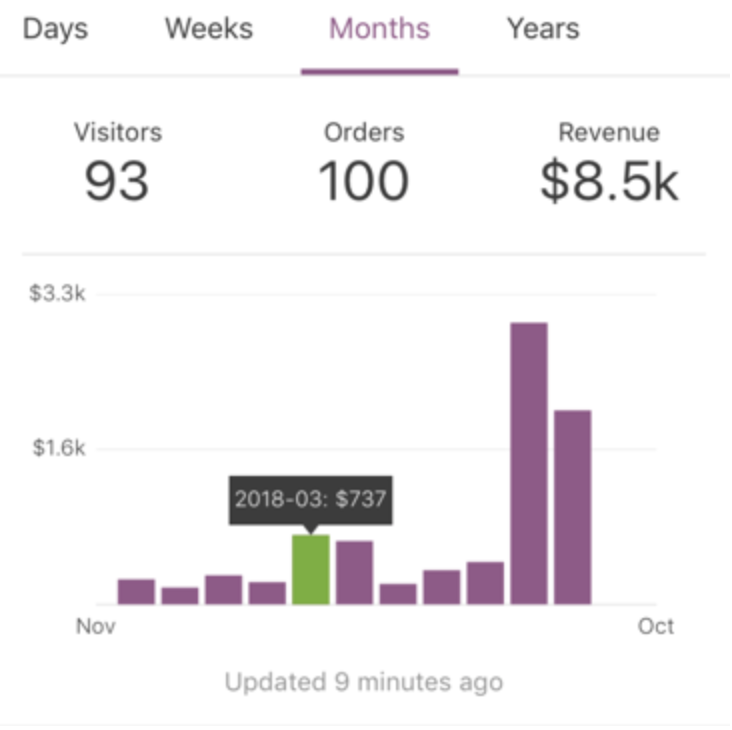
The top section of My Store displays Visitors, Orders, and Revenue for the selected period.
Data can be viewed for:
- Past 30 Days
- Past 13 Weeks
- Past 12 Months
- Past 5 Years
Bar graphs display an overview of how sales change over time.
Tap on an individual bar to view that period’s data.
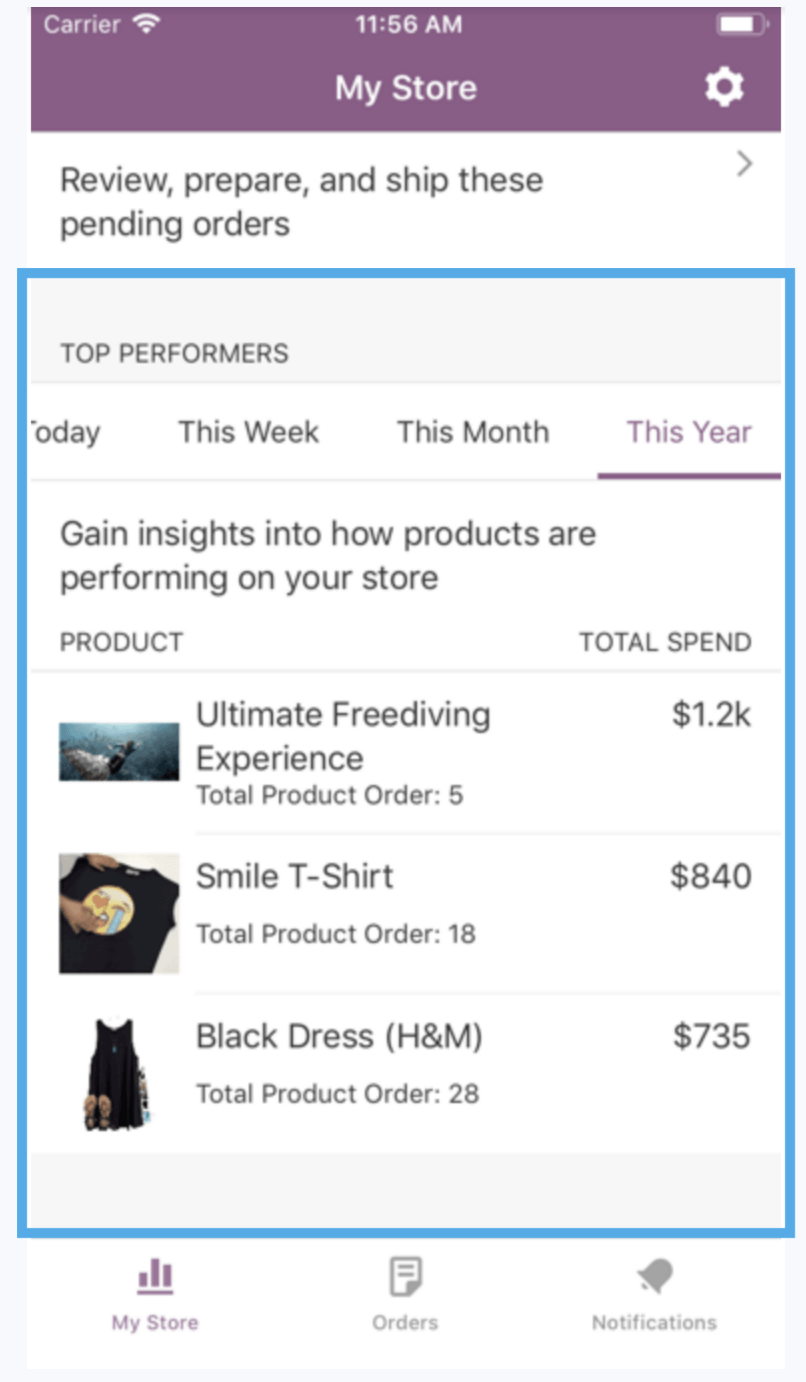
The middle section only appears when there are pending orders for your store.
Tap to go directly to the Orders screen that displays all pending orders in Processing status. More info on order statuses at: Managing Orders.
The bottom section displays top-selling products for:
- Today
- Past Week
- Past Month
- Past Year
The My Store tab updates each time you open the app. Or pull down the entire screen to manually refresh as needed.
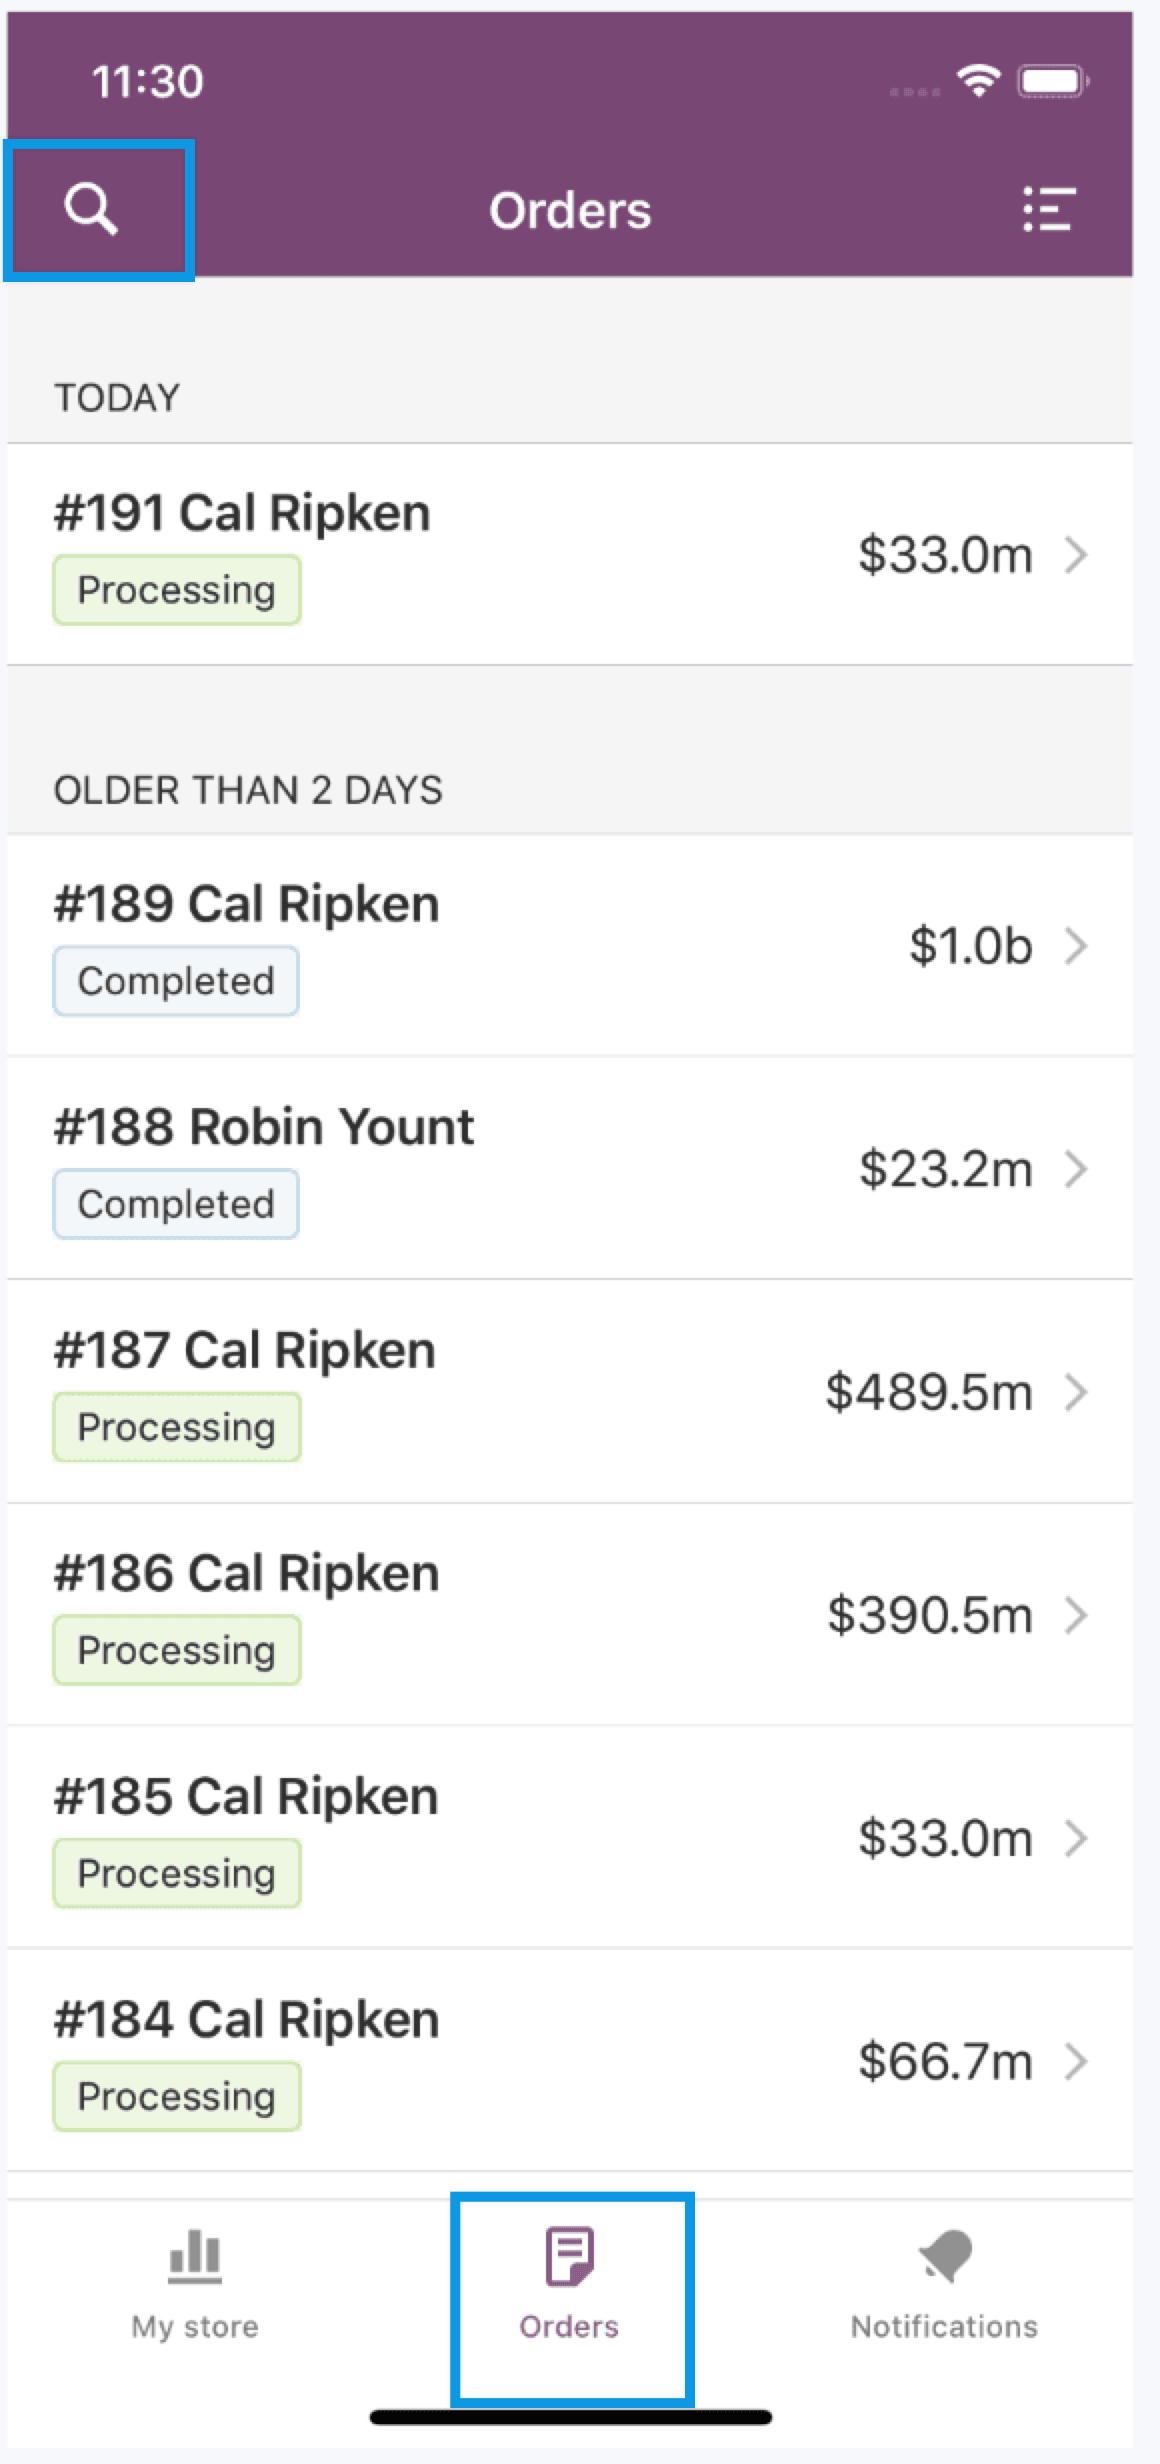
Orders
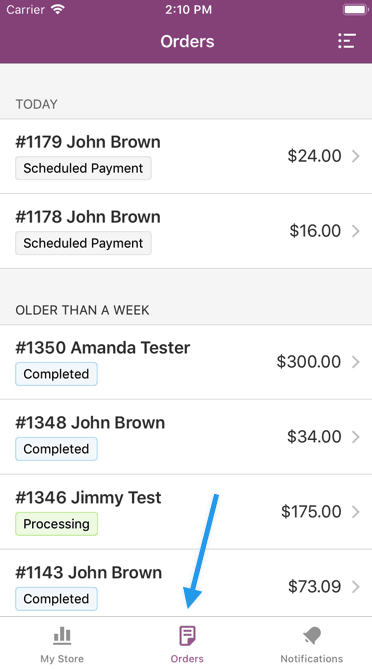
The Orders tab allows you to access a list of orders, filter by status, search for a specific order, and view and manage orders.
To get started, tap the bottom-middle Orders icon.
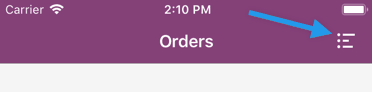
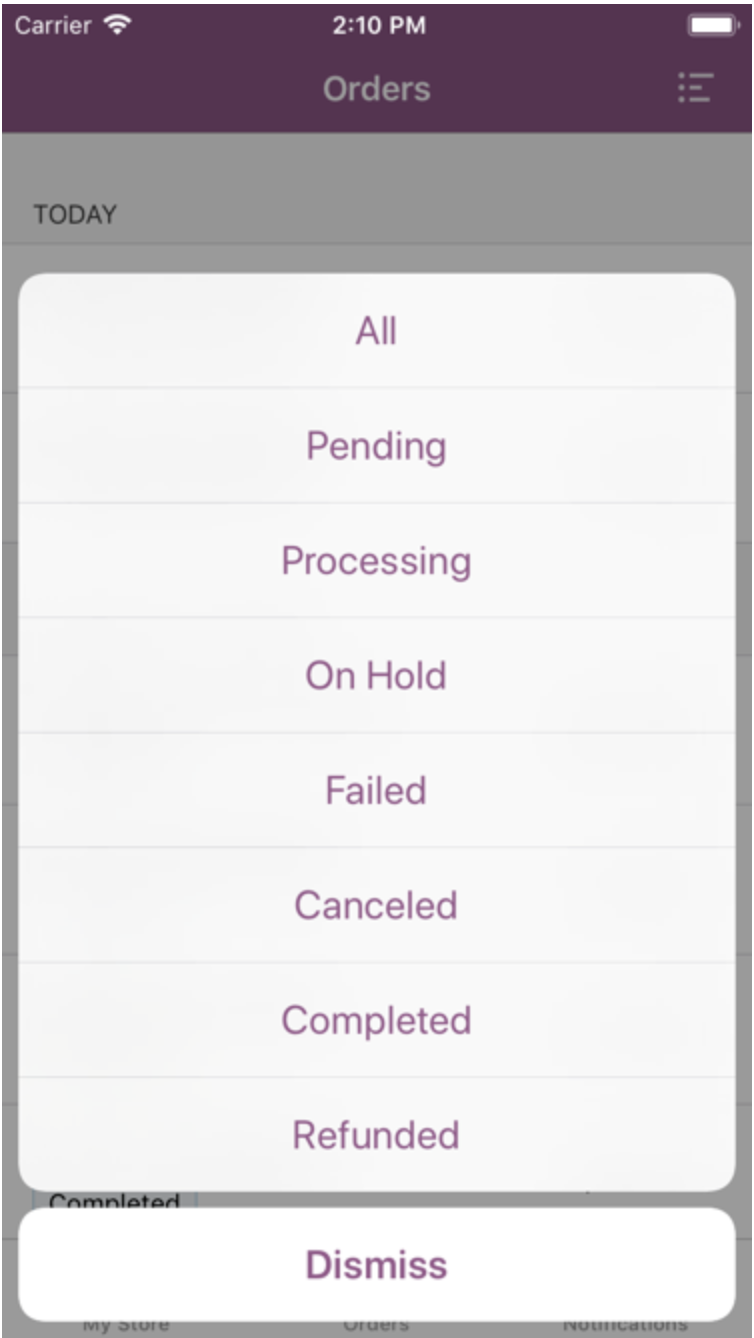
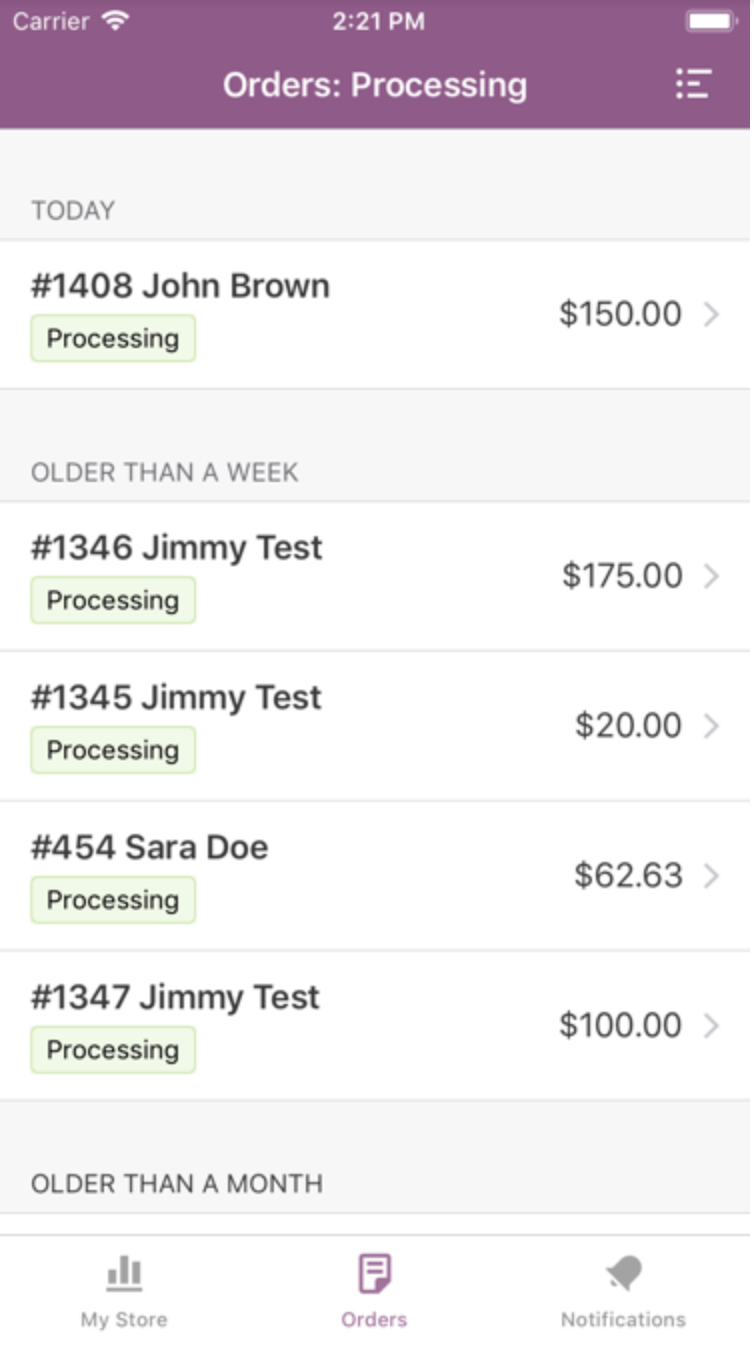
Filter
To filter the Orders list by single order status:
- Tap the Filter icon in the top toolbar.
- Select an order status to filter by: Pending, Processing, On Hold, Failed, Canceled, Completed, or Refunded.
All orders fitting the selected Filter are then listed by period, starting with the most recent.
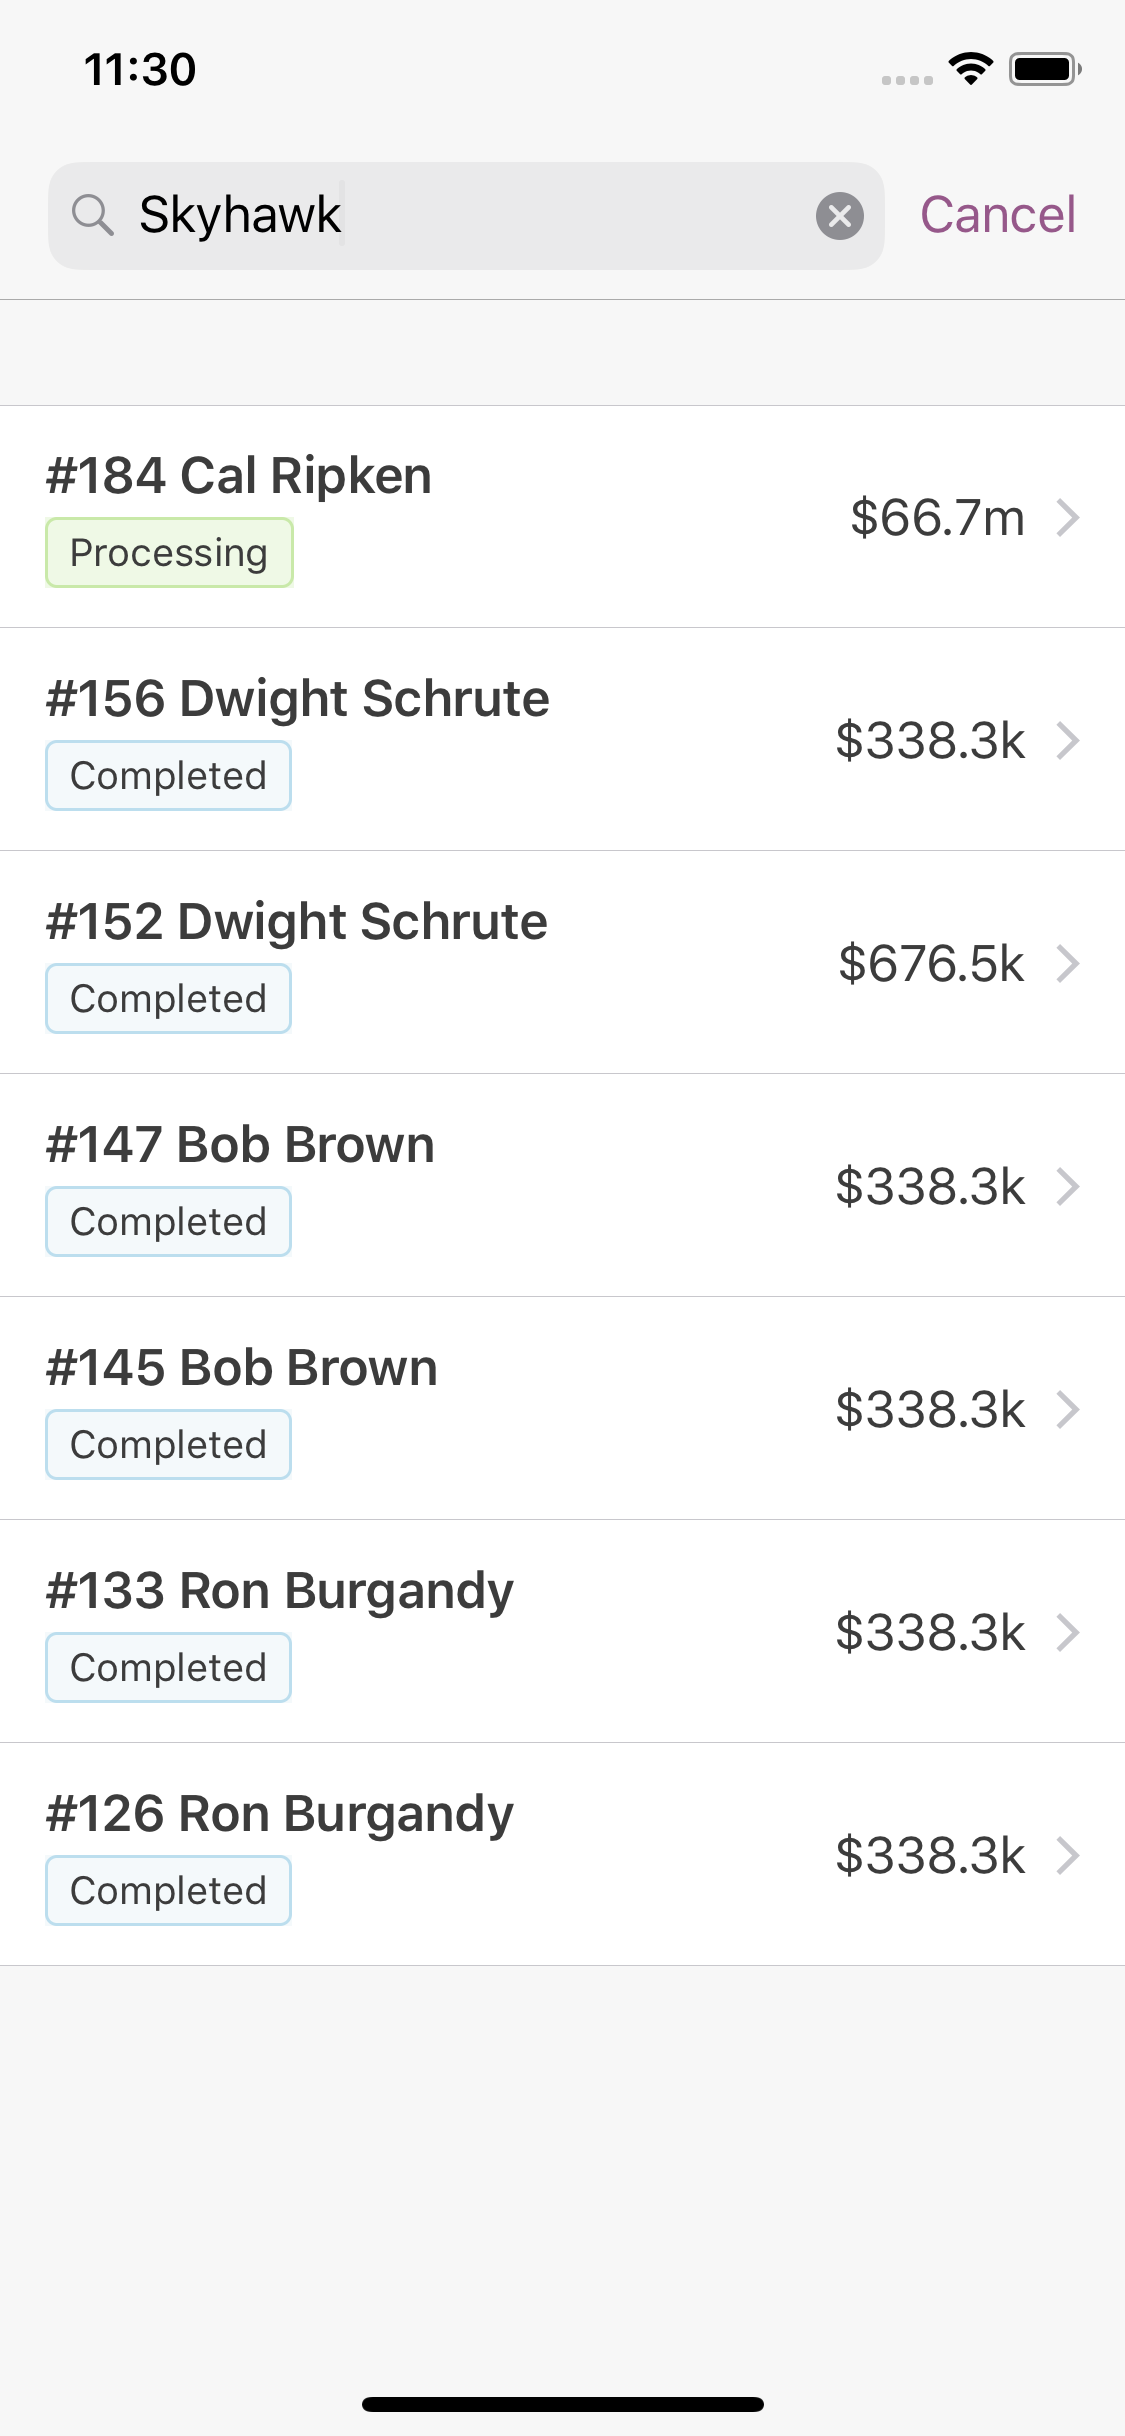
Search
To search for a specific order or orders:
- Tap the Search icon in the top toolbar.
- Begin typing. The search will look for matching terms by first name, last name, product, and order number.
View and Manage Orders
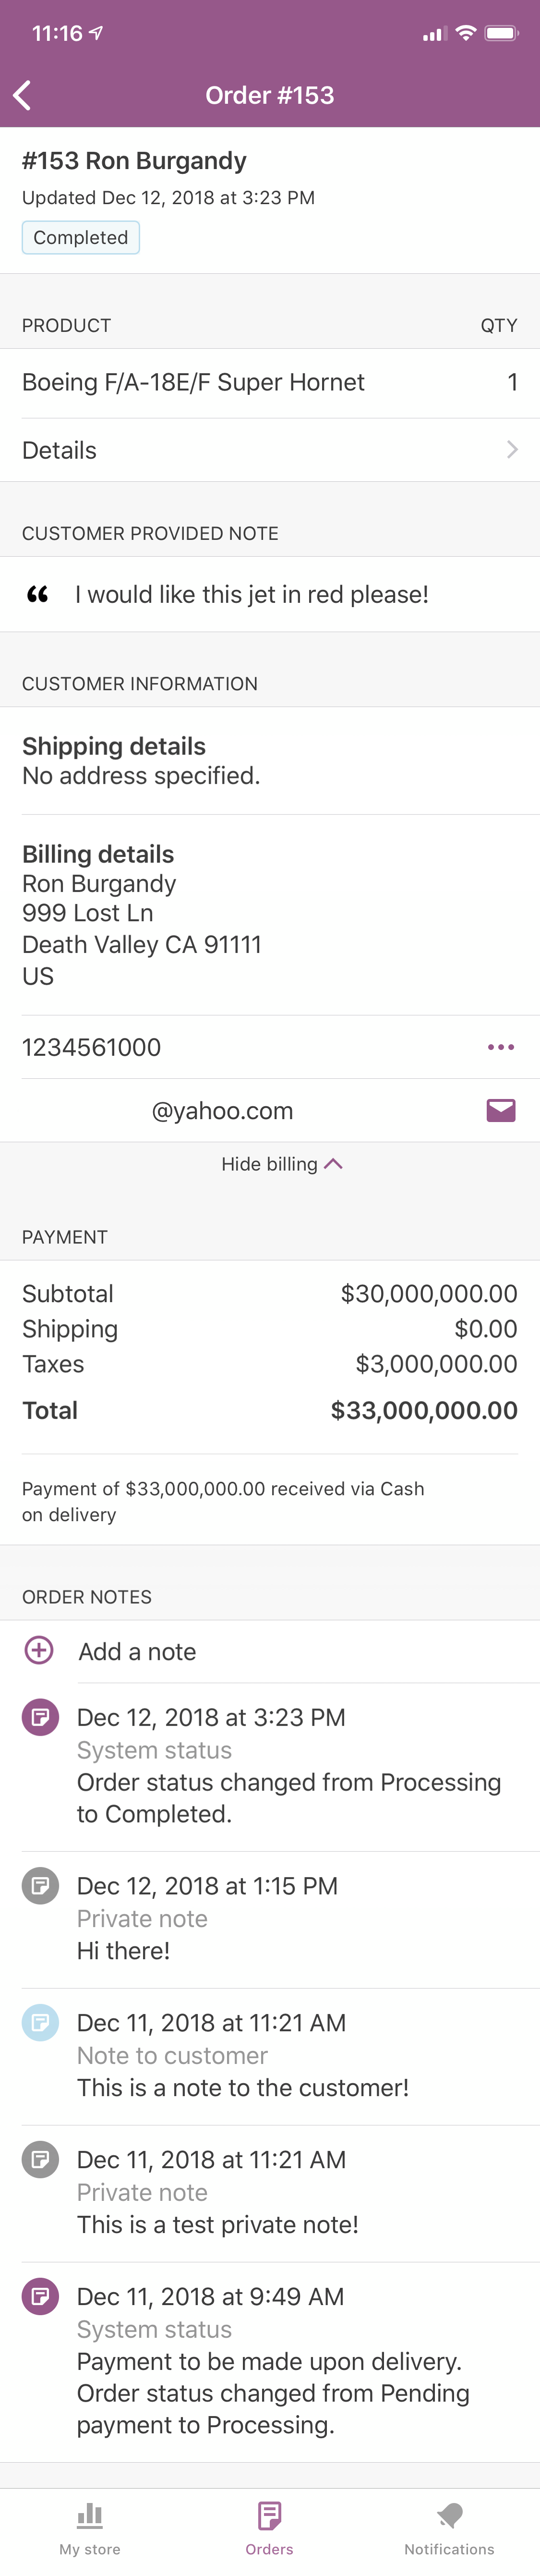
View order
To view an order in detail, select an individual order in the list or tap the order displayed in the New Order notification.
The Order Detail screen provides details on:
- Order date and status
- Products ordered, prices and quantity
- Customer notes
- Customer information, including billing and shipping
- Payment information, including order total, payments, refunds, coupons, and how the order was paid
- Order notes – private, system, and public
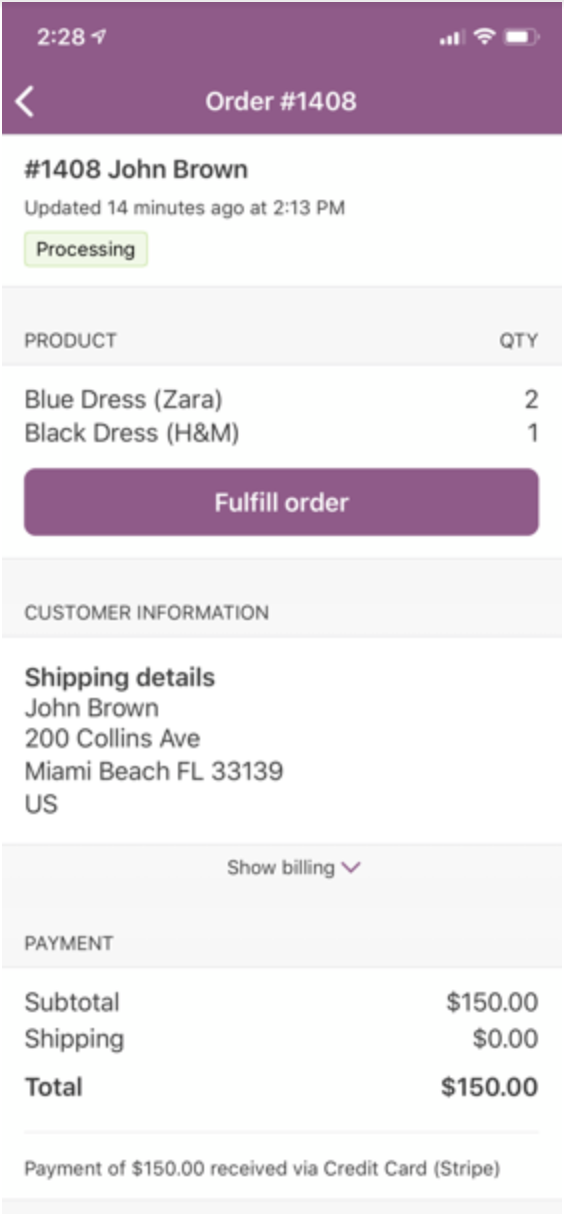
Manage order
To fulfill an order:
- Open an order that is in Processing status to display the Order Detail screen.
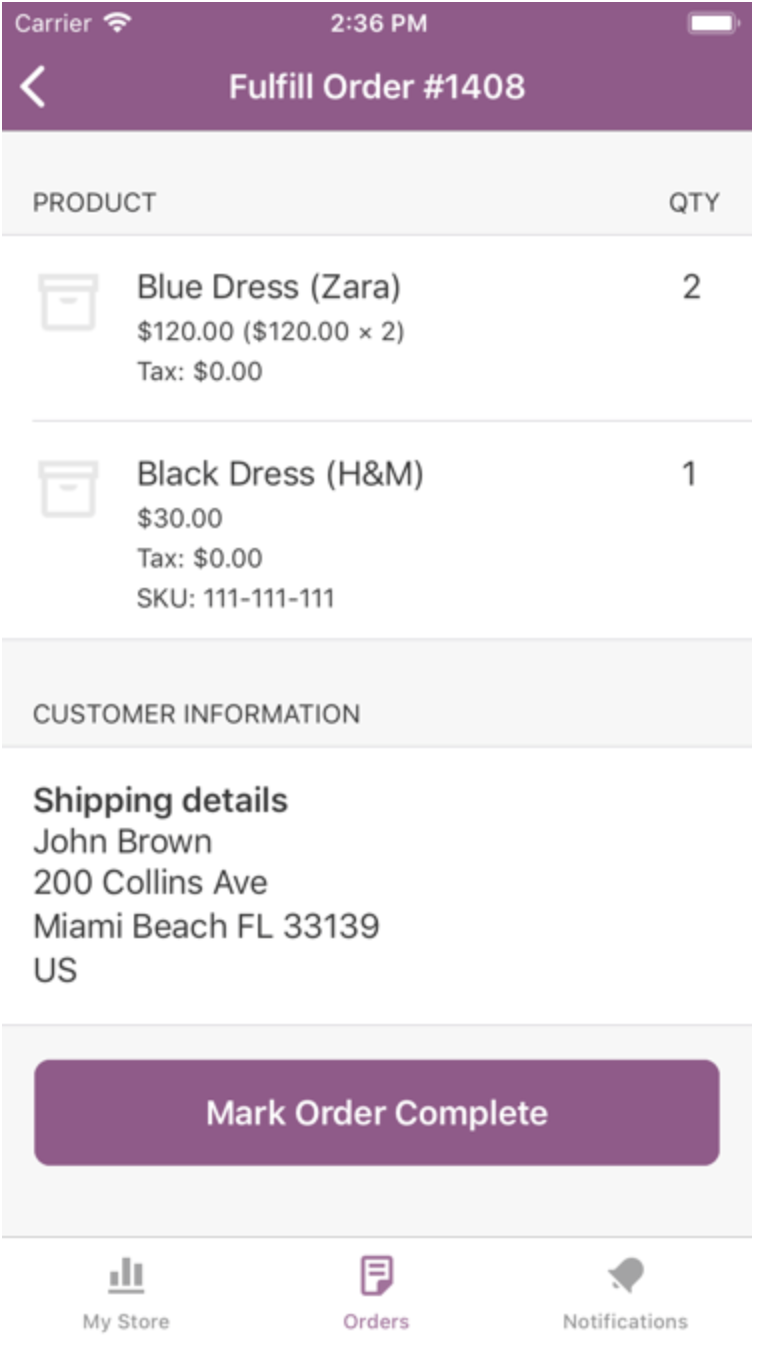
- Tap Fulfill Order. The Order Fulfillment screen appears.
- Verify the product details and shipping information, then Mark Order Complete.
Marking an order complete with the app triggers a Completed Order email to the customer, the same as if the order was fulfilled on your site. More info at: Email Notifications.
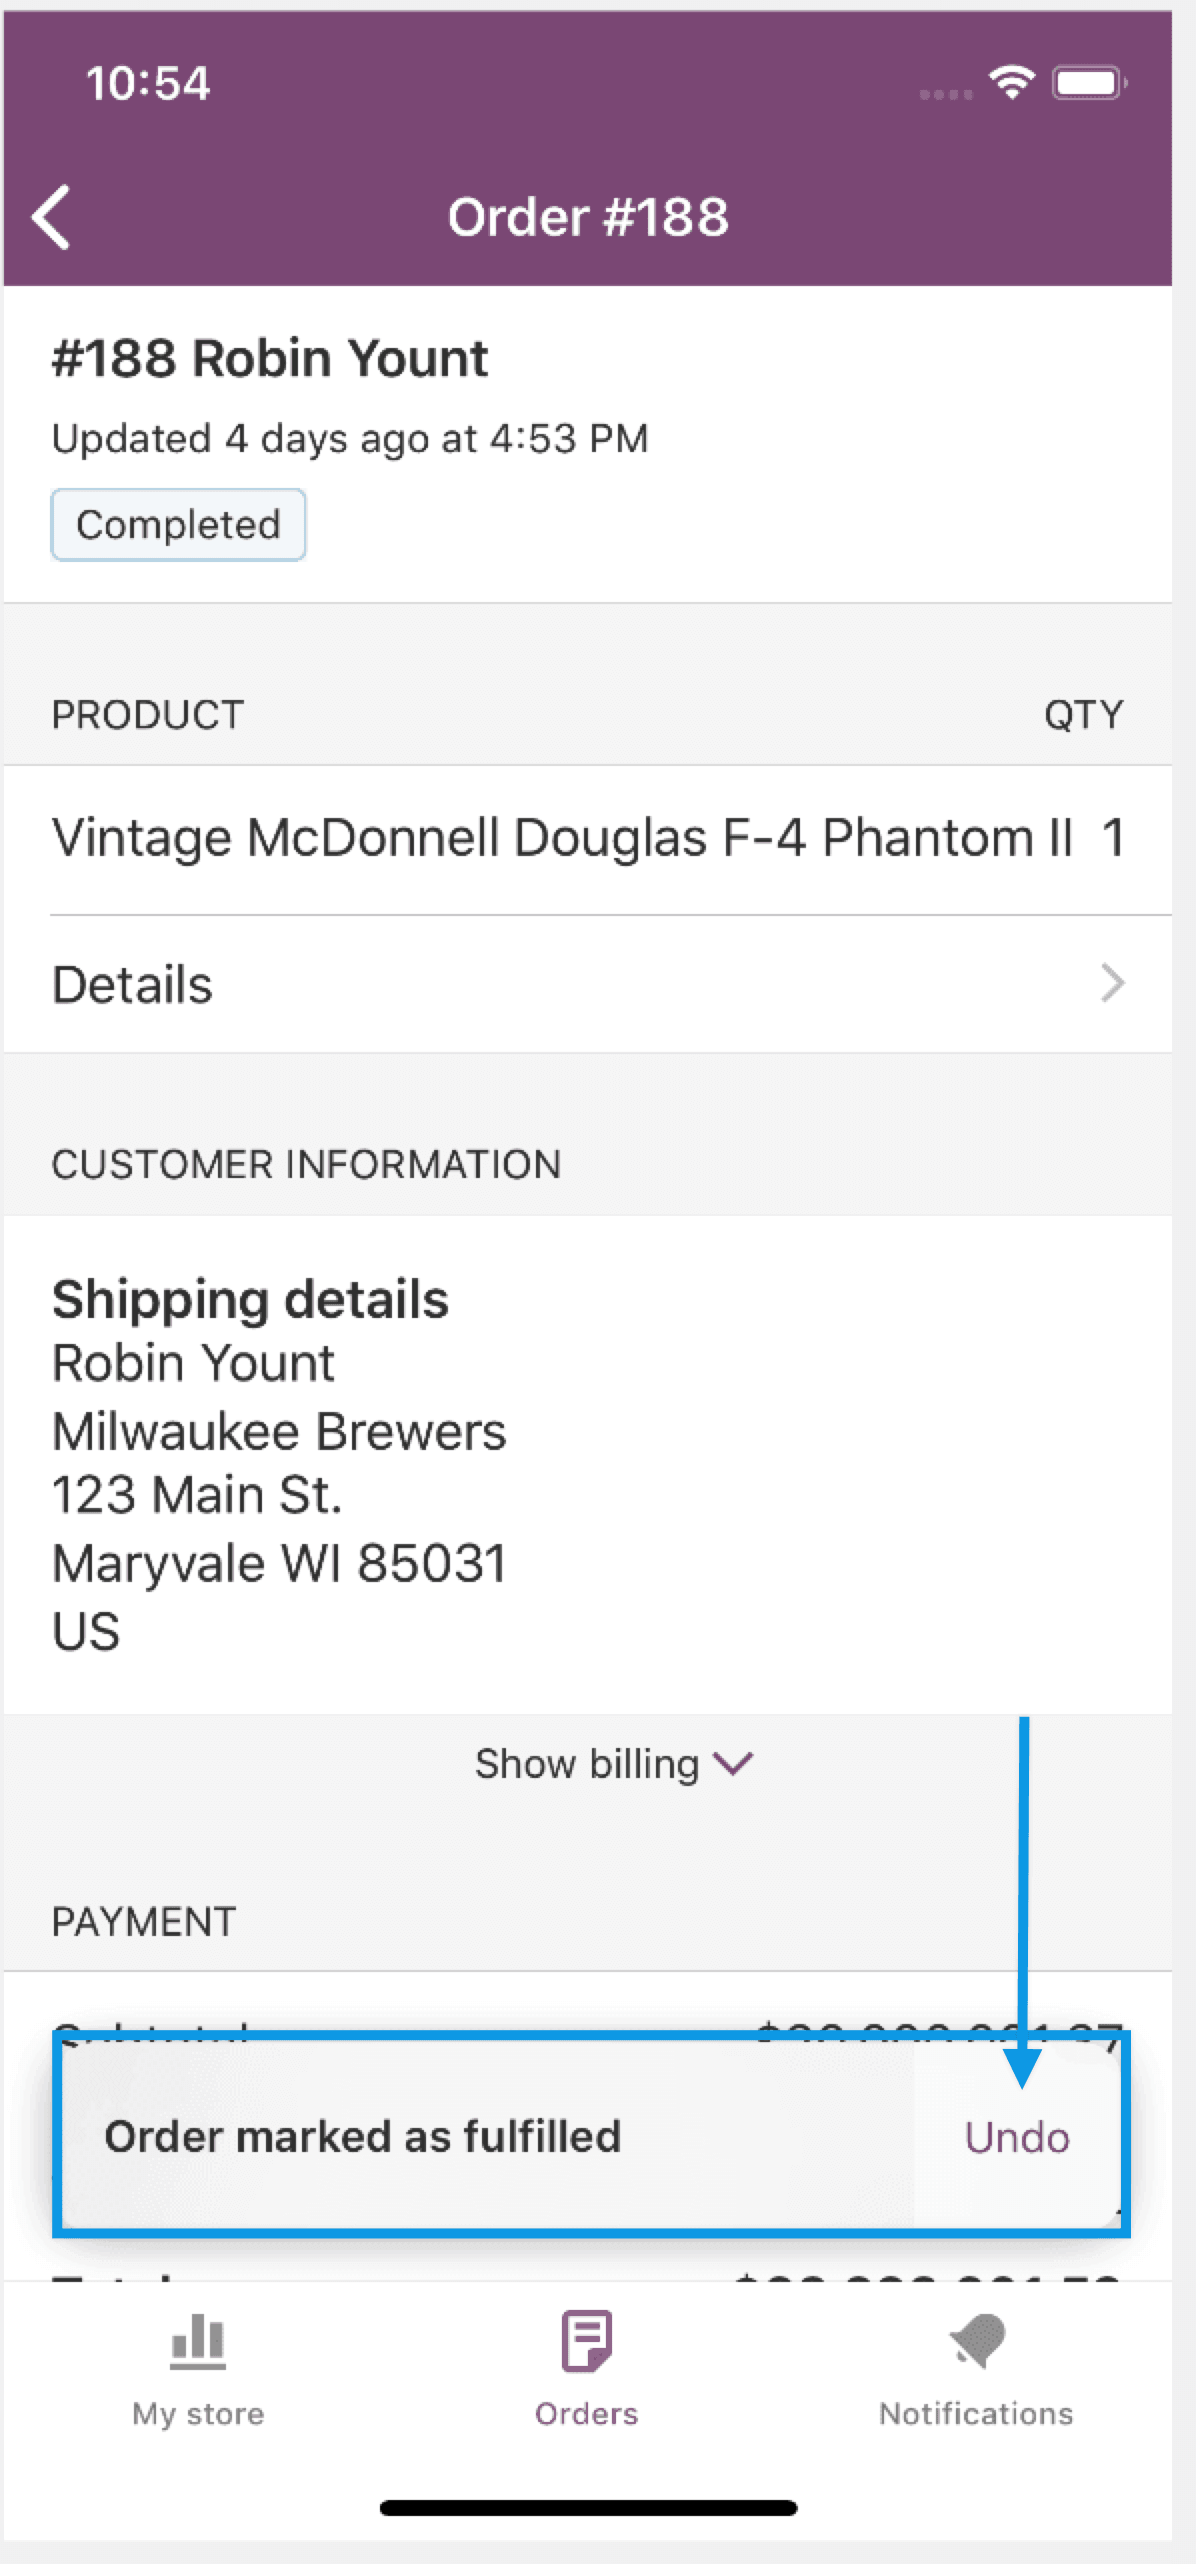
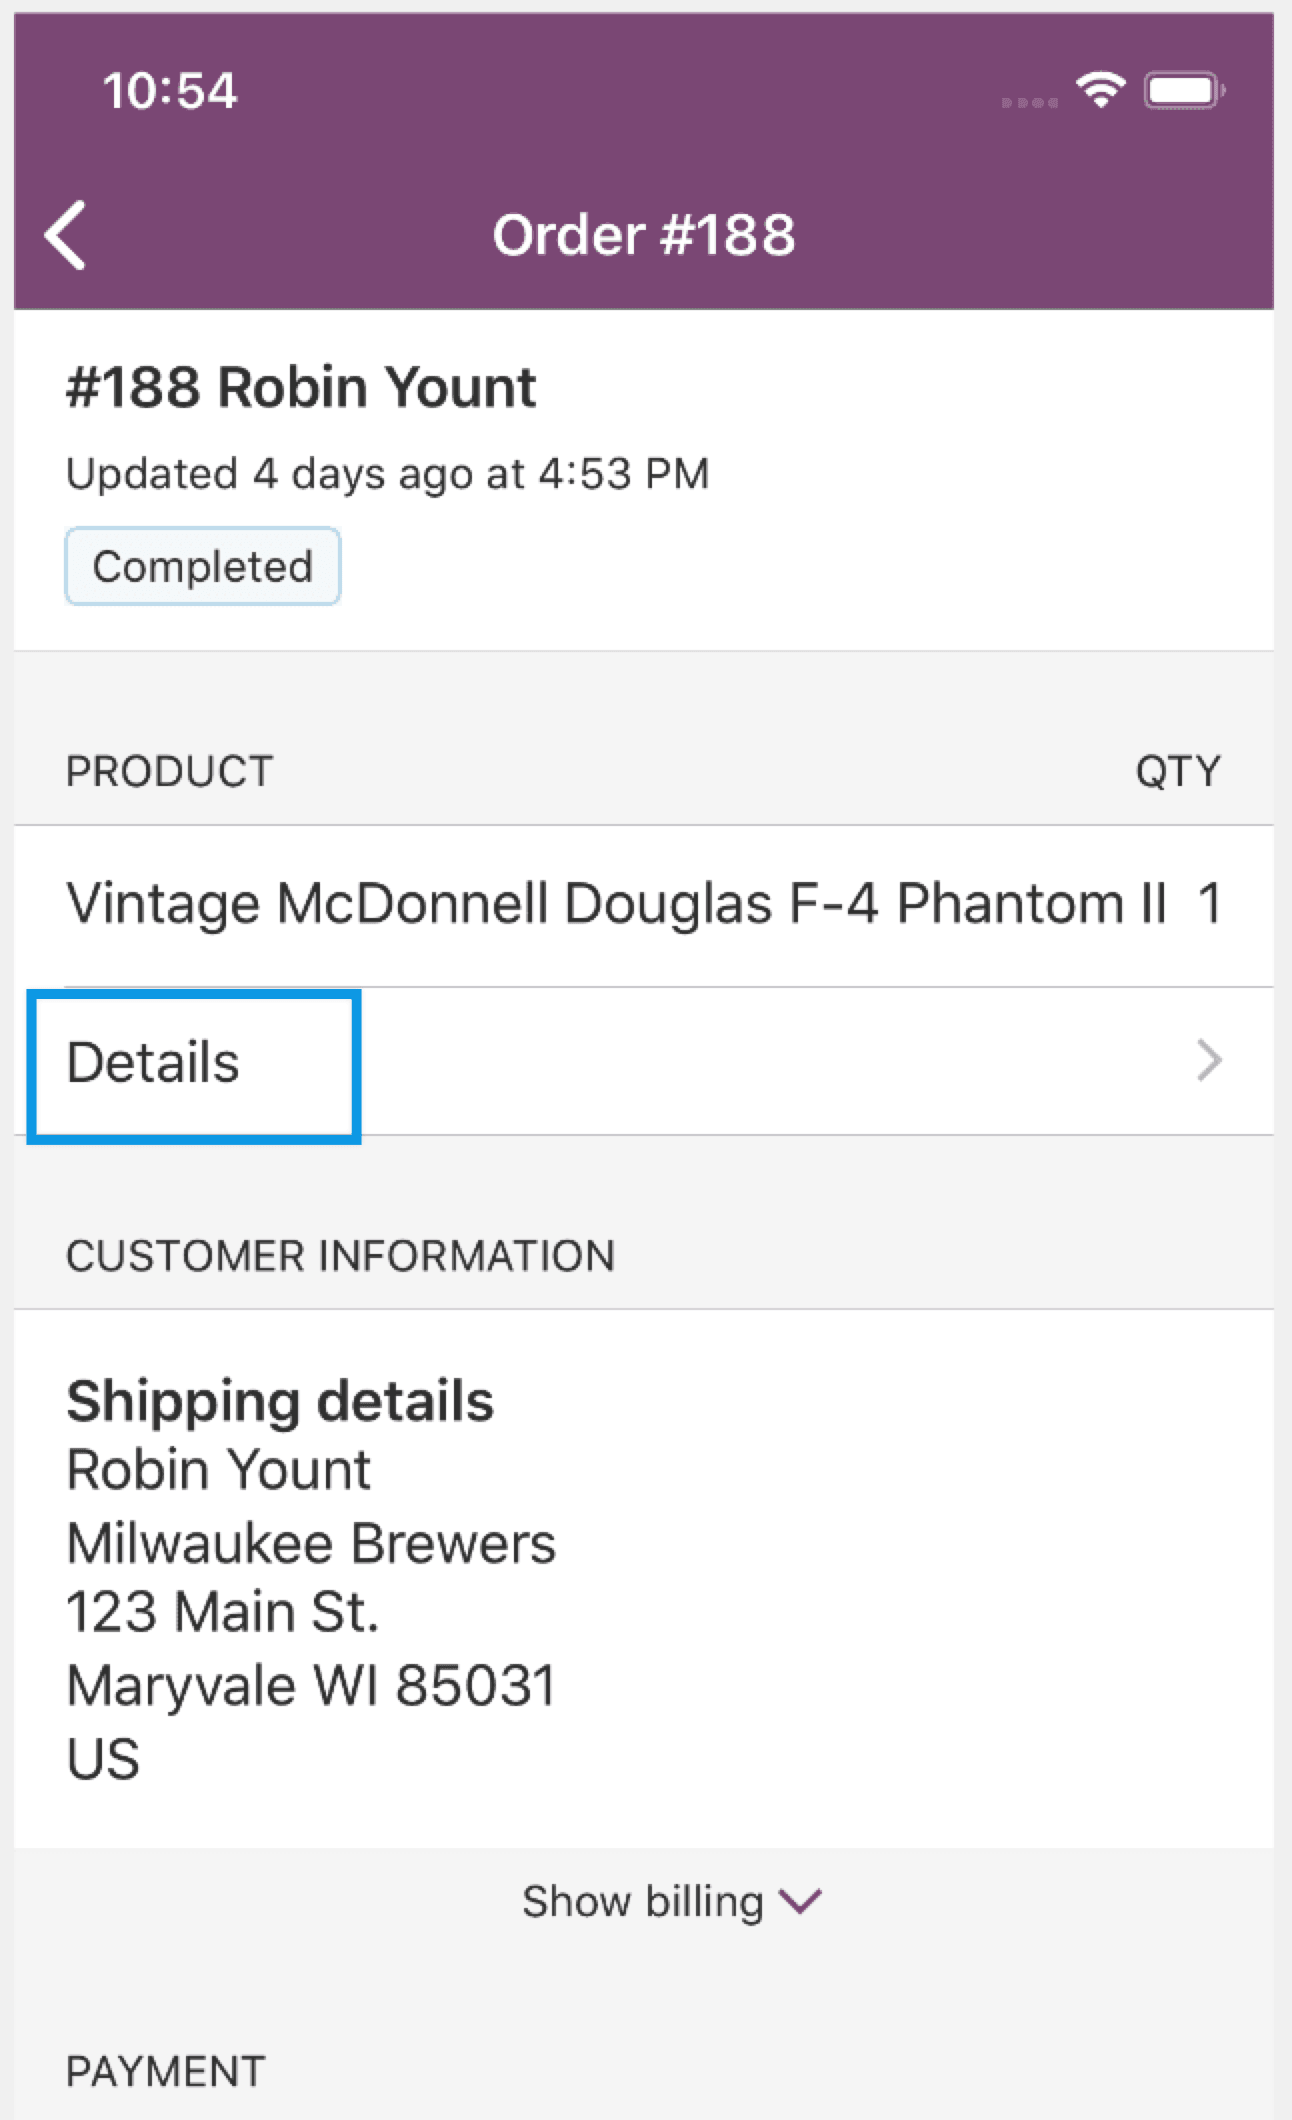
To view product details of an order:
The Details of products ordered become available when the order is fulfilled. Tap Details to view.
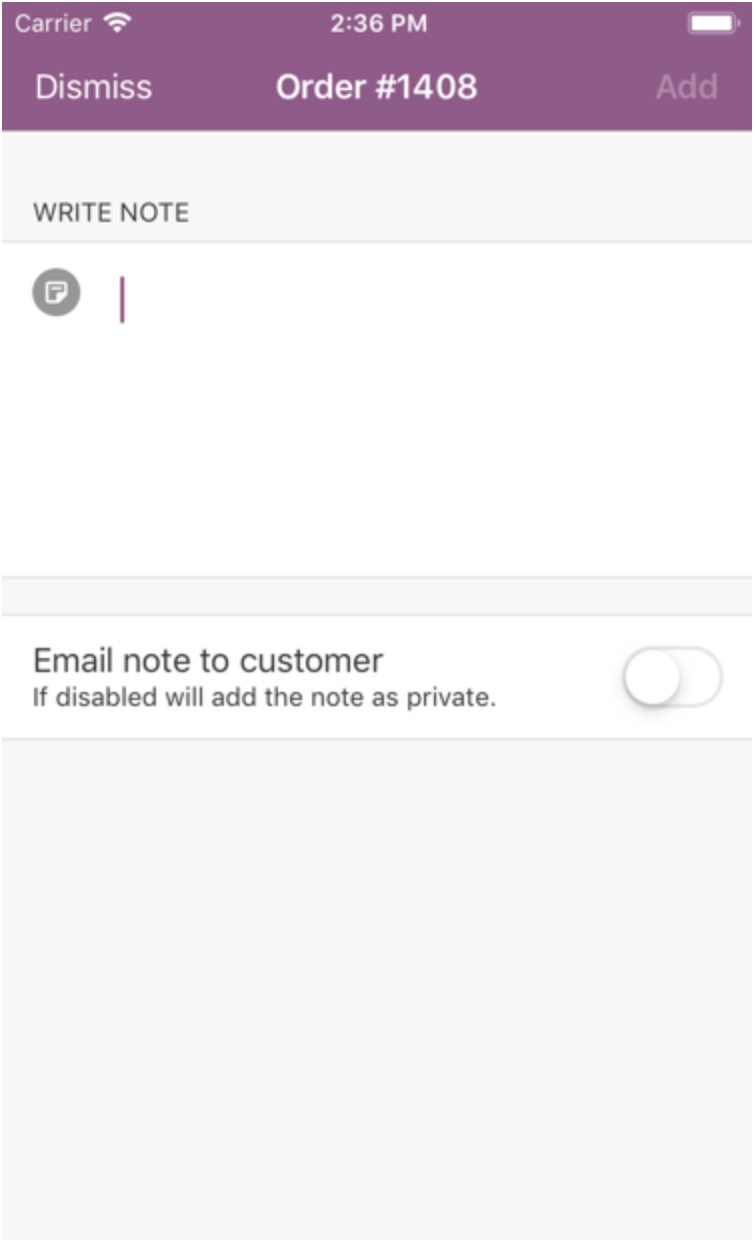
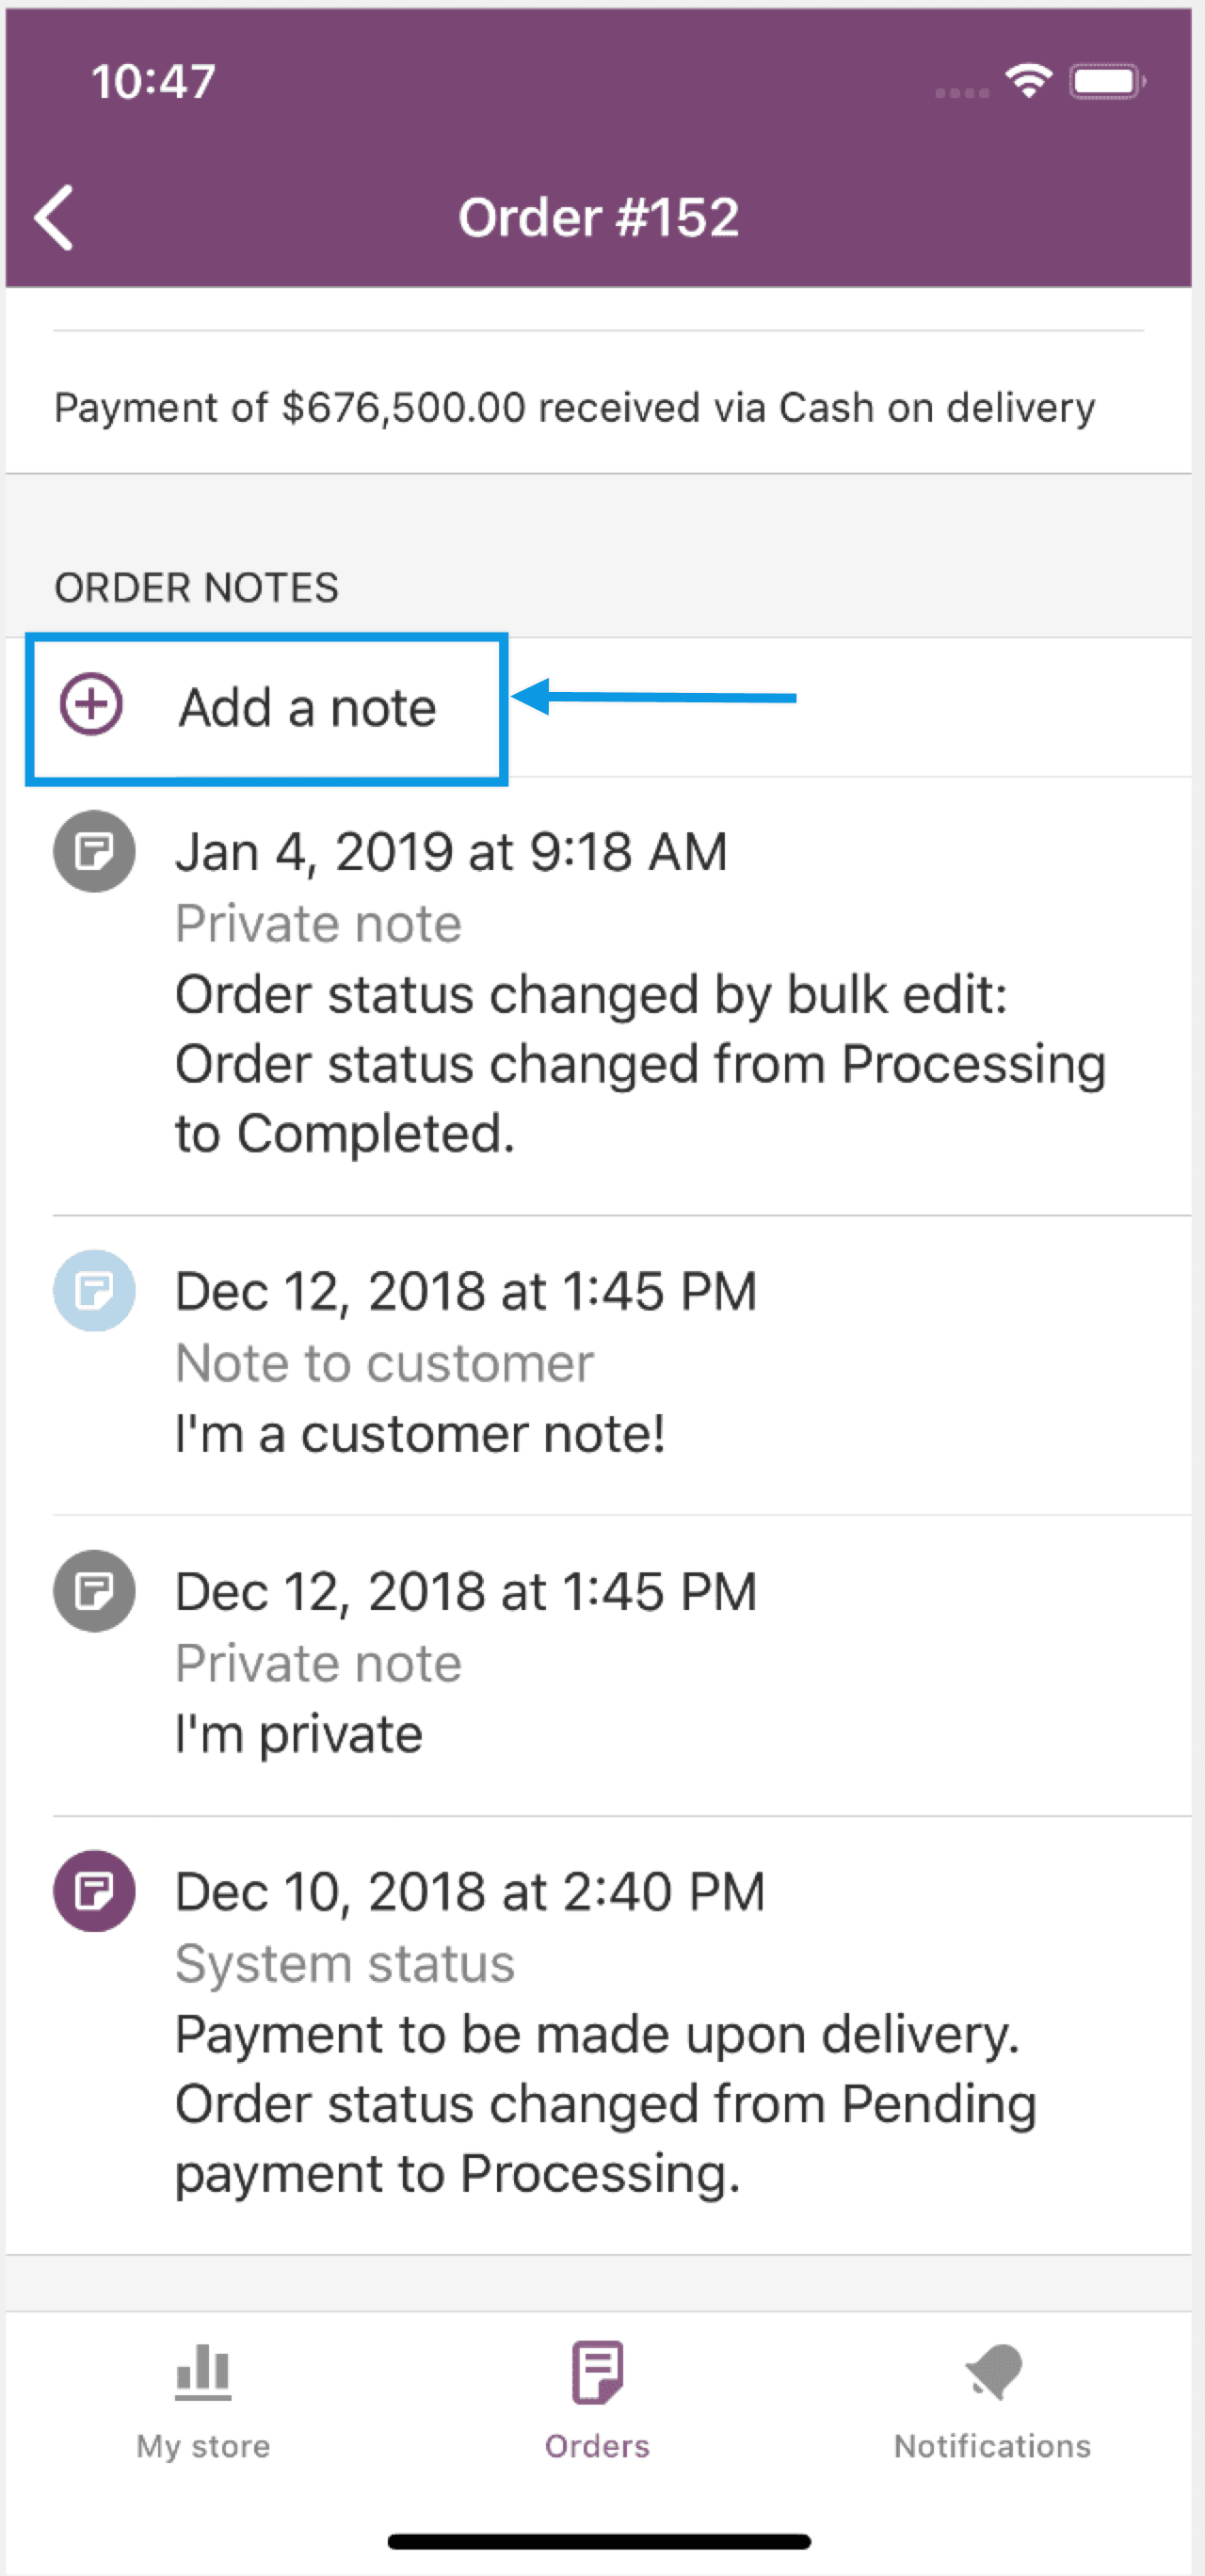
To add an order note:
- Open an order to access the Order Detail screen.
- Scroll down and select Add a Note. The Add Note screen appears.
- Enter a note.

- Choose to keep the note private (default) or to make visible to the customer by toggling the Email Note to Customer option on or off.
- Tap Add in the upper-right corner to save.
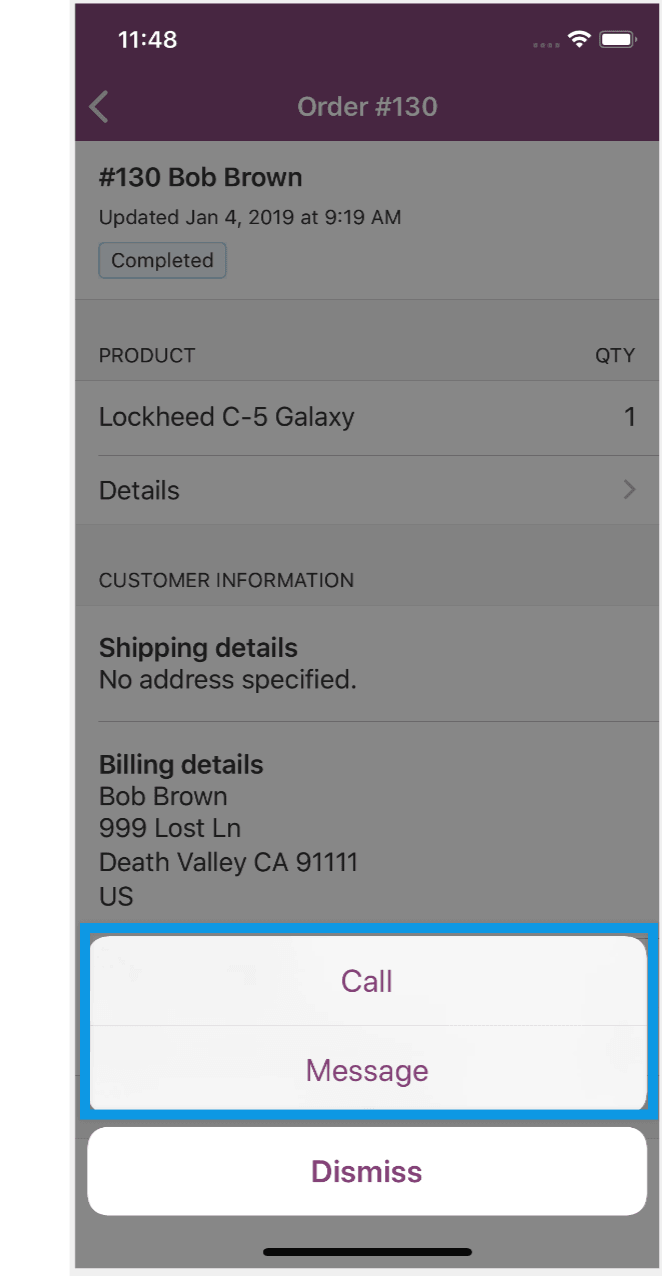
To contact the customer:
- Go to the: Individual order > Order Detail screen > Customer Information section > Show Billing.
- Select a method of contact:
- Send an email by tapping the envelope next to the customer’s email address. This option is only available if an email address is entered during checkout.
- Send a text message by opening the ellipsis (…) menu next to the phone number and selecting Message. This option is only available if a valid phone number is entered during checkout.
- The app sends a text message to all numbers, but the attempt is only successful if it is a mobile number.
- Call the customer by opening the ellipsis (…) menu next to the phone number and selecting Call. This option is only available if a valid phone number is entered during checkout.
- Copy an address by long-pressing on the address area, then tap Copy on the iOS Edit menu; or swipe right and tap the Copy menu item (RTL users would swipe left). Paste into an iOS app that accepts text.
The Orders tab updates each time you open the app. Or pull down the entire screen to manually refresh as needed.
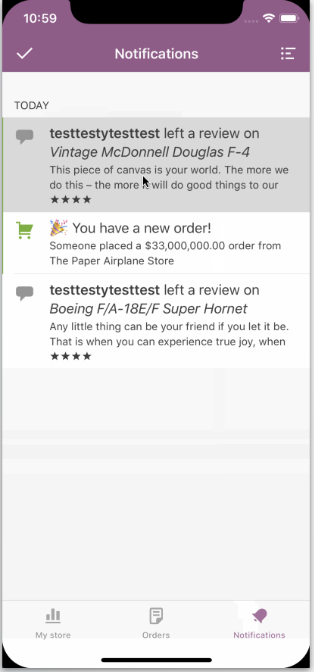
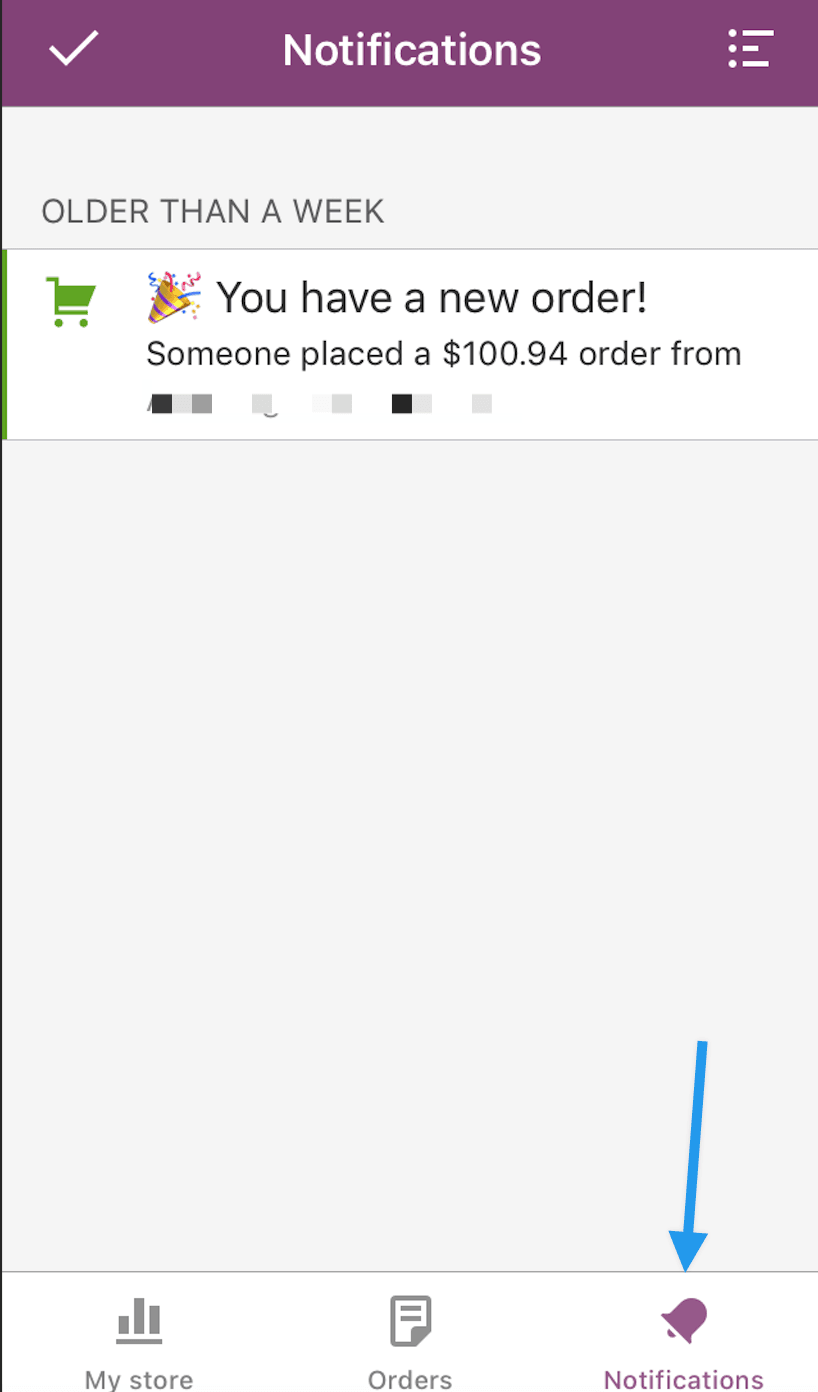
Notifications
To get started, tap the bottom-right Notifications icon.
The Notifications tab displays two types of notifications for the connected store:
- New Order – a new order has been received. Tap the notification to open it in the Order Detail screen.
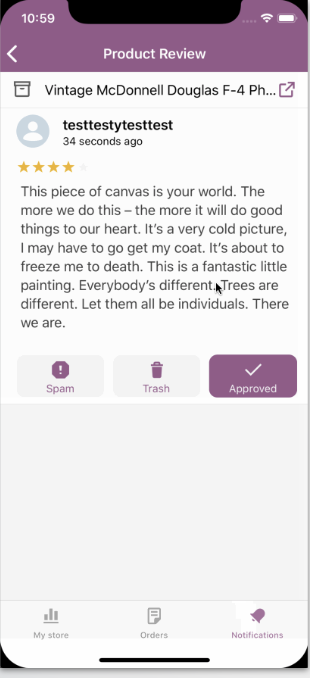
- Product Review – a new product review has been submitted. Tap the notification to open it in the Review Moderation screen.
A green dot appears above the Notifications icon when you have a new notification, and a custom Cha-ching! comes packaged with the app to alert you of a new order.
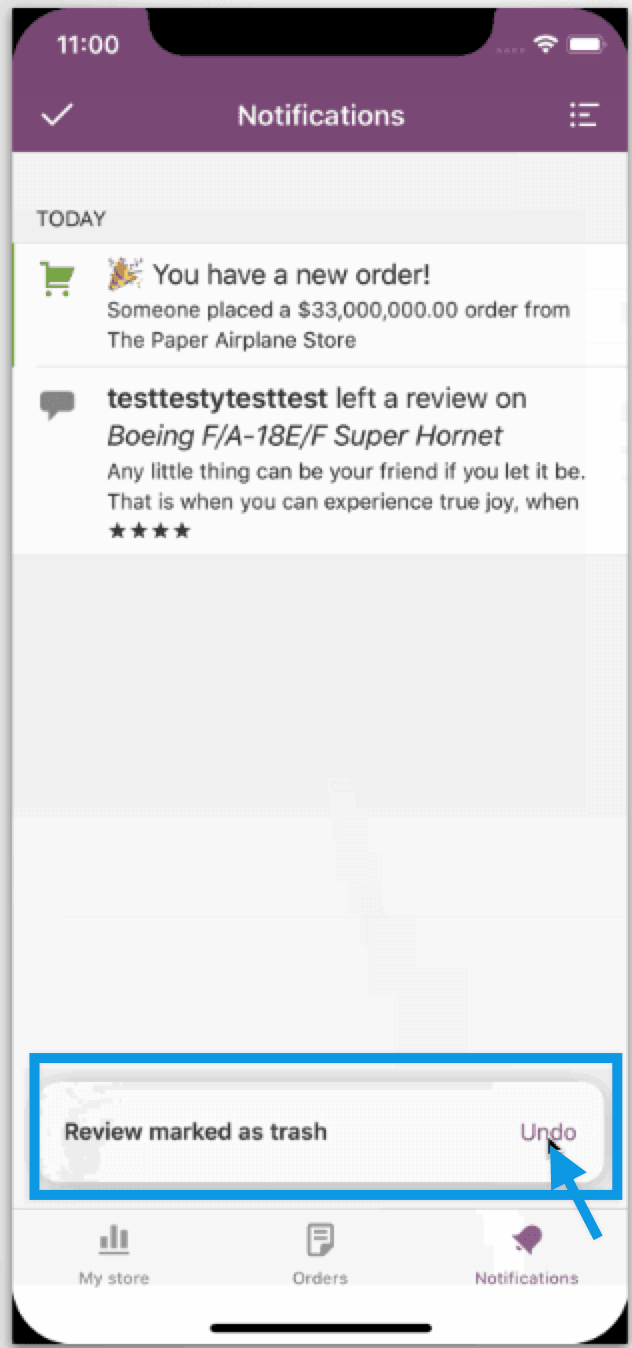
Review Moderation
To approve, unapprove, or mark a product review as spam or trash:
- Open the Product Review Notification either via an alert you received or from the Notifications tab. The Product Review Detail screen will appear.

- Select an option:
Notification settings
At this time, it is not possible to disable notifications within the WooCommerce iOS app.
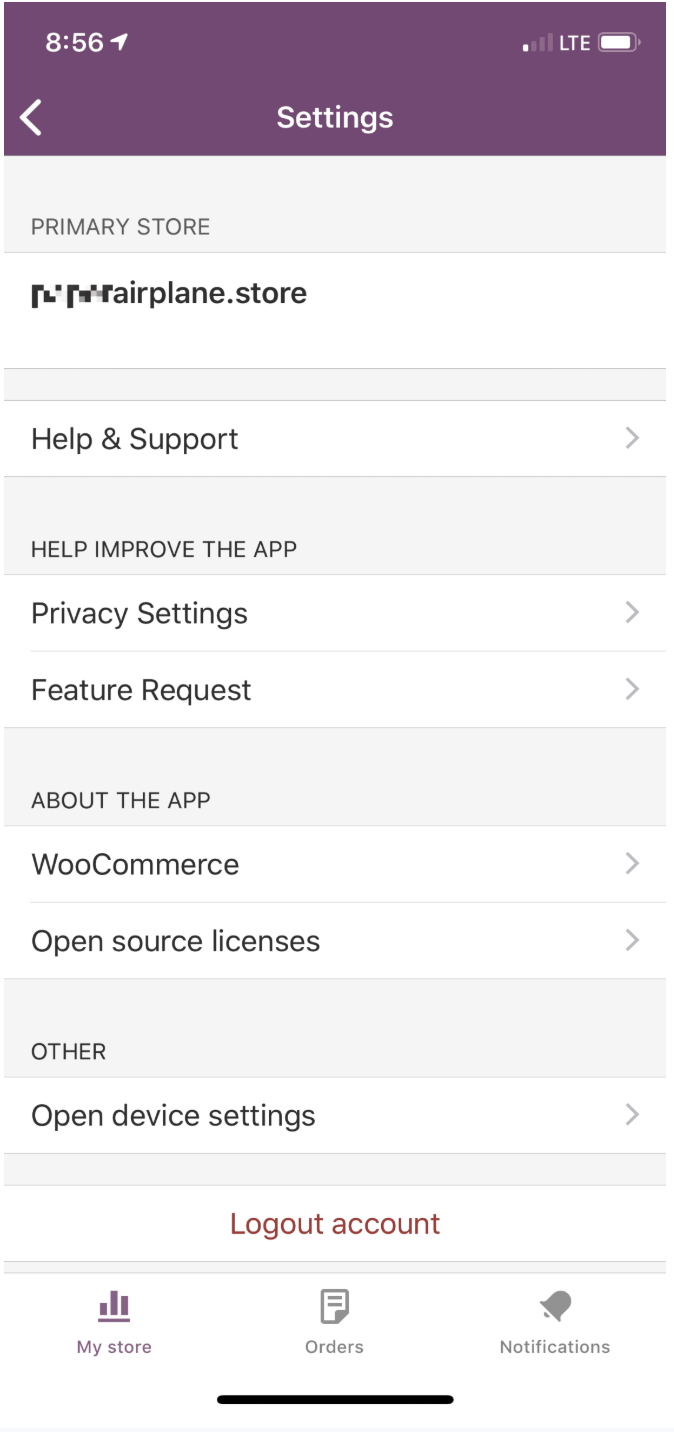
Settings
Use Settings to:
- View which store is connected to the app
- Get Help & Support
- View and adjust Privacy Settings
- Help improve the app and log a Feature Request
- Learn more about WooCommerce and Open-source licenses
- Open your Device Settings
To open Settings:
- Go to the Main screen, reached from the My Store, Orders or Notifications tabs.

- Tap the upper-right gear icon. The Settings screen will appear.
- Select:
- Help & Support (next section)
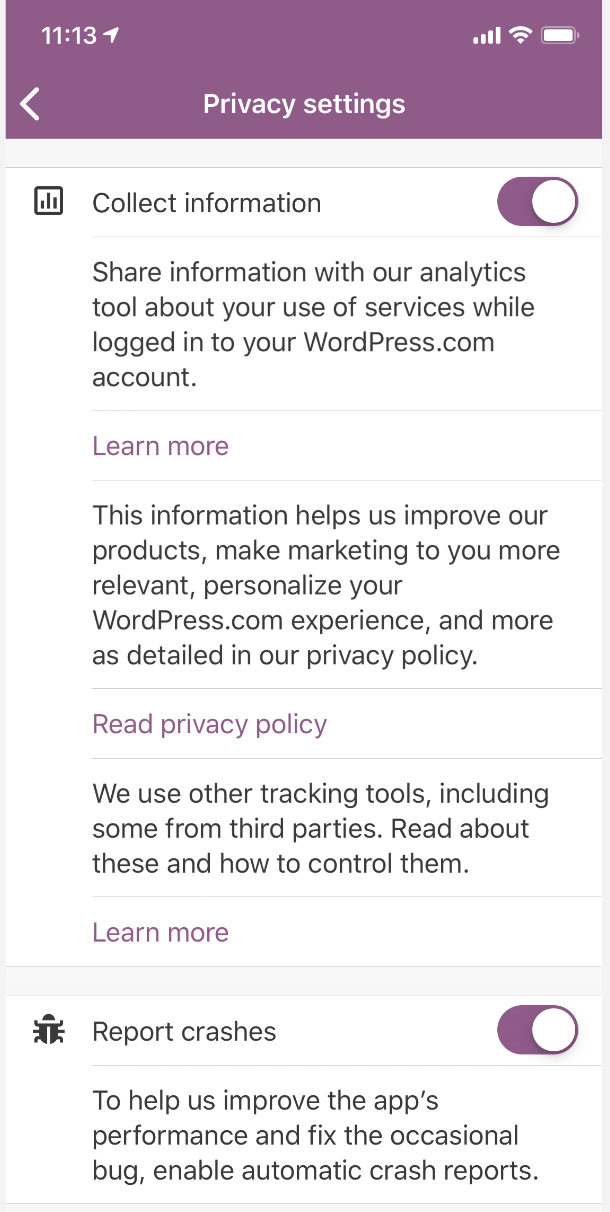
- Privacy Settings: Toggle to enable or disable permissions to share data and report crashes, plus read our Privacy Policy.
- Feature Request: Links to our Ideas Board, where you can submit an idea to improve the app.
- WooCommerce and Open source licenses: Learn more about our Terms and Services and licenses.
- Open device settings: Link to your phone settings.
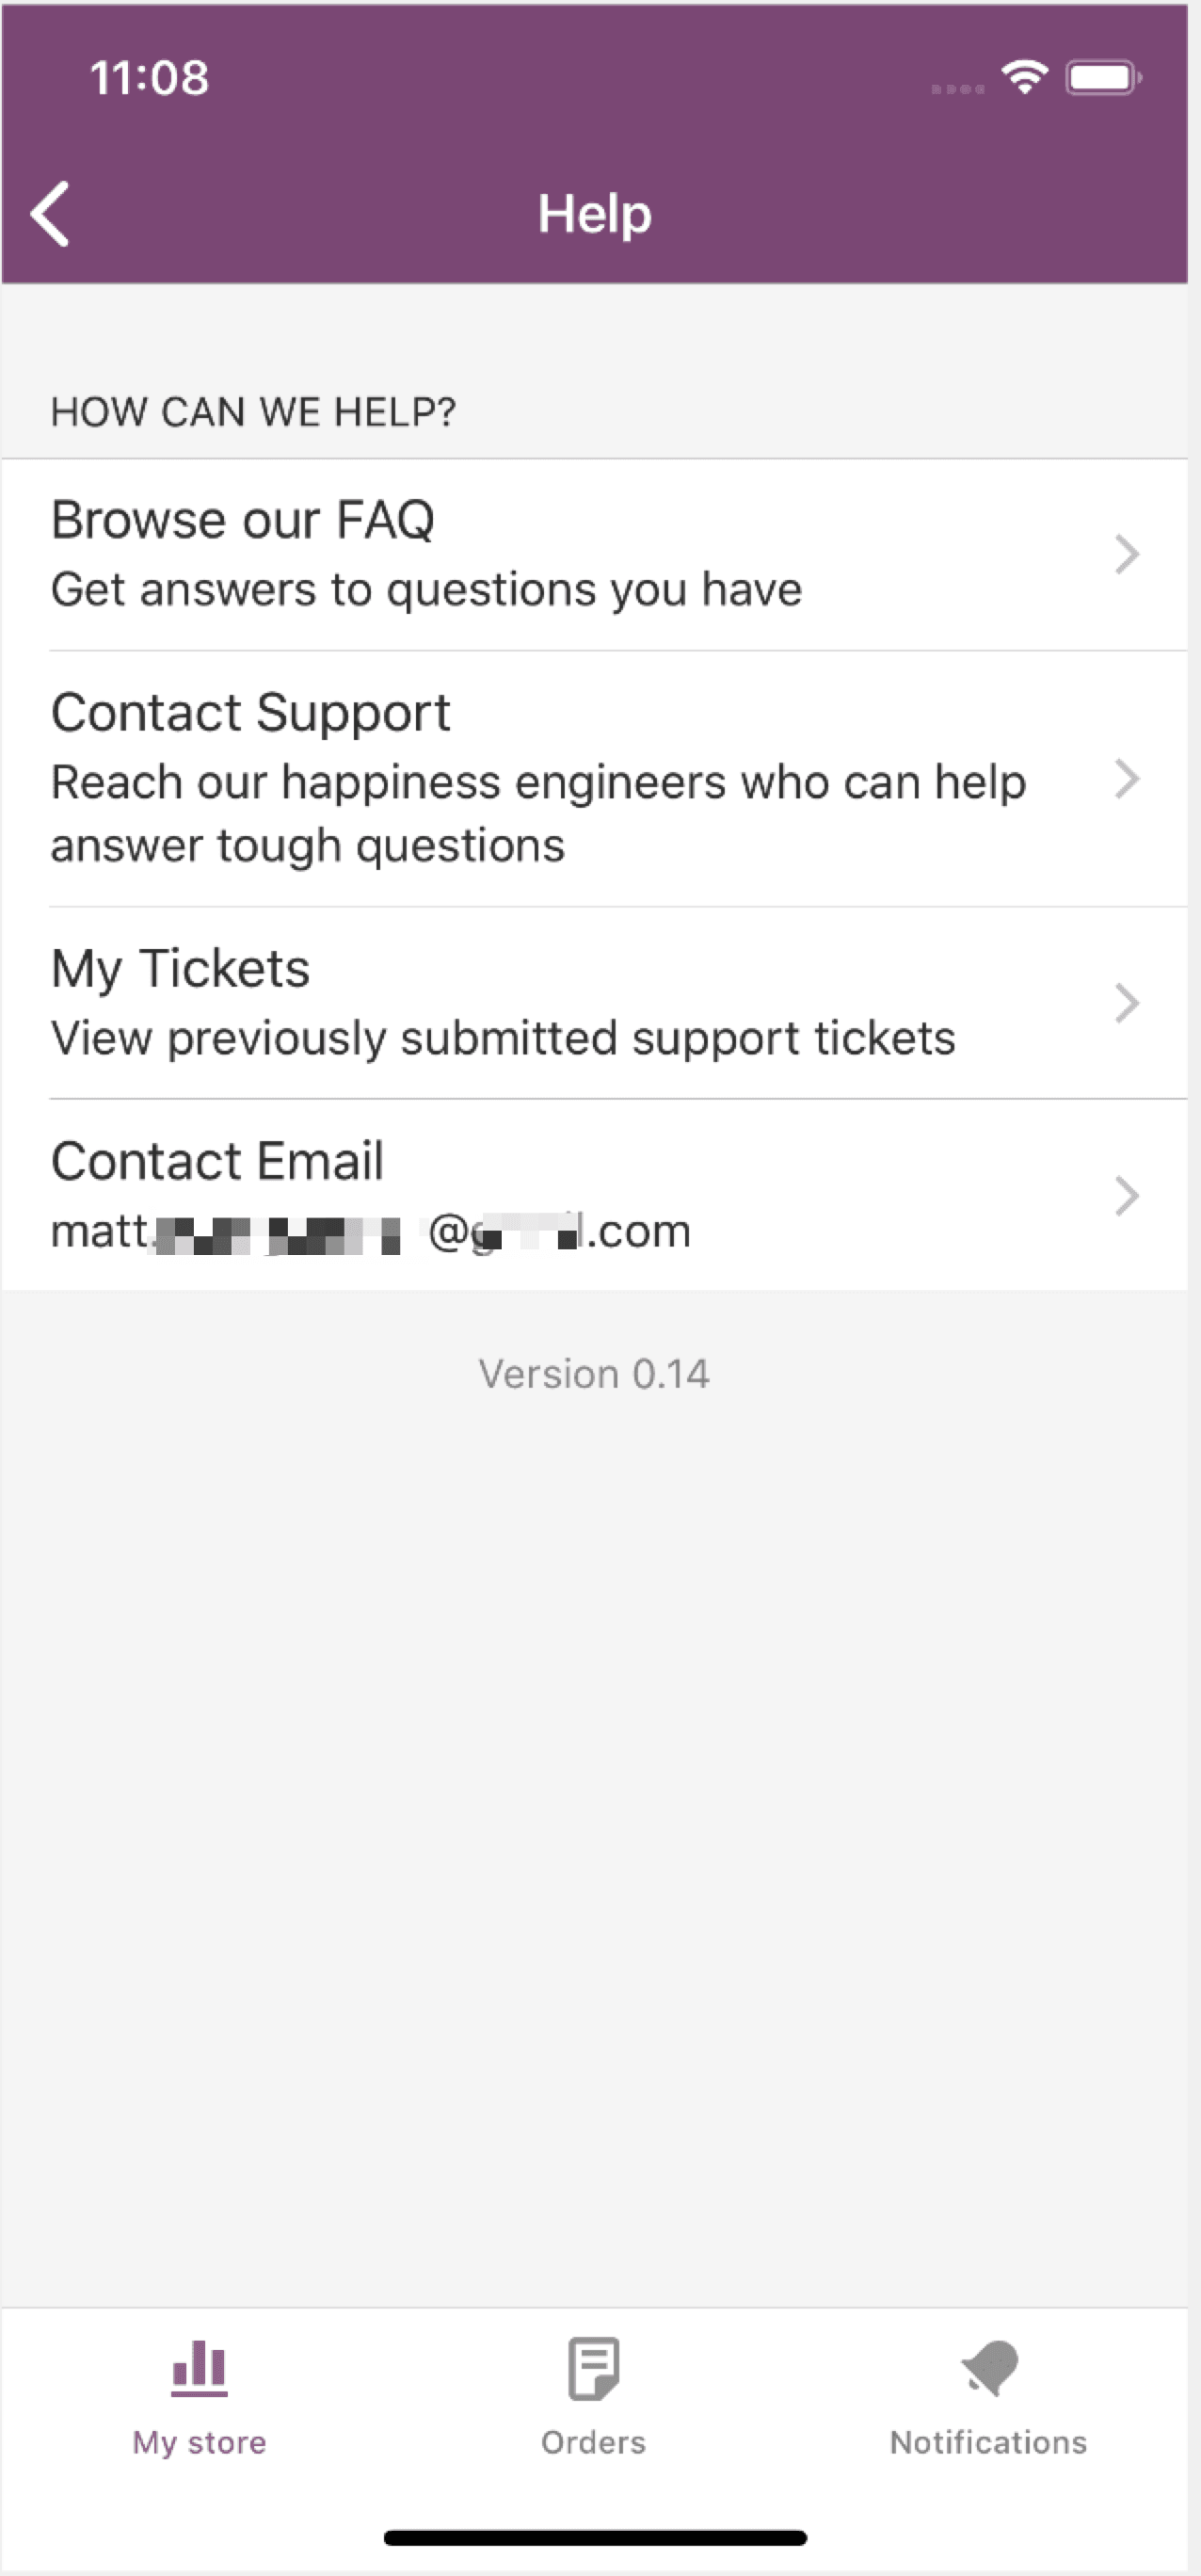
Help & Support
Find helpful resources or get in touch with one of our Happiness Engineers directly from the WooCommerce iOS app.
To open the Help & Support screen:
- Open Settings as above.
- Tap Help & Support.
- Choose whether to:
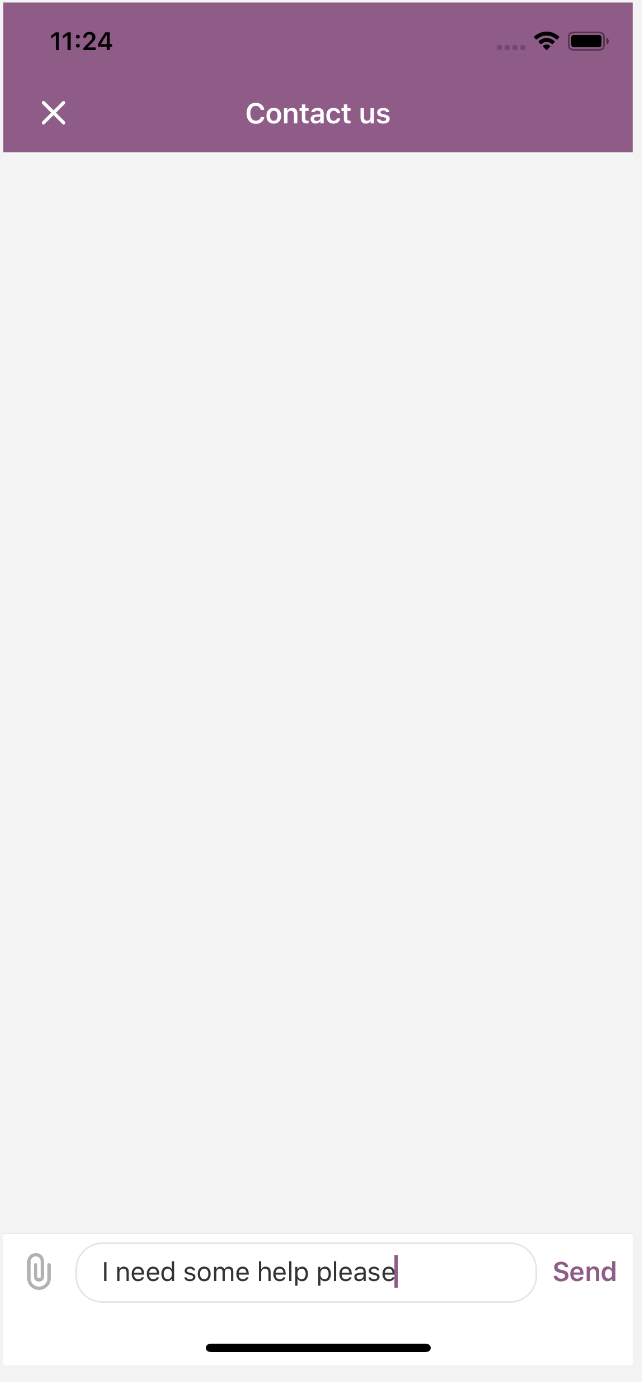
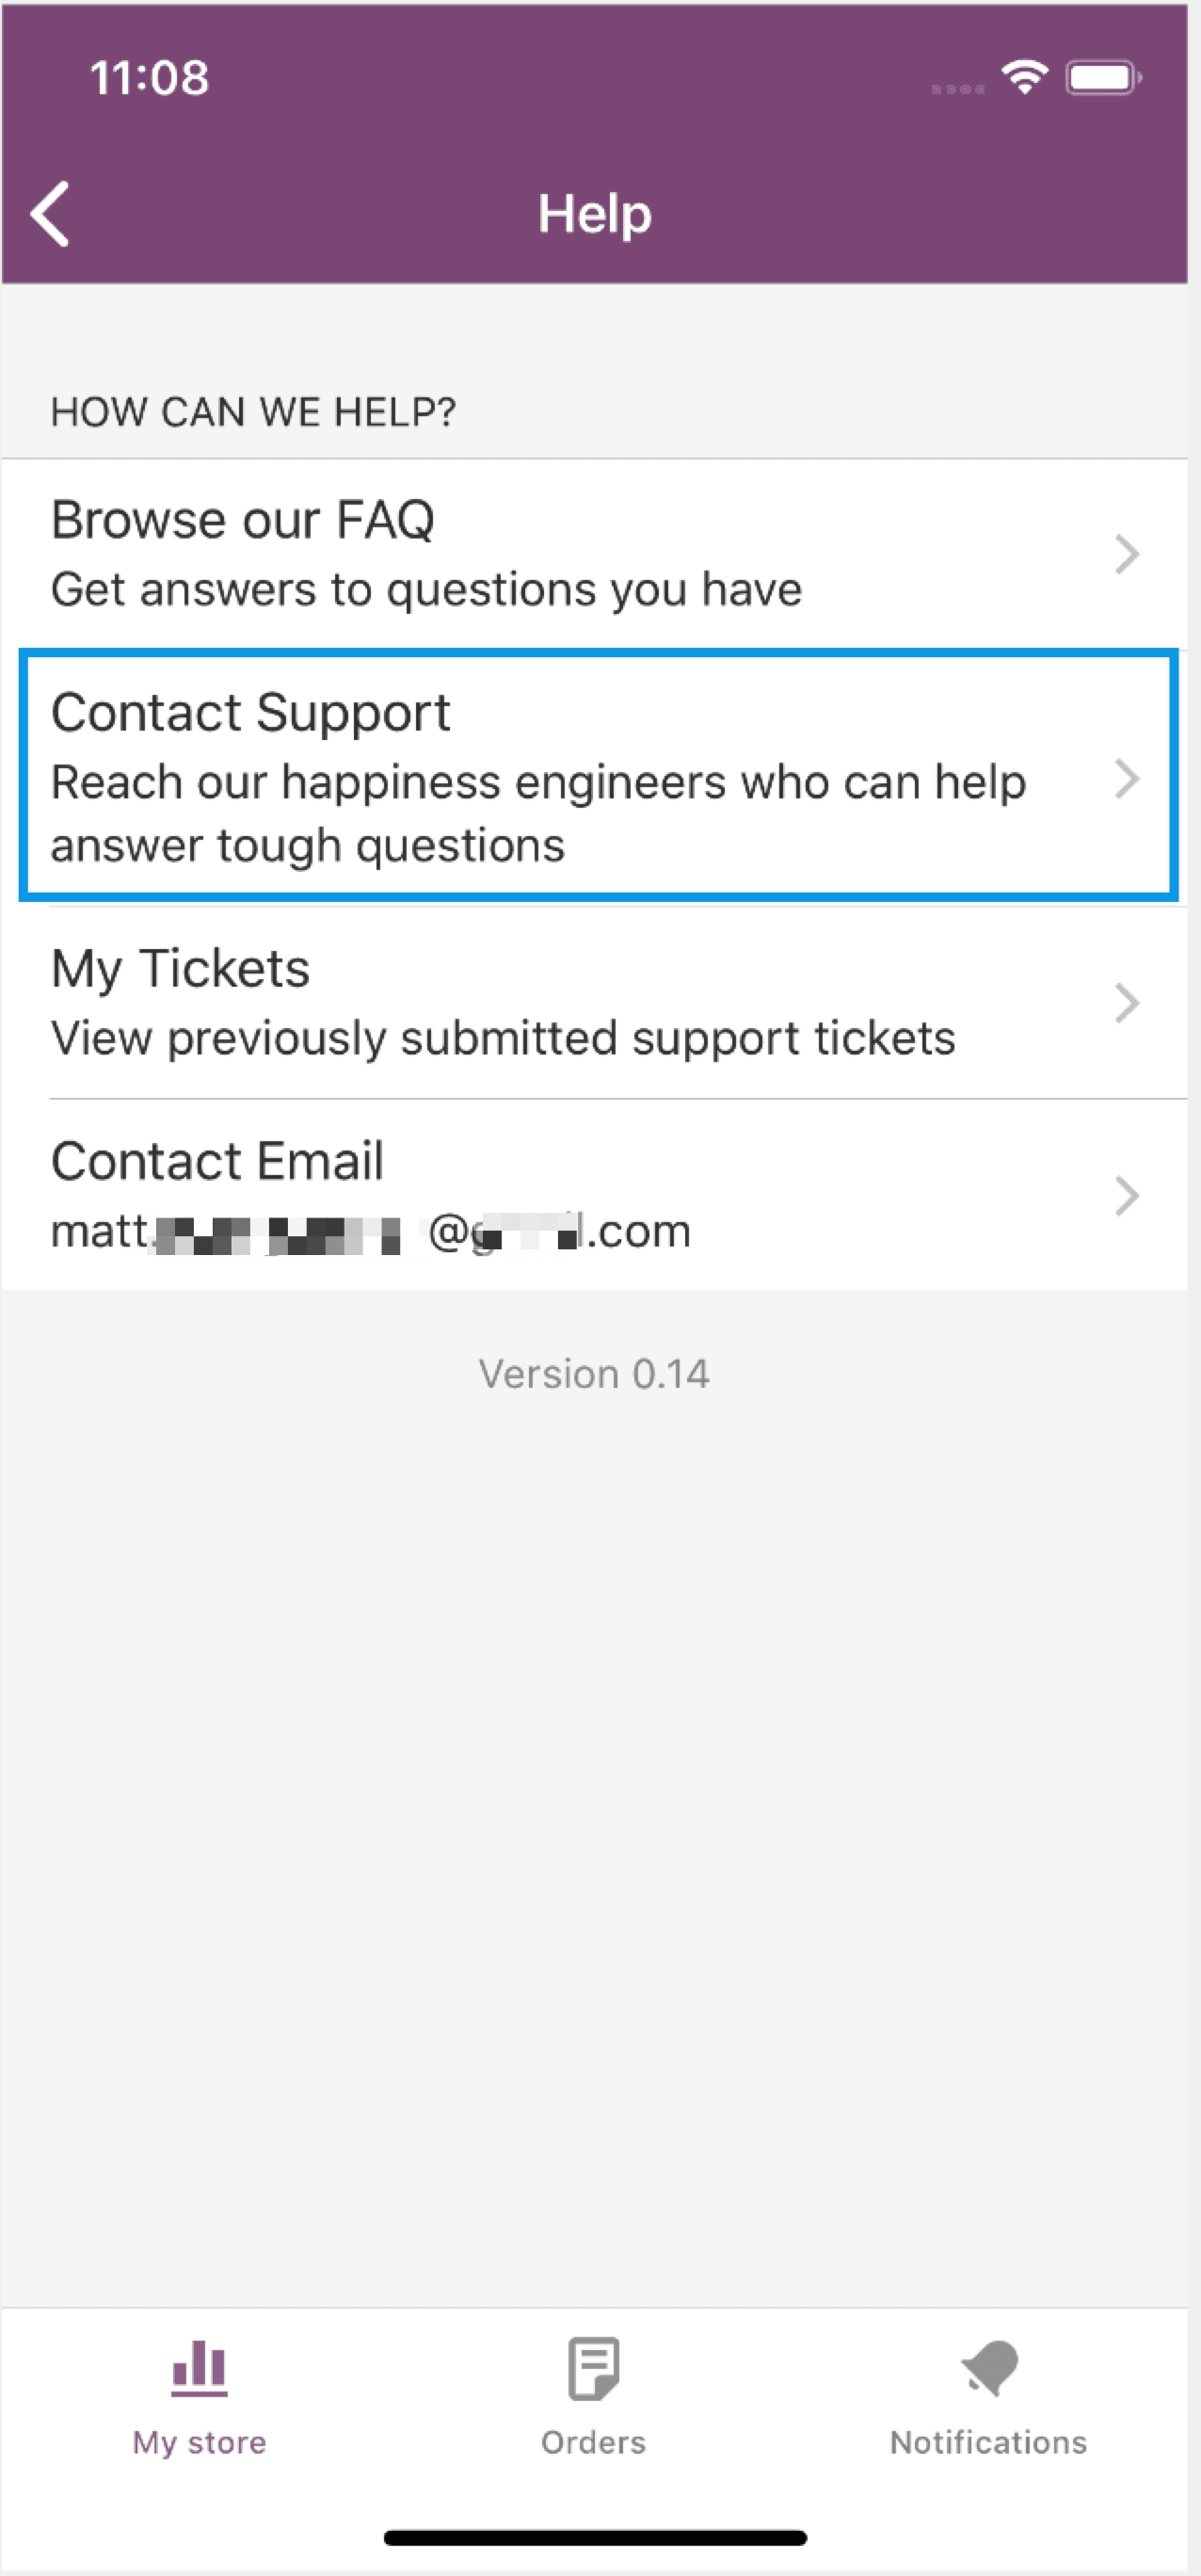
Contact Support
Get in touch with a Happiness Engineer directly from the WooCommerce iOS app:
- Open Settings as above.
- Select Help & Support.
- Tap Contact Support.
- Type your message, attach screenshots or files, and Send to our Support team.

Alternatively, you may also use the links provided below in Questions and Feedback to receive assistance.
Troubleshooting
Nothing can be done from the app side to handle errors that arise, so be sure to review the known issues with setup at: Troubleshooting the WooCommerce iOS app.
We track everything and reach out to authors when conflicts are reported to us, and then update the list as items are patched.
Frequently Asked Questions
I was/am using the previous iOS app, do I need to use the current version?
It’s totally up to you. Both apps remain available: The former (legacy) and the current.
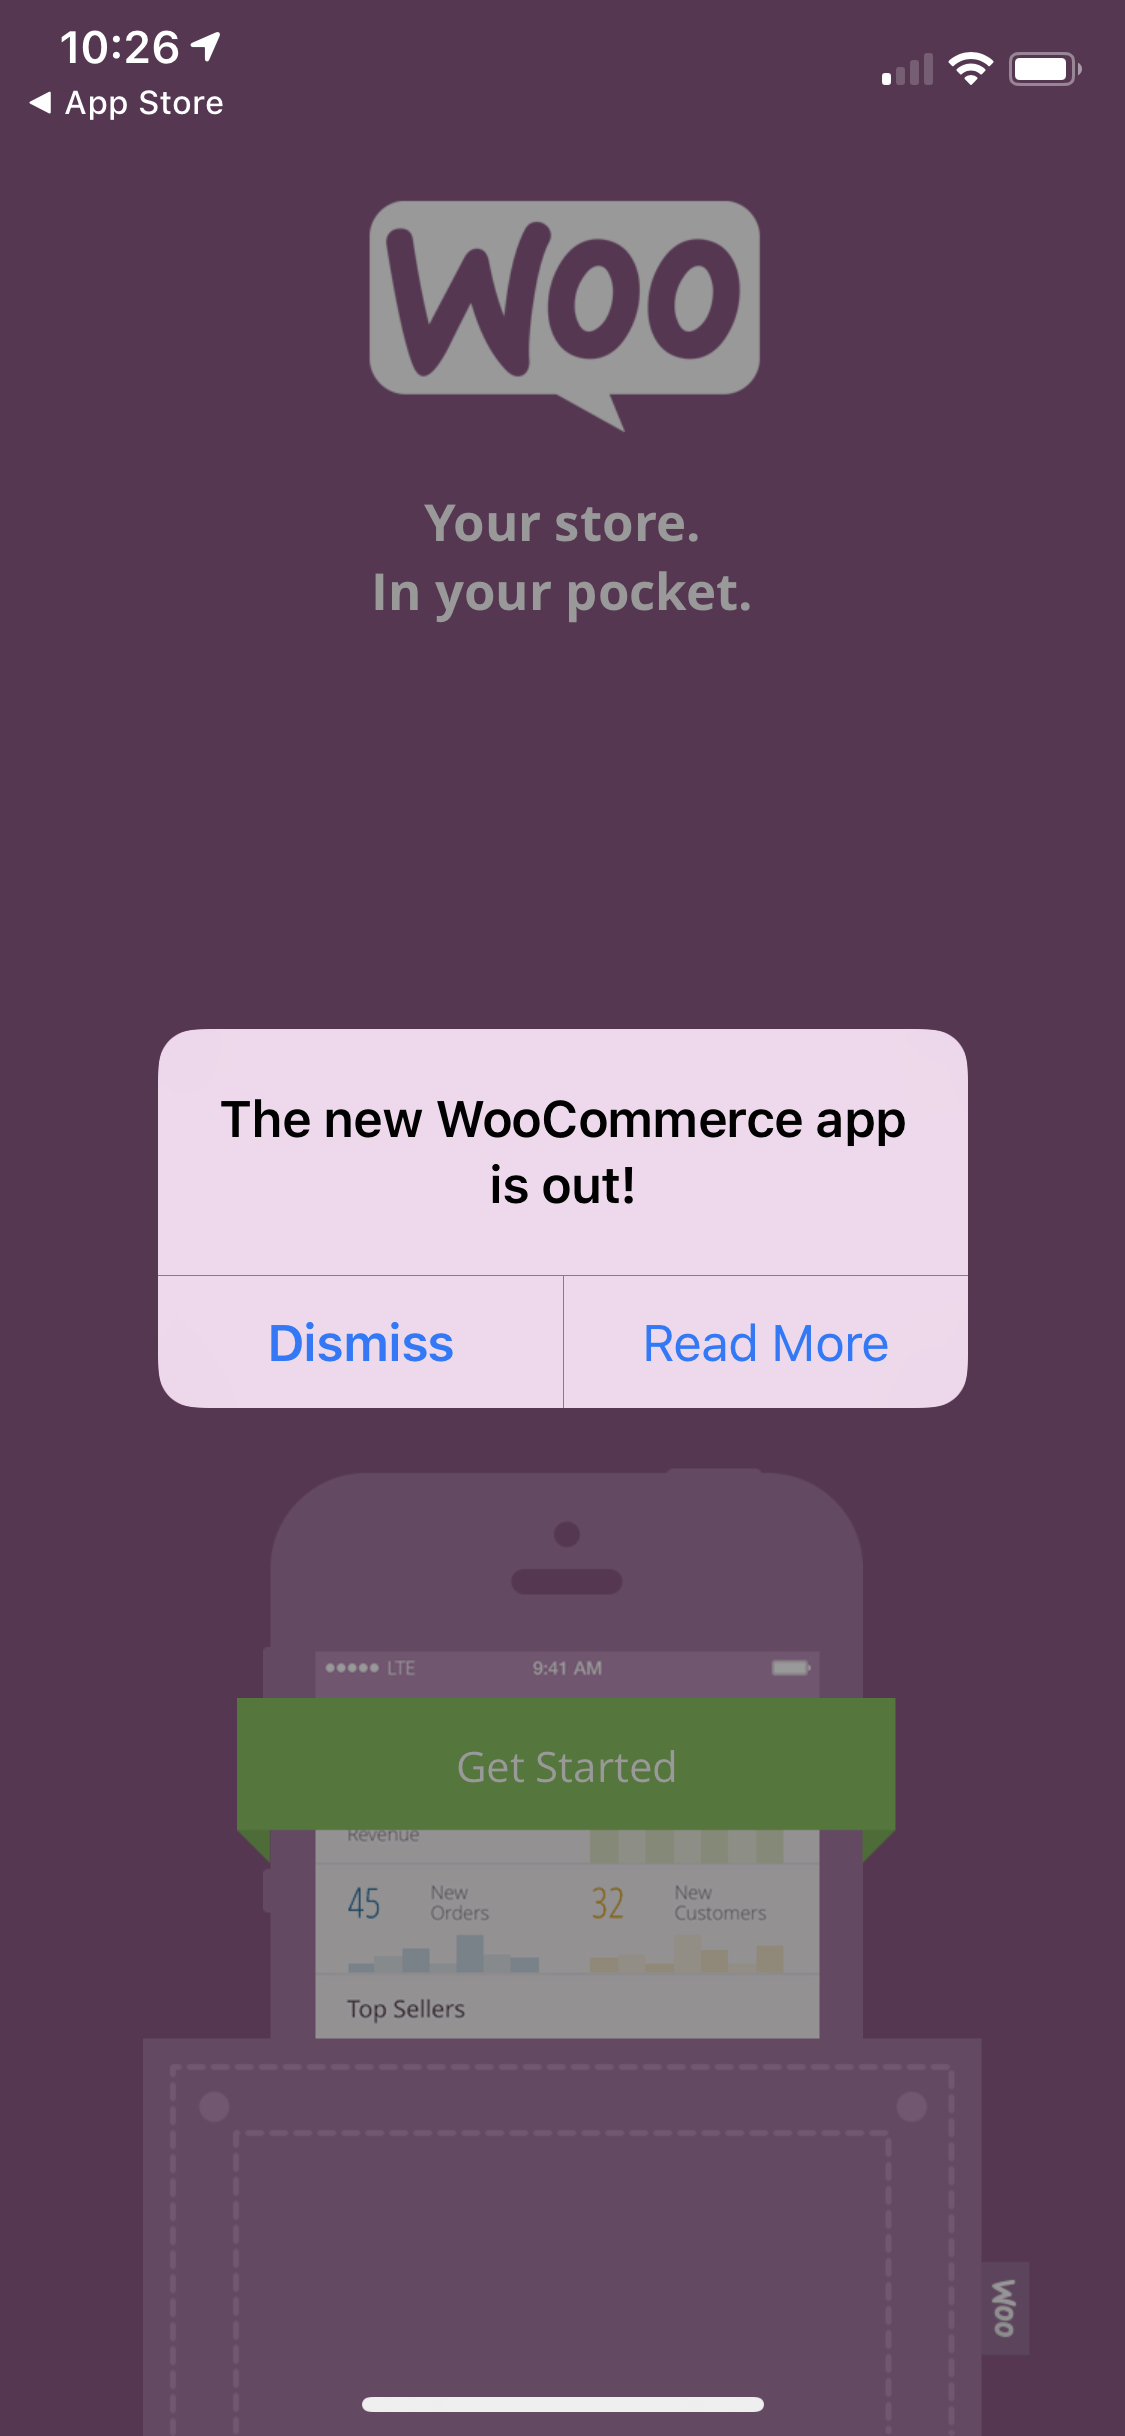
A notification will display, alerting you that a new iOS app for WooCommerce is available. The new app does not update or write over the previous one so nothing is lost.
Both WooCommerce iOS apps may be installed and used simultaneously on your device because they run on different platforms – one is a standalone app, and one is using Jetpack. The work independently from each other.
This is also the reason it’s possible to have the same store connected to both apps.
Why do I need Jetpack?
The Jetpack plugin enables a connection from your self-hosted site to a WordPress.com account and provides a common authentication interface across disparate server configurations and architectures. More info at: Woo Halo – Why is Jetpack required for mobile apps?
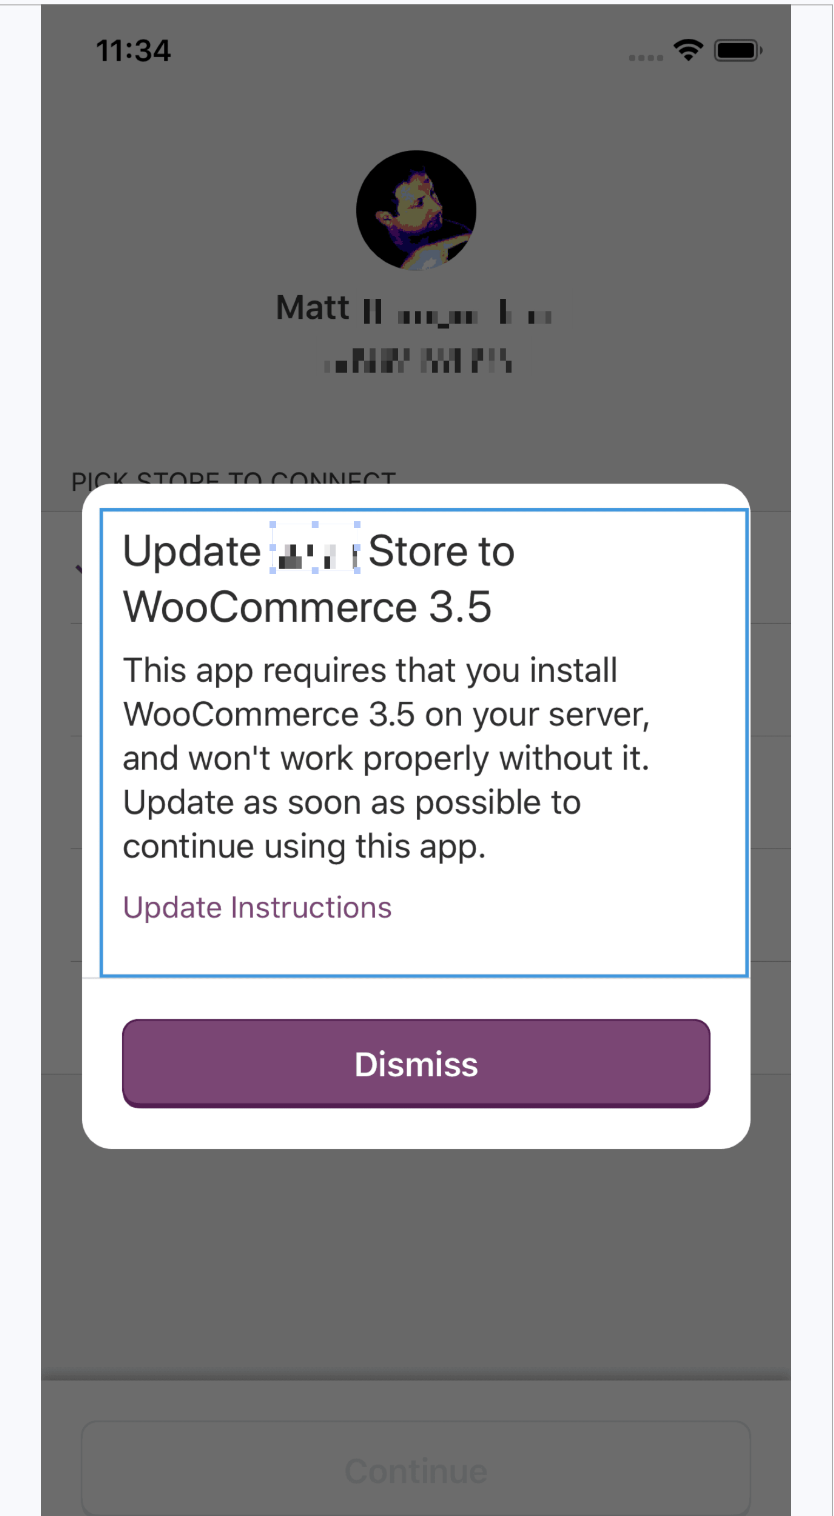
I logged in, but my store does not appear in the list to select. Why?
It could be one of two reasons.
- Only WordPress.com stores and self-hosted sites with WooCommerce and Jetpack plugins installed are displayed in the list of available options.
- WooCommerce 3.5 or higher is required. If a store does not meet this requirement, an Update to WooCommerce 3.5 required message will display.