AliExpress dropshipping for WooCommerce plugin is a sure shot of success to expand your global reach to millions of users. The plugin allows you to connect your WooCommerce store with the most significant wholesale supplier – AliExpress dropshipping. With the help of this plugin, you can easily import products from AliExpress to your WooCommerce store in a few simple clicks and sell them to your buyers quickly.
To get started, you first need to register yourself on AliExpress, by following the simple method listed further in this content. After that, you need to apply for a dropshipping workbench program. And then you can install this plugin easily so that you experience robust and diversified selling experience in running your dropshipping business.
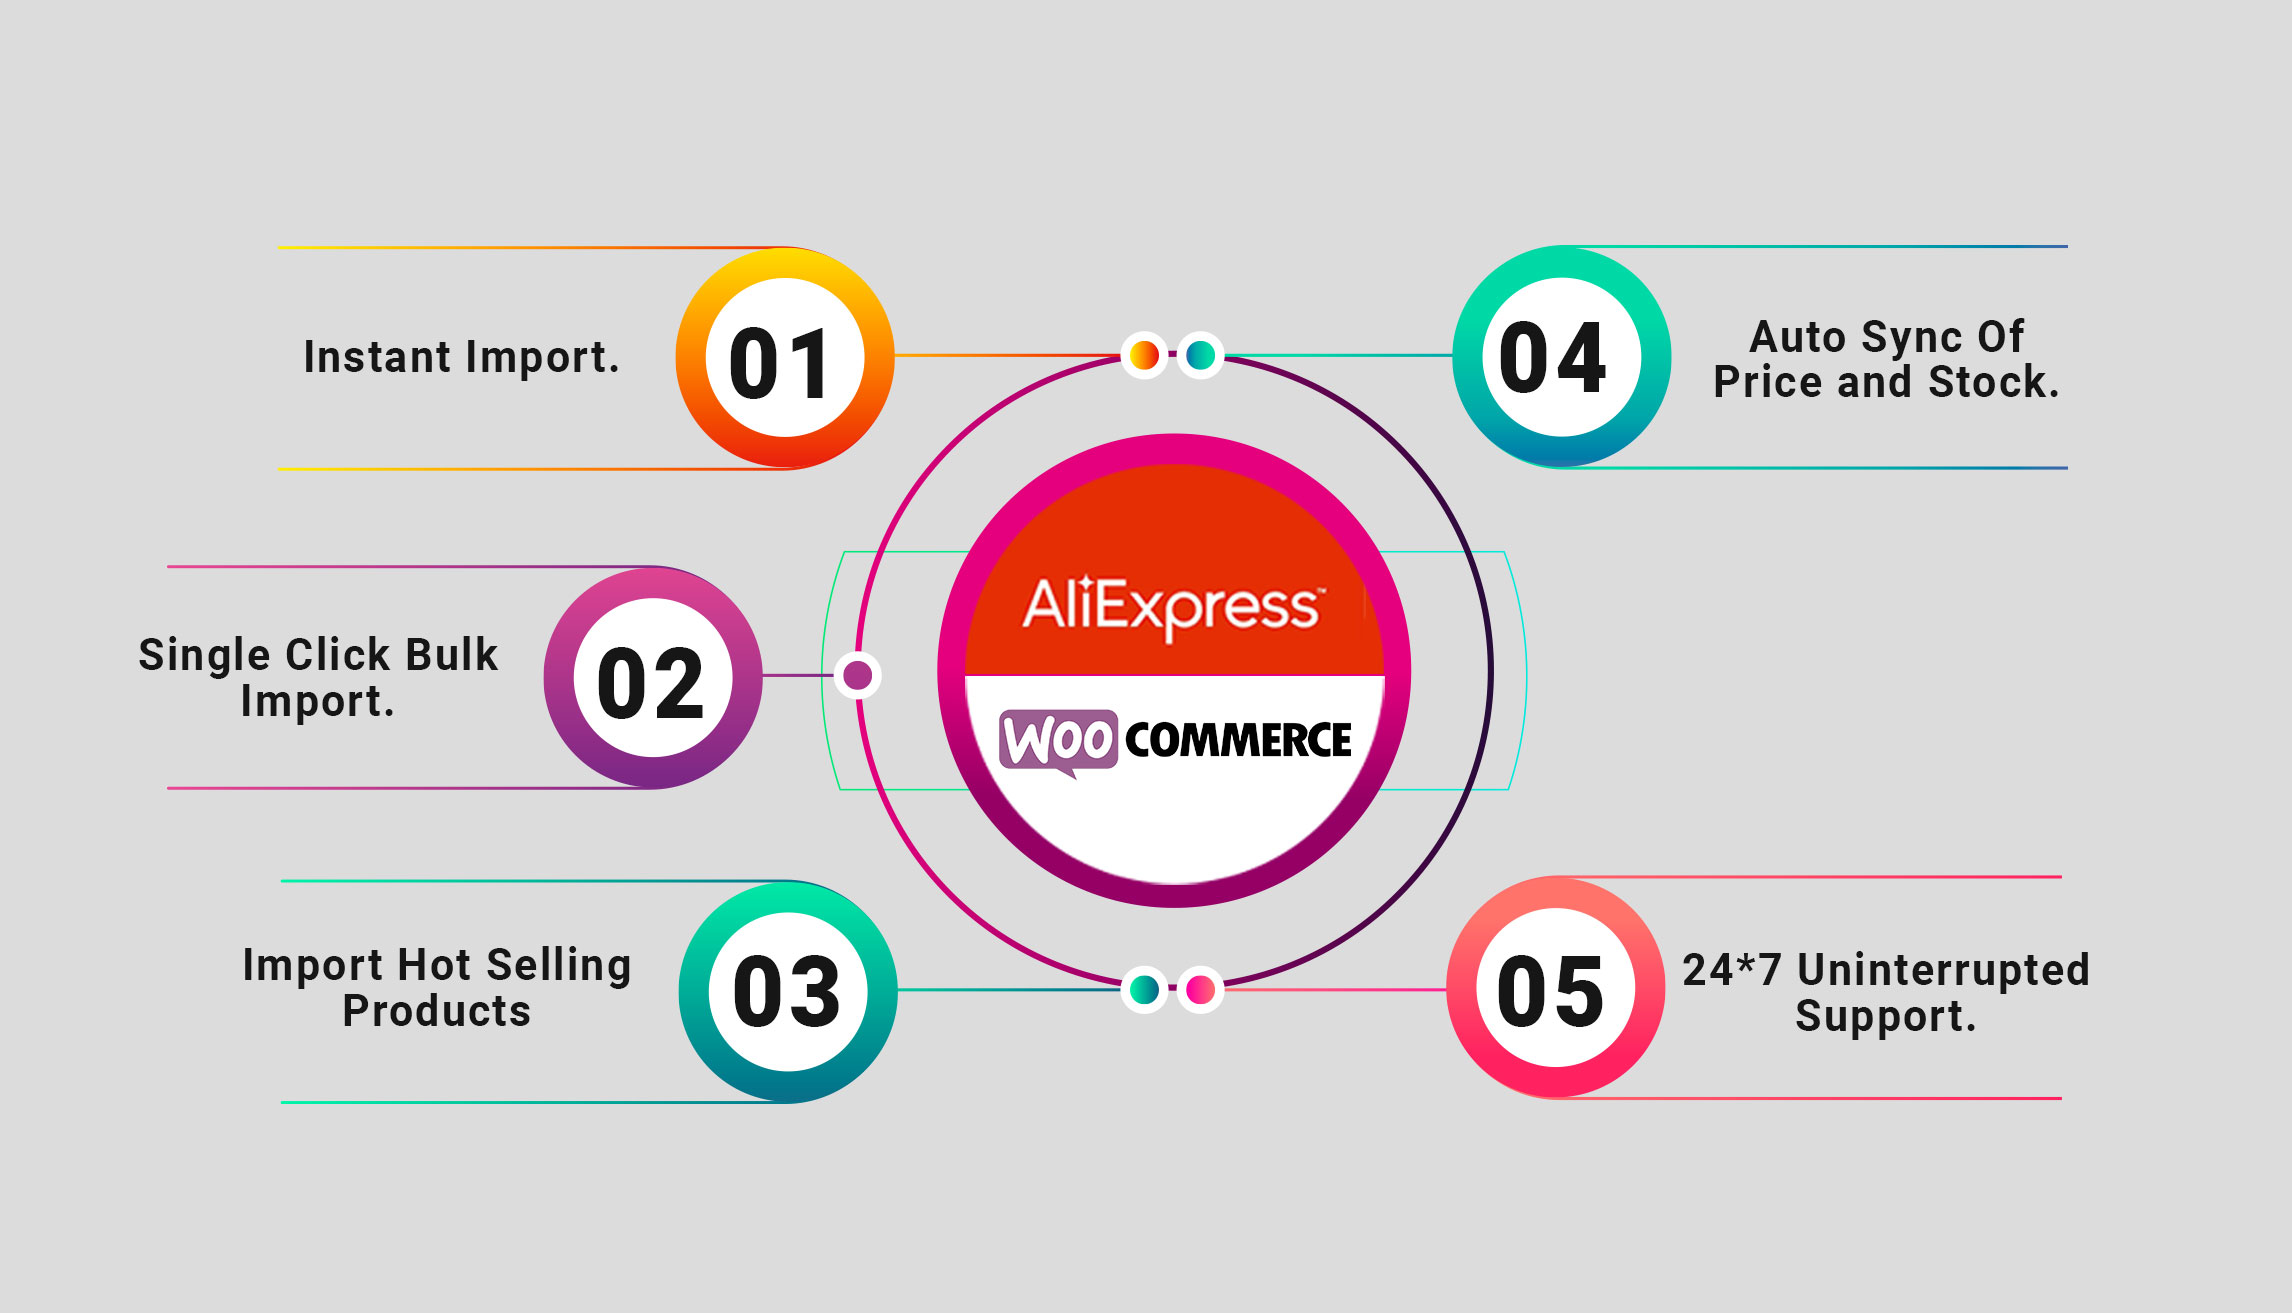
Key Features:
- Import products from AliExpress you would like to sell in your store.
- Set price markup rules to increase profit margin by increasing it in either multiple or by a fixed amount.
- Instant import a specific product by filtering and finding top-selling products based on the AliExpress category or keywords.
- Import multiple products with a single click in a hassle-free manner.
- Import hot-selling products on AliExpress in your WooCommerce store.
- Setting a time interval for the syncing of products
- Automate the syncing of price and stock with AliExpress using “CRONS”.
- Compatible with chrome extension (Aliexpress Dropshipping Assistant For WooCommerce).
AliExpress Buyer Account
After registration to be able to import products from AliExpress, API must be compatible with the store which requires joining of AliExpress Workbench program with the associated AliExpress buyer account.
You can apply here for DropShipping Workbench:
Or user can access it from ->
- Login AliExpress
- Go to AliExpress Account setting
- DropShipping center in the same section.
Import product using Chrome Extension from AliExpress
- Add the chrome extension to your browser as shown in the below screenshot:
You can get the chrome extension by clicking here.
- Add the chrome extension to your browser as shown in the below screenshot:

- After adding the chrome extension, Click on Enter Shop URL button as shown in the screenshot below:

- Enter Shop URL / Domain and Click on the Save button as shown below:
Note: Do not add / in the last

- After successfully connecting your store, you will be taken to the previous page, now you can open the chrome extension and enter the Keyword and select shipment method and click on search for searching the products on AliExpress, as shown below in the screenshot:

- By entering the keyword for searching the product you will be redirected to AliExpress where products related to the keywords will be displayed. Add the product you want to list on your store using the ( + ) icon, as shown in the screenshot below:

- A successful notification of product addition will arrive if it is added successfully to the Woocommerce store.

- View the products added to your store by visiting WooCommerce products section, as shown in the screenshot below:

AliExpress WooCommerce configuration
After successfully creating the seller account on AliExpress, you can now configure your WooCommerce store with AliExpress by following these simple steps discussed below with the help of a screenshot.
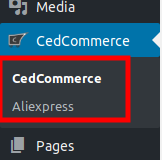
Go to the WooCommerce admin panel, select CedCommerce menu from the left sidebar.
Now click on AliExpress to access the AliExpress plugin
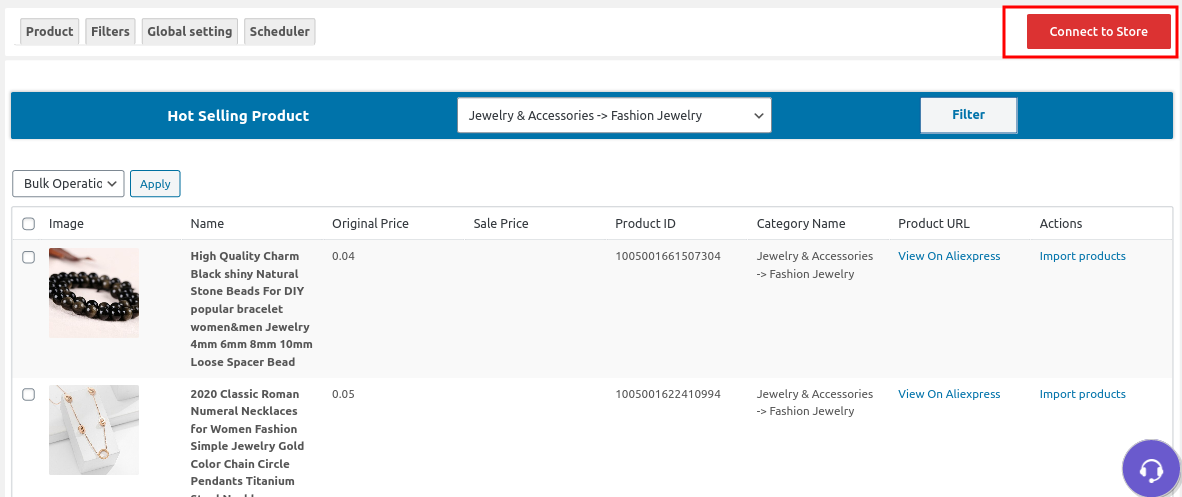
Next, you will see the Connect to store option, as shown below in the screenshot, which is the one-click authorization step for connecting WooCommerce store with AliExpress.
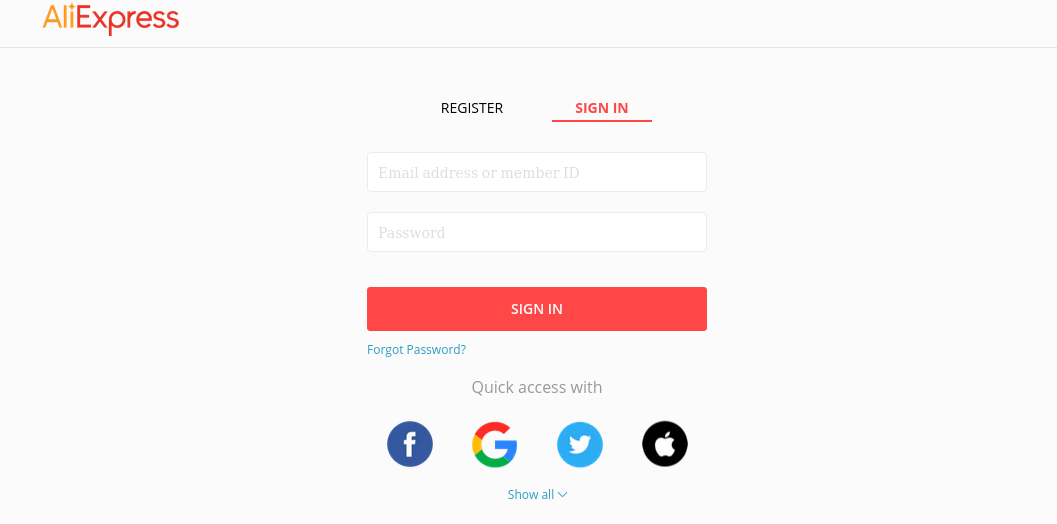
As you click on the connect to store option you will be redirected to the page, where you will have to sign-in using AliExpress login details, as shown below in the image:
As you complete all the above steps successfully, you will be redirected to a page displaying connected to the store, as shown in the screenshot:

Product
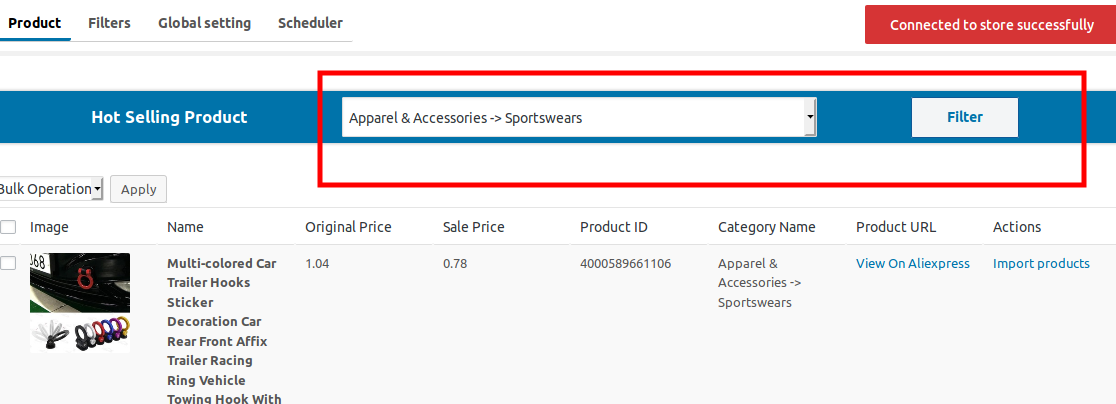
You can view all the trending products on AliExpress in the particular category from the dropdown box of AliExpress categories and then click the filter, as shown below:
You can do the following, once the products from AliExpress are displayed
- View on Aliexpress
- Import a product instantly
- Bulk Import Products
a) View on AliExpress
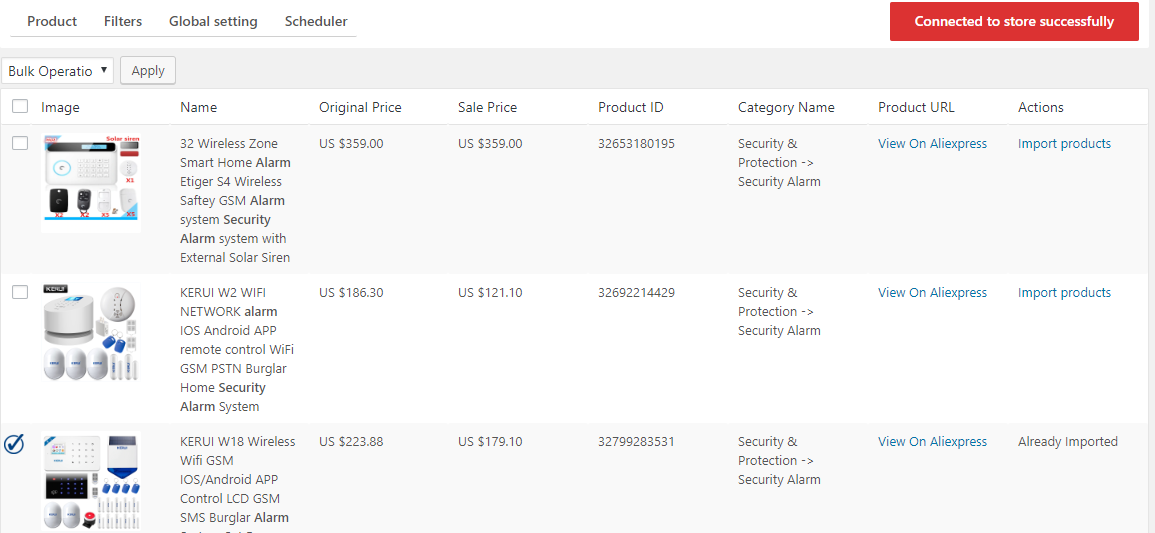
The product list appears, as shown in the below screenshot:

After the products are displayed you can view the product on AliExpress as Shown below:

b) Import product
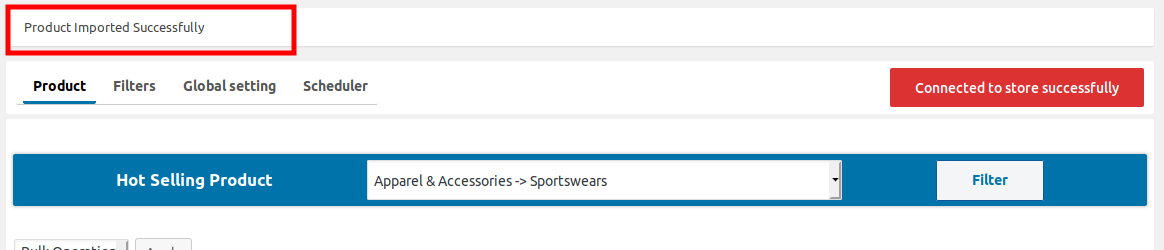
If you want to import a particular product immediately click on Import products, as shown below:

After importing the product to your WooCommerce store, success notice of product imported can be seen, as shown in the screenshot:
c) Bulk operation
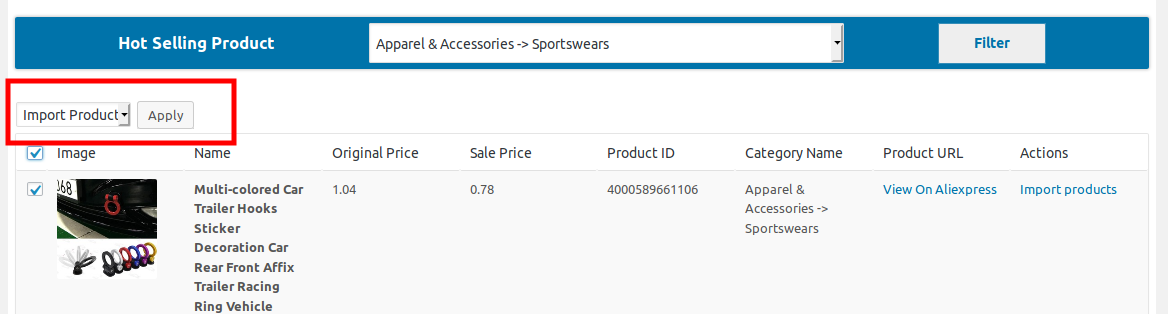
Select the checkboxes associated with the required products
Click the dropdown next to the Bulk operation field, select the Bulk operation, and then click on the Apply button as shown in the screenshot:
Filters
You can Filter out the product of AliExpress based on categories and keywords on your WooCommerce store. Using this feature, finding a product will become easier on your WooCommerce store.
With advanced pricing markup formula, you can apply different markup – rules for the product.
You can do the following tasks under this feature:
- Add filter
- Edit filter
- Delete filter
a) Add Filter
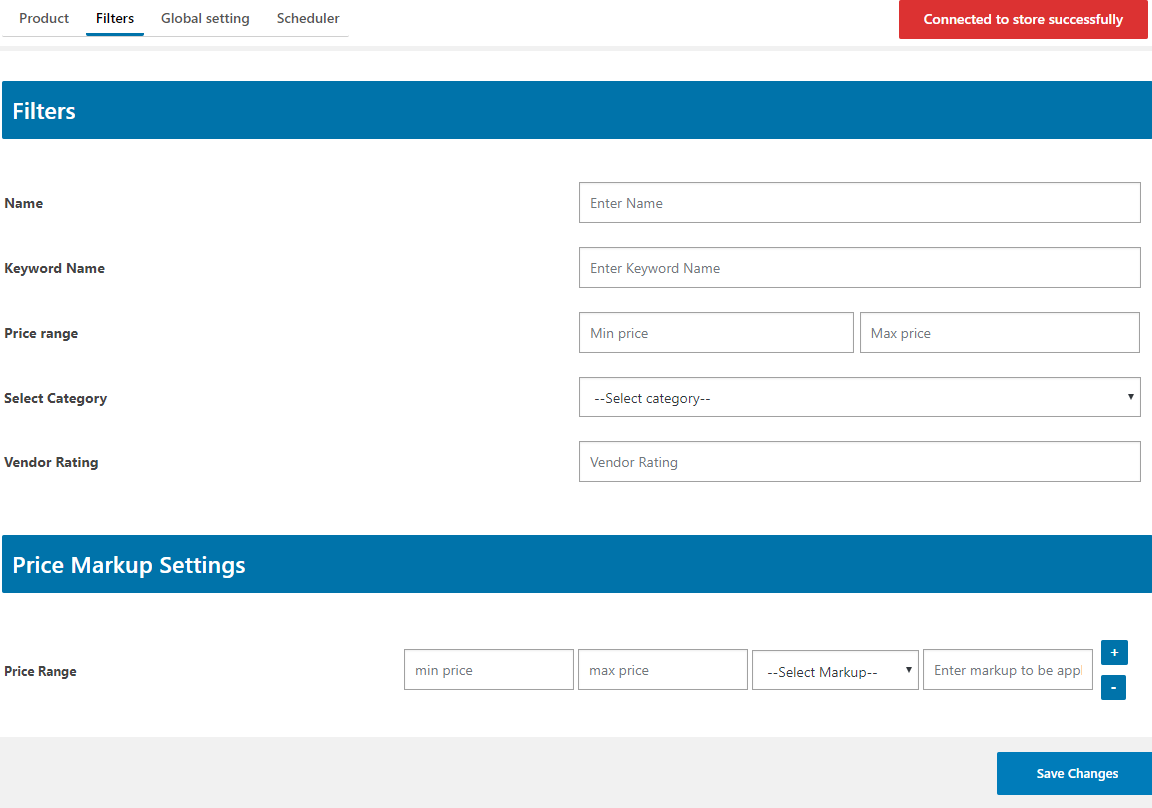
The filter page appears, as shown in the following screenshot:

Then click on the Add filter button, as shown below:

You will be redirected to a page where you have to fill the details, as shown below in the image:
- In the name section, you can enter the name of the product.
- Enter the keyword name for easy product search.
- Select the price range for your product
- Select the most appropriate category and the vendor rating for the product
In the price markup settings, Set up the markup rules to increase profit margin by increasing it in either percentage or by a fixed amount.
you can view the products of a particular filter by hitting the view products under the action tab
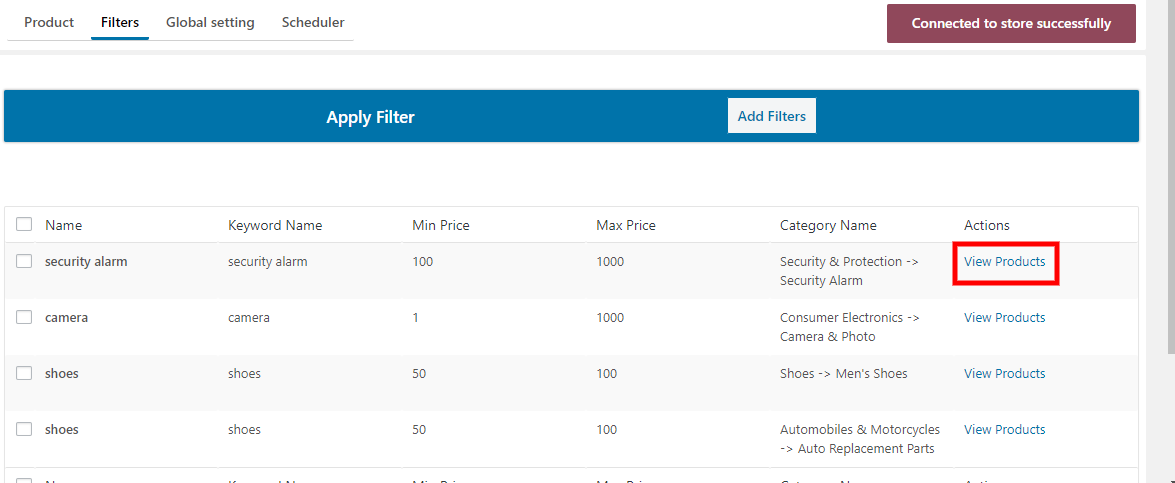
On hitting the view products the admin is allowed to see the products of that particular filter as mentioned in the screenshot:
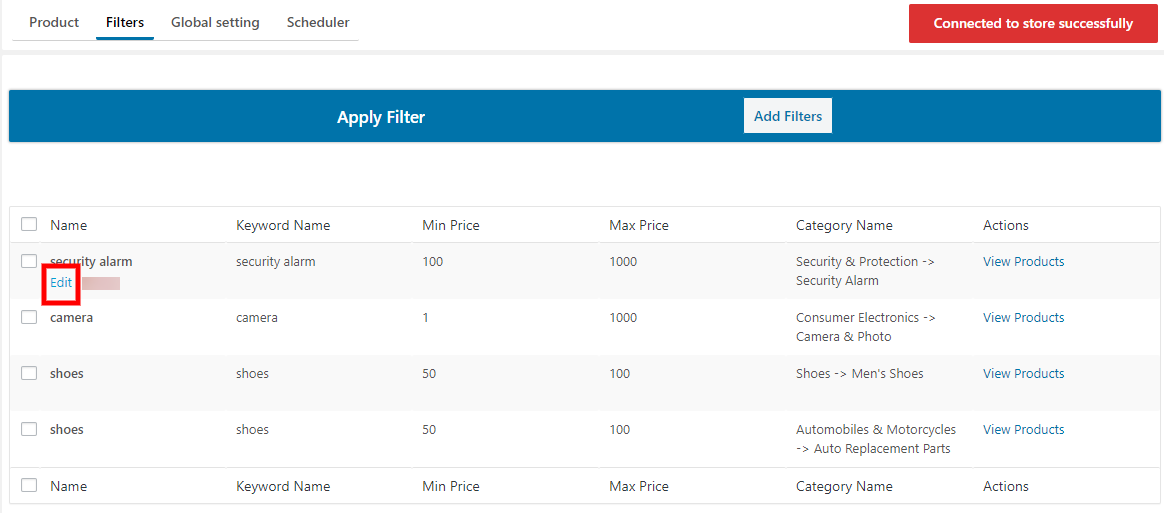
b) Edit Filter
In the below appearing image, as you click on the EDIT tab, you can change or improve the details added in the filters.
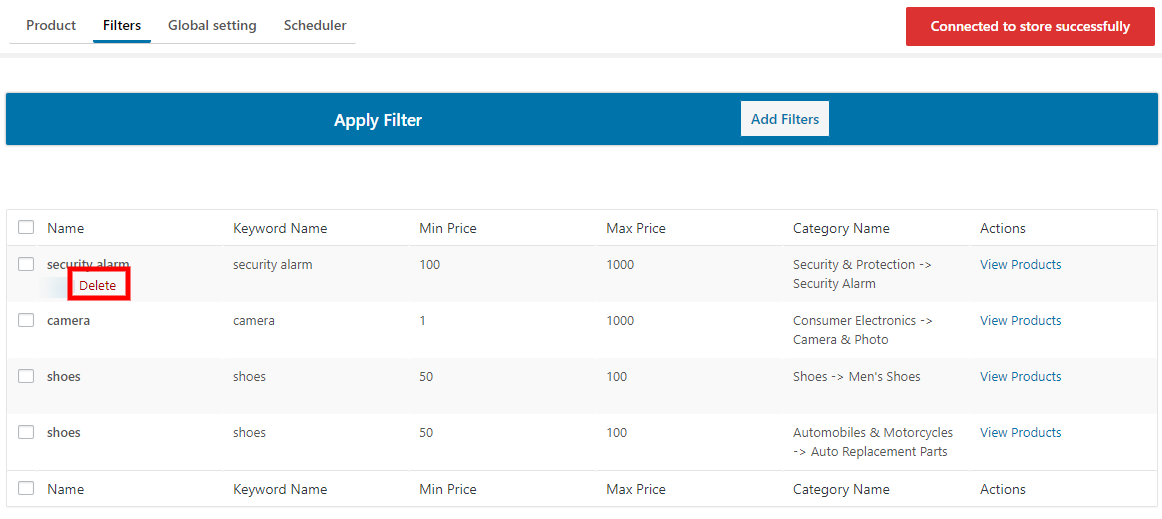
c) Delete filter
Click on delete to delete the product. This will lead to the deletion of the filter for the product from the store.
Global Setting
Under the global settings option, you can select status for creation of a product in WooCommerce store, whether you want to create the product in publish state or draft.
Price markup setting is also available which is a default price setting for products that were not present in the filter markup feature.
You can do the following under this feature:
- Select post status
- Price markup settings
The global settings page appears, as shown in the below screenshot:

Under global settings option, you can set the select post status and price markup setting As shown in the figure.

As you click on the select post status dropdown, you can select the publish option to create published product or select draft to create draft product in your store, as shown below:

Scheduler
The Plugin takes care of the price, and stock of the products with the help of auto-synchronization of price and stock from AliExpress to your WooCommerce store. – you can select the time interval for automation as per your needs.
The scheduler page appears as shown in the following screenshot:

Select the desired option from the dropdown box, and save the changes after selecting the desired option as below:
