WooCommerce Order Barcodes generates unique barcodes for every order placed on your site. These barcodes can be used on e-tickets, e-reservations, packing slips or anything else that would benefit from having a scannable barcode attached to it.
Barcodes are generated for every order as soon as they are placed.
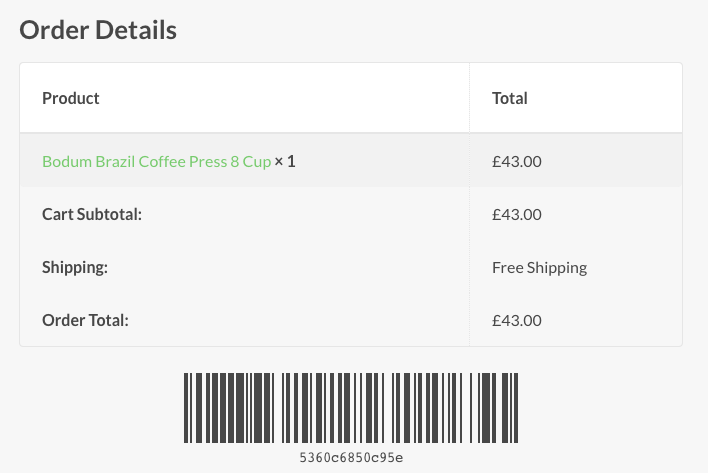
They are also generated for orders that are created manually via the WordPress dashboard. Once an order has been placed, the barcode is included in all order emails as well as the order details page in the customer’s WooCommerce account area. This allows the customer to easily print out the barcode if necessary.
Important: If you are using WooCommerce Order Barcodes in combination with WooCommerce Box Office you will also get an individual barcode for each ticket. This barcode will not be mailed out. Customers need to print it from the order screen (link in the confirmation email).
Installation
- Download the .zip file from your WooCommerce account.
- Go to: WordPress Admin > Plugins > Add New and Upload Plugin with the file you downloaded with Choose File.
- Install Now and Activate the extension.
More information at: Install and Activate Plugins/Extensions.
Setup and Configuration

- Go to: WooCommerce > Settings > General.
- Scroll down to Order Barcodes.
- Select Barcode Type (see below for examples)
- Select Barcode Colors
- Save changes.
Changing settings will only affect future barcodes. Barcodes that have already been created are unaffected.
Barcode Types
There are five barcode types available when using the WooCommerce Order Barcodes extension. Here are examples of each:
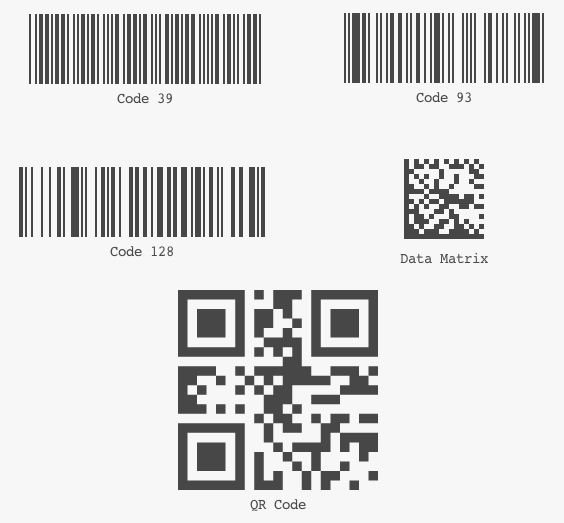
Code 39, 93 and 128 barcodes will work with standard USB barcode scanners, while the Data Matrix and QR Code types will work with digital scanners and mobile devices. The barcode type you should use will depend on the best solution for your use case.
Usage
Generating barcodes
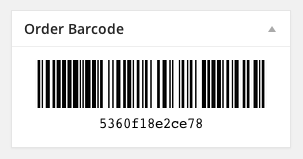
Barcodes are generated automatically when the extension is active, so you don’t need to do any extra setup to get that side of things working correctly. You can view existing barcodes on the order edit screen in the WordPress dashboard:
Scanning barcodes
In order to scan your barcodes, you can use the [scan_barcode] shortcode. This will generate a form that looks like this:

This form will only be usable by users with the manage_woocommerce capability. It allows you to scan or enter a barcode and perform one of four actions on the order to which it is linked:
- Look up – This will simply look up the order details and display them on screen.
- Complete order – This will mark the order as complete and then display the order details on screen.
- Check in – This will mark the order as ‘checked in’ and then display the order details on screen.
- Check out – This will mark the order as ‘checked out’ and then display the order details on screen.
You can pre-select one of these options using the action parameter of the shortcode by setting it to one of the following: lookup, complete, checkin or checkout. The shortcode with a pre-set action will look like this: [scan_barcode action="checkin"]. All actions are performed via ajax so the page does not reload after running them – this means you can scan in barcodes rapidly without long wait times between each scan. The order details are displayed using the view-order.php template, so if you have customized that template on your site then they will follow those same customizations.
Using a smartphone or tablet
The most common way to scan barcodes for events is by using a smartphone or tablet. This can be easily achieved by using the scanning form along with a free app on your phone or tablet. All you need to do is load up the page with the scanning form in the browser of your smartphone or tablet and then open up one of the many apps available for this purpose and you can scan your barcodes quickly and easily. We do not make any of these apps, but here are two that are very effective:
- Barcode Scan to Web for iOS
- Tips for use:
- Access the app settings and enter the URL for your check-in page as the homepage URL
- Use the “back arrow” at the top to return to the home screen, and then click the home icon at the bottom to refresh. You should then see the check-in page, but not the form itself. You will need to log-in to see the check-in form.
- Go to the address bar at the top and edit the URL to go to /wp-admin
- This will take you to the standard WordPress login screen, where you’ll need to log in.
- Once logged in, hit the home button again at the bottom to re-load the check-in page and you’ll be ready to scan barcodes!
- Tips for use:
- Barcodescanner Keyboard for Android
We obviously cannot guarantee these apps, but they are the ones that we have found effective in our testing. You can do a simple search of the iTunes Store as well as the Google Play Store to find other similar apps as well. Specific usage instructions will be available in the apps themselves.
Using a USB scanner
If you are using a USB scanner to scan in your barcodes, then the scanner will be automatically detected and the action will be performed without you having to click the ‘Go’ button. This will save a lot of time when, for example, scanning e-tickets at the door to a concert.
Manually typing in a barcode
When manually typing in a barcode you must type in the full string of text that appears below the barcode and then hit enter or click the ‘Go’ button.
Generating barcodes for existing orders
Existing orders will not automatically have barcodes added to them. In order to generate barcodes for these orders, you simply need to visit the order page in the WordPress dashboard and a unique barcode will be generated and added to the order as you load the page.
Troubleshooting
Barcodes not displaying in Gmail (version 1.3.18 and below)
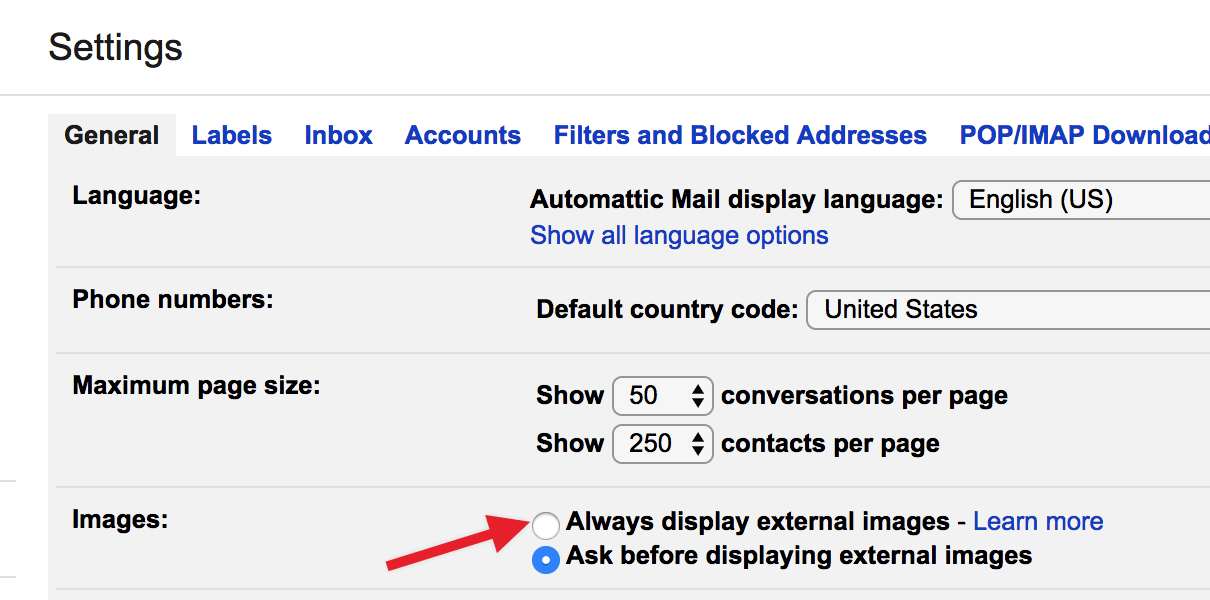
If you happen to hear of, or see any, issues with the barcode displaying in Gmail, it may be a setting to change and things will work as expected. Head into your Gmail settings and the General tab. There will be a section for images. Change it to “Always display external images” and the barcode should now work.
Barcodes still not displaying in Gmail – hosting with WPEngine (version 1.3.18 and below)
Images displayed directly in Gmail are loaded through a proxy in order to protect user security. This means that images are downloaded by a Google Proxy Server before being shown in your email client.
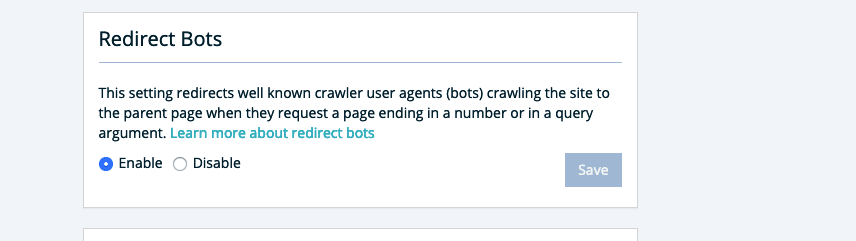
If you’re still not seeing images in Gmail after applying the above Gmail settings and your site is hosted with WP Engine, the GET requests from Google Proxy Servers might be getting redirected, preventing the images from being downloaded. Navigate to the Utilities section within your WP Engine account and look for the Redirect Bots setting.
Disabling it should resolve this issue, but, it’s a good idea to speak with WP Engine support first to see if there are any options for removing the redirect specifically for Google’s Proxy Server requests.
Code Snippets
Scanning barcodes results in a ‘permission denied’ error
If you are getting a ‘permission denied’ error when you attempt to scan a barcode, as of v1.1 you will see one of the following two error messages:
Security check failed
In this case, the security token (also known as a ‘nonce’) is not being checked correctly. This will most likely be due to how your server is set up, so if you get this error then adding the following snippet to your theme’s functions.php file will disable the nonce check:
You do not have sufficient permissions to scan barcodes
In this case the user you are logged in as does not have permission to scan barcodes. The default permissions required are that the user has the ‘manage_woocommerce’ capability, but you can change this to anything you want (or even make it different per user). If you get this error when you don’t think you should then adding the following snippet to your theme’s functions.php file will enable scanning permissions for all users (but you can edit it to process any requirements you like):
 by
by Manual Output / Display of Barcode
Use the following PHP to output an order’s barcode anywhere: