The WooCommerce Branding extension lets you replace WooCommerce branding and icons with your own within the admin. Give your store’s backend a personal touch.
Installation
- Download the .zip file from your WooCommerce account.
- Go to: WordPress Admin > Plugins > Add New and Upload Plugin with the file you downloaded with Choose File.
- Install Now and Activate the extension.
More information at: Install and Activate Plugins/Extensions.
Setup and Configuration
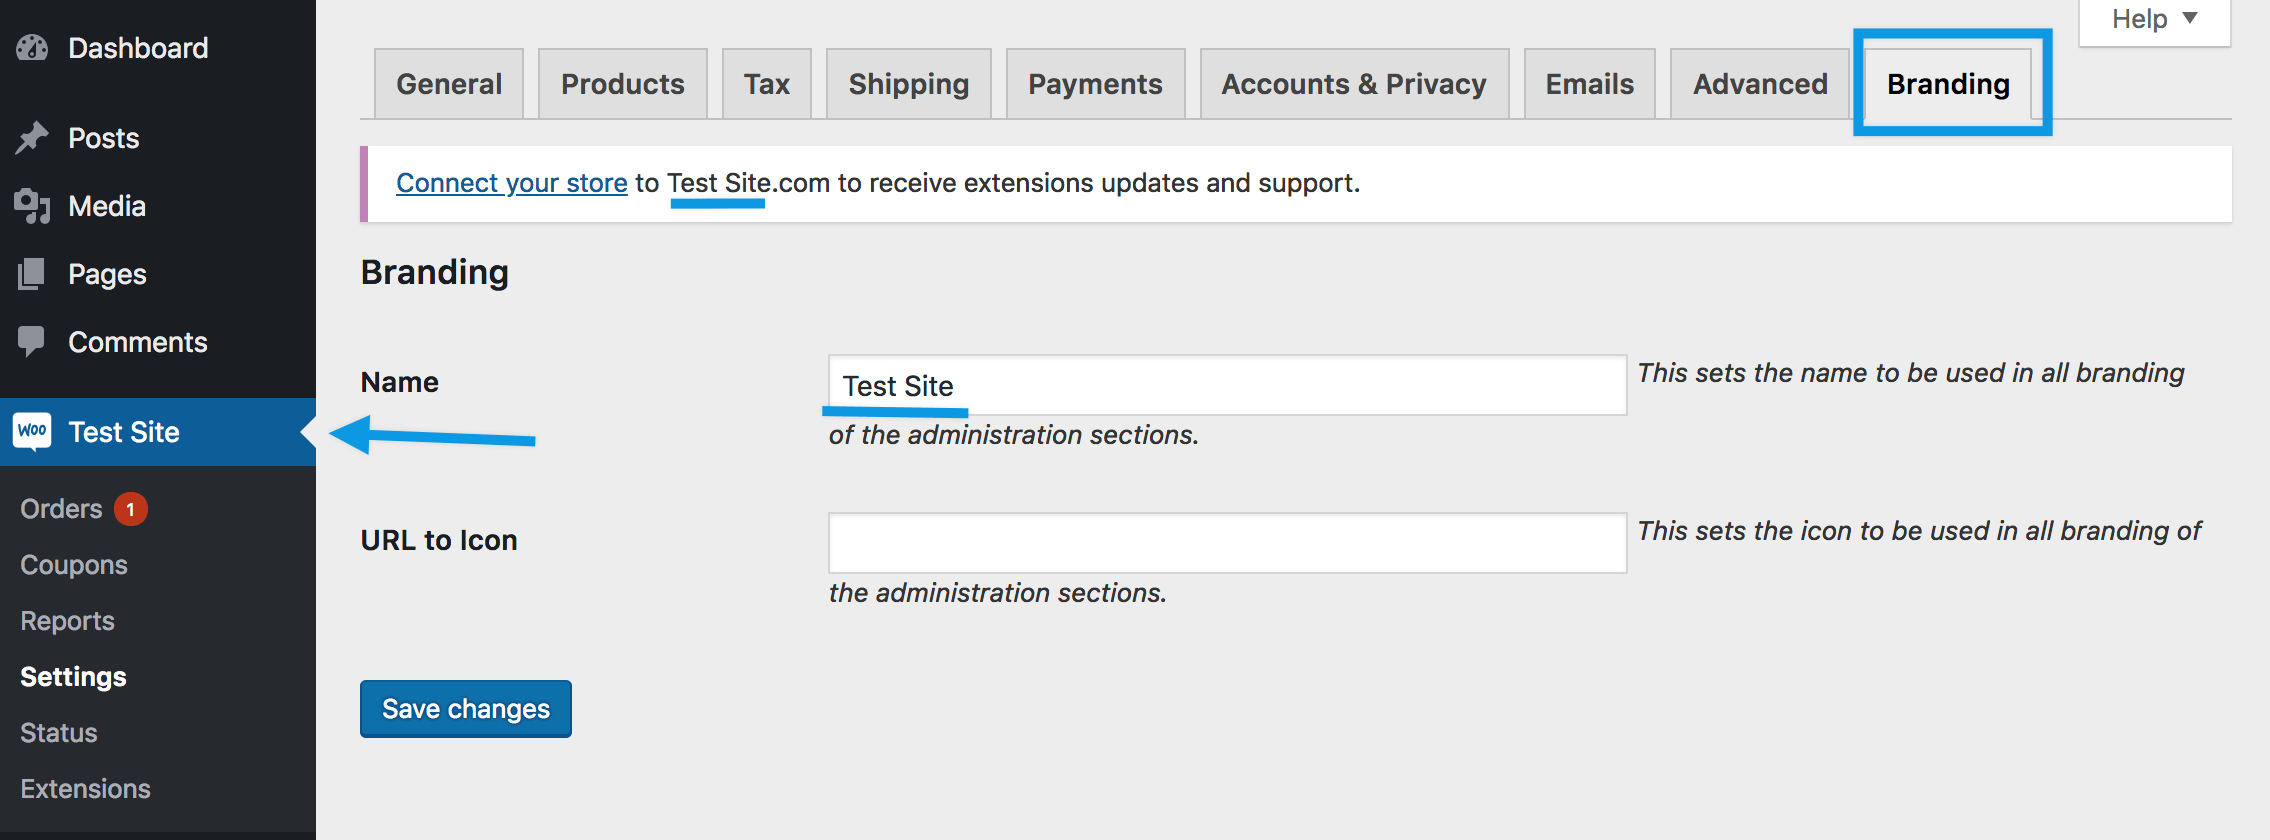
- Go to: WooCommerce (Your Site’s Name) > Settings > Branding.
- Enter your brand’s Name – This replaces all instances of ‘WooCommerce’
- Enter the URL to Icon – Use the WordPress media uploader upload an icon/logo, then copy the URL and paste here.
- Save changes.
You may need to refresh the WordPress admin screen to see changes reflected.
Known Limitations
Strings that cannot be customized are:
- Shortcodes containing woocommerce
- Admin URLS containing woocommerce
- Third party themes
- Unlocalized strings
Questions and Feedback
Have a question before you buy? Please fill out this pre-sales form.
Already purchased and need some assistance? Get in touch with a Happiness Engineer via the Help Desk.